Stars and Stripes

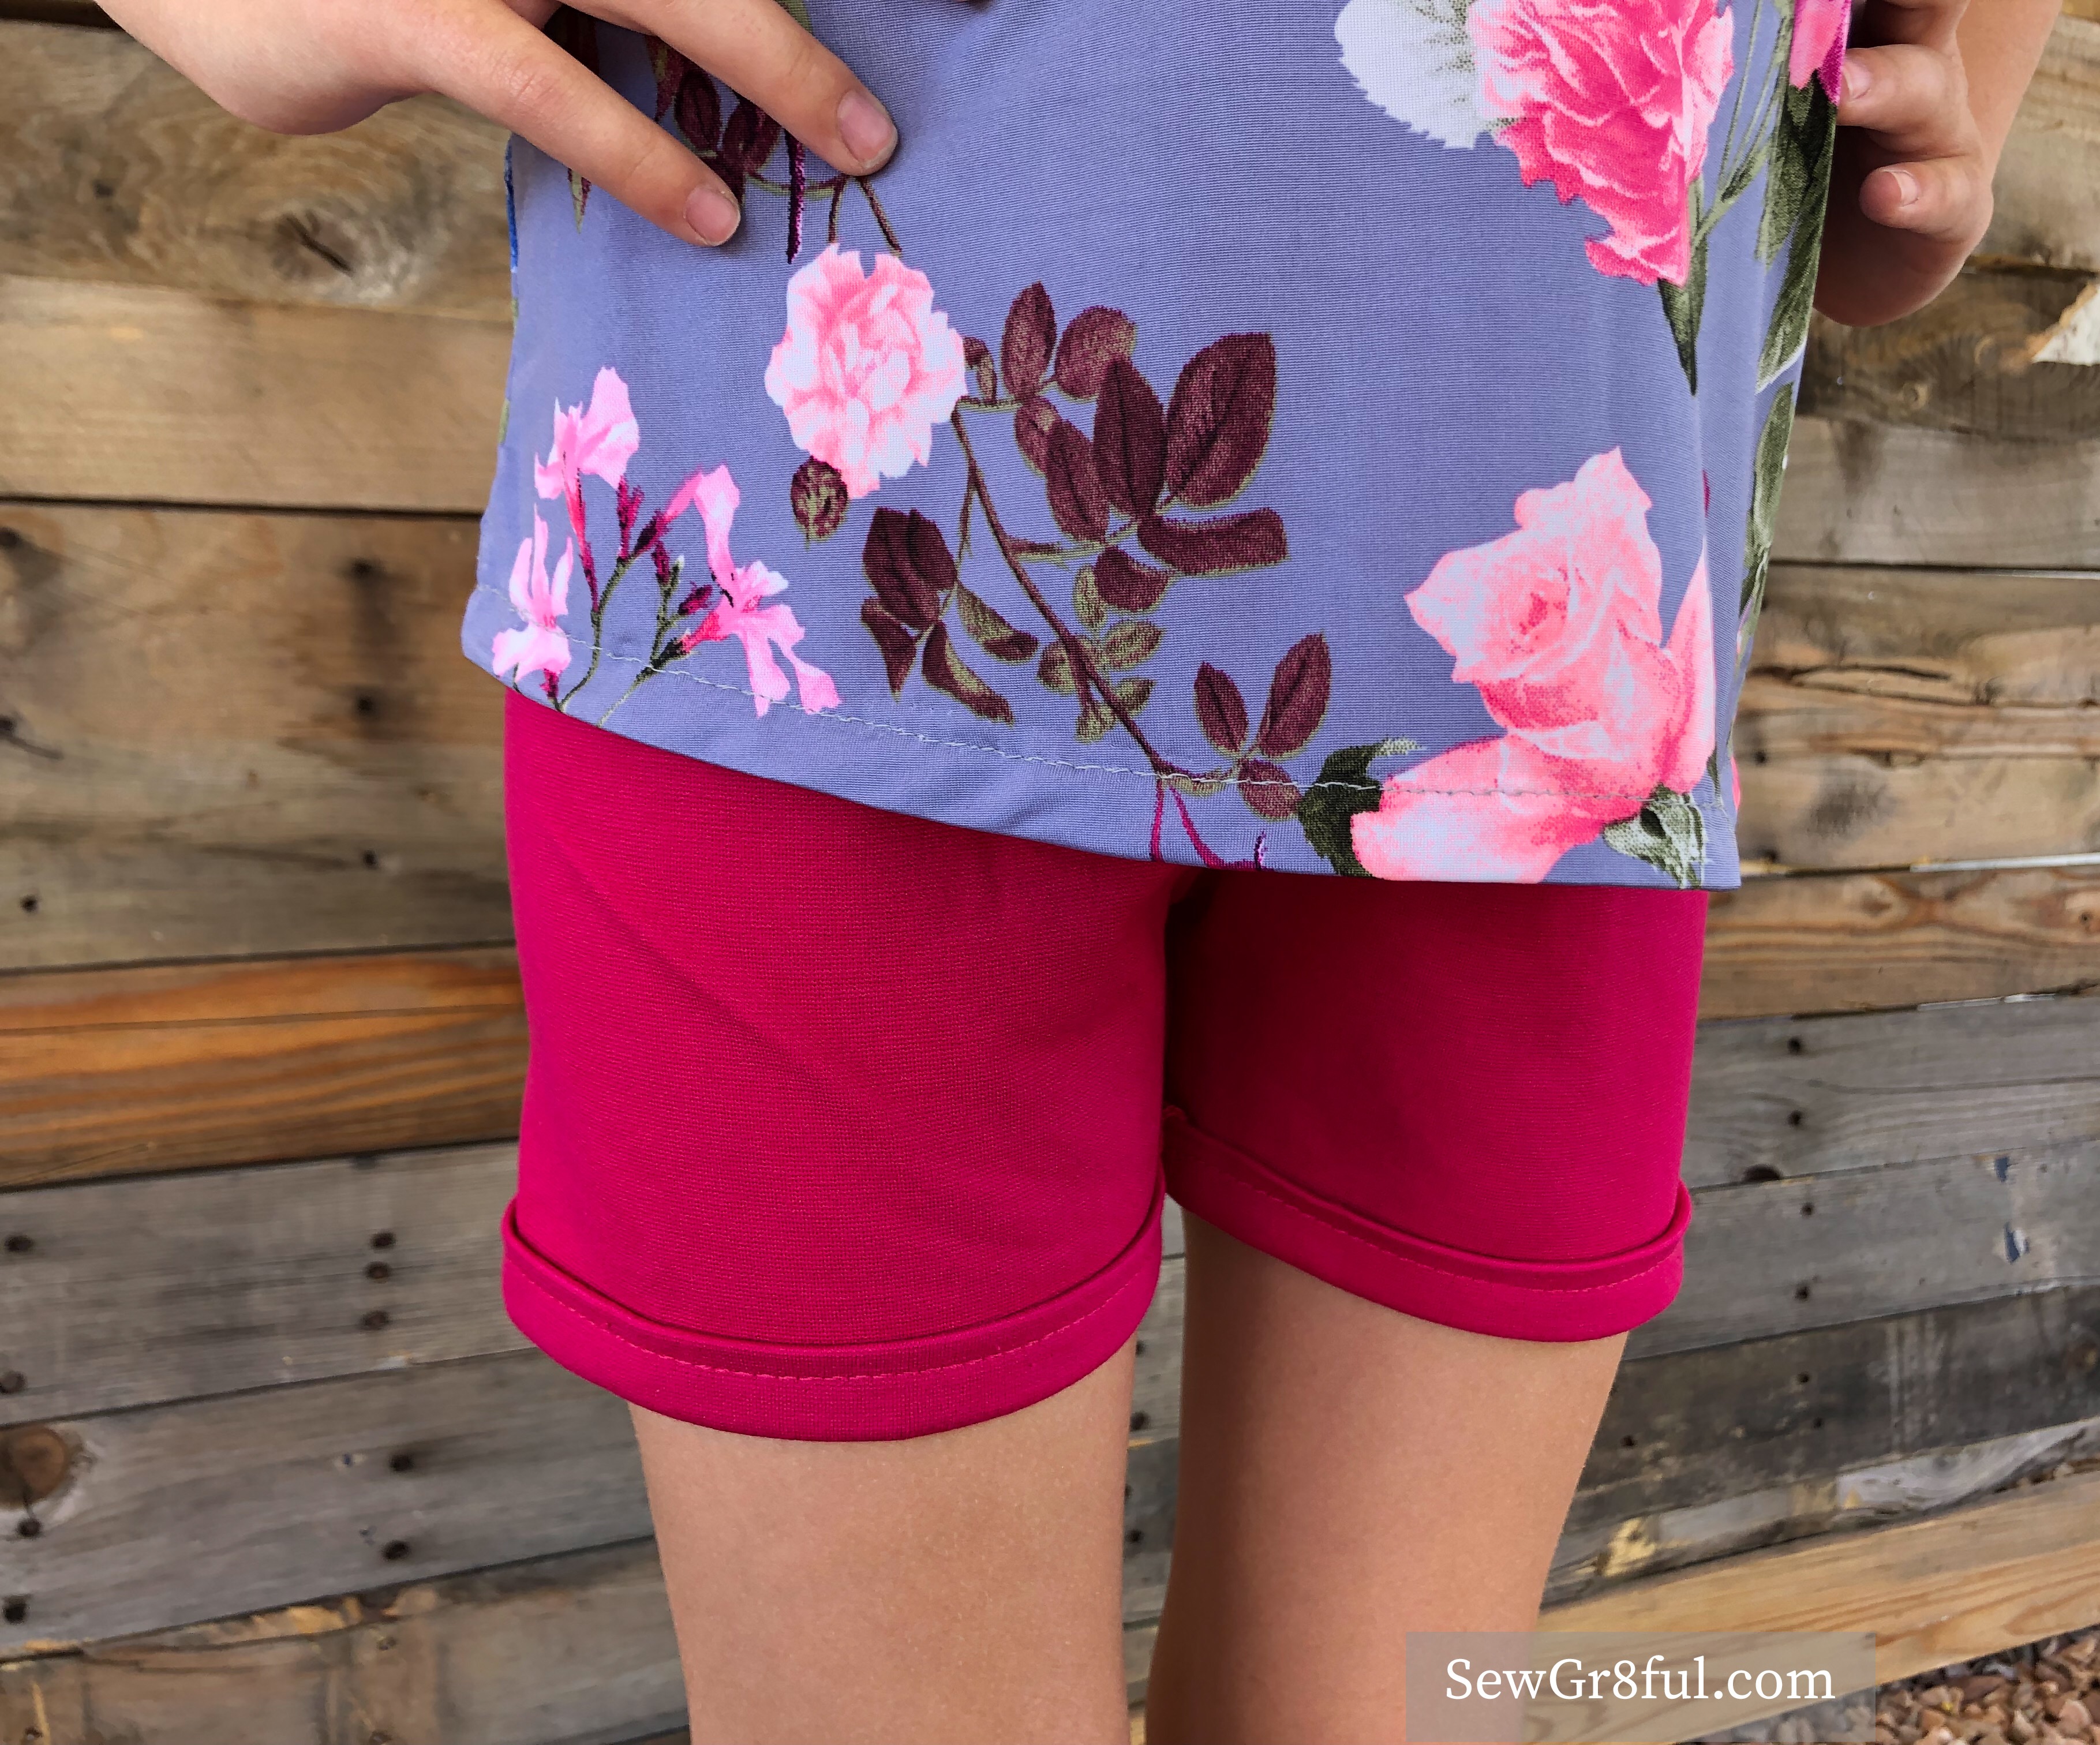
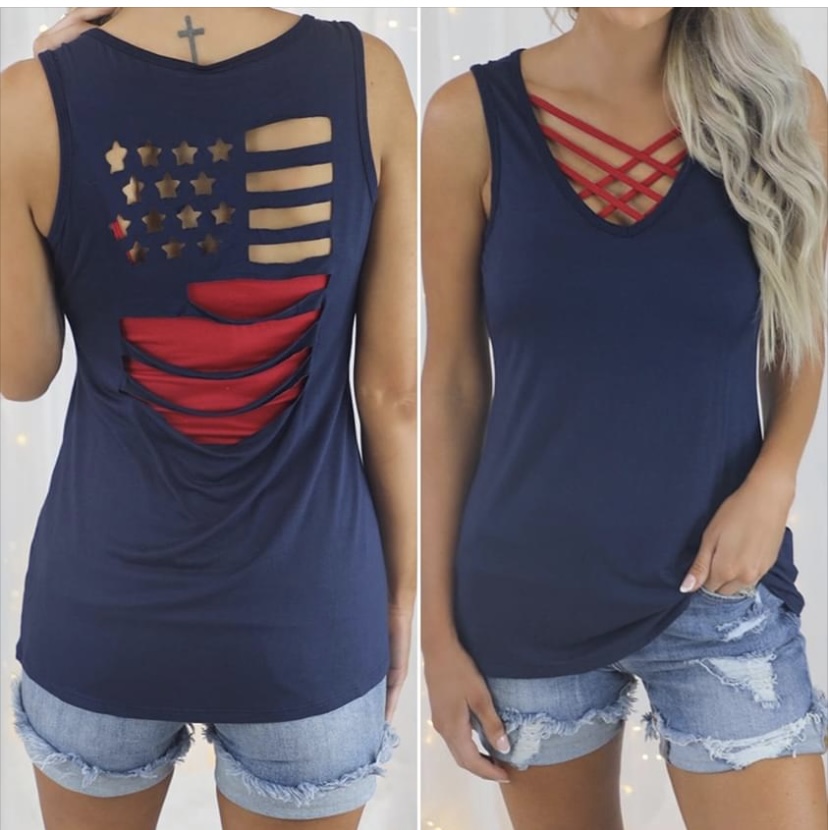
My family likes to wear patriotic things all year round, but especially on Memorial Day, Independence Day and Veterans Day. Back in April, I came across a shirt from an online boutique and I thought it would be a perfect addition to my patriotic attire.

Image from Nictops

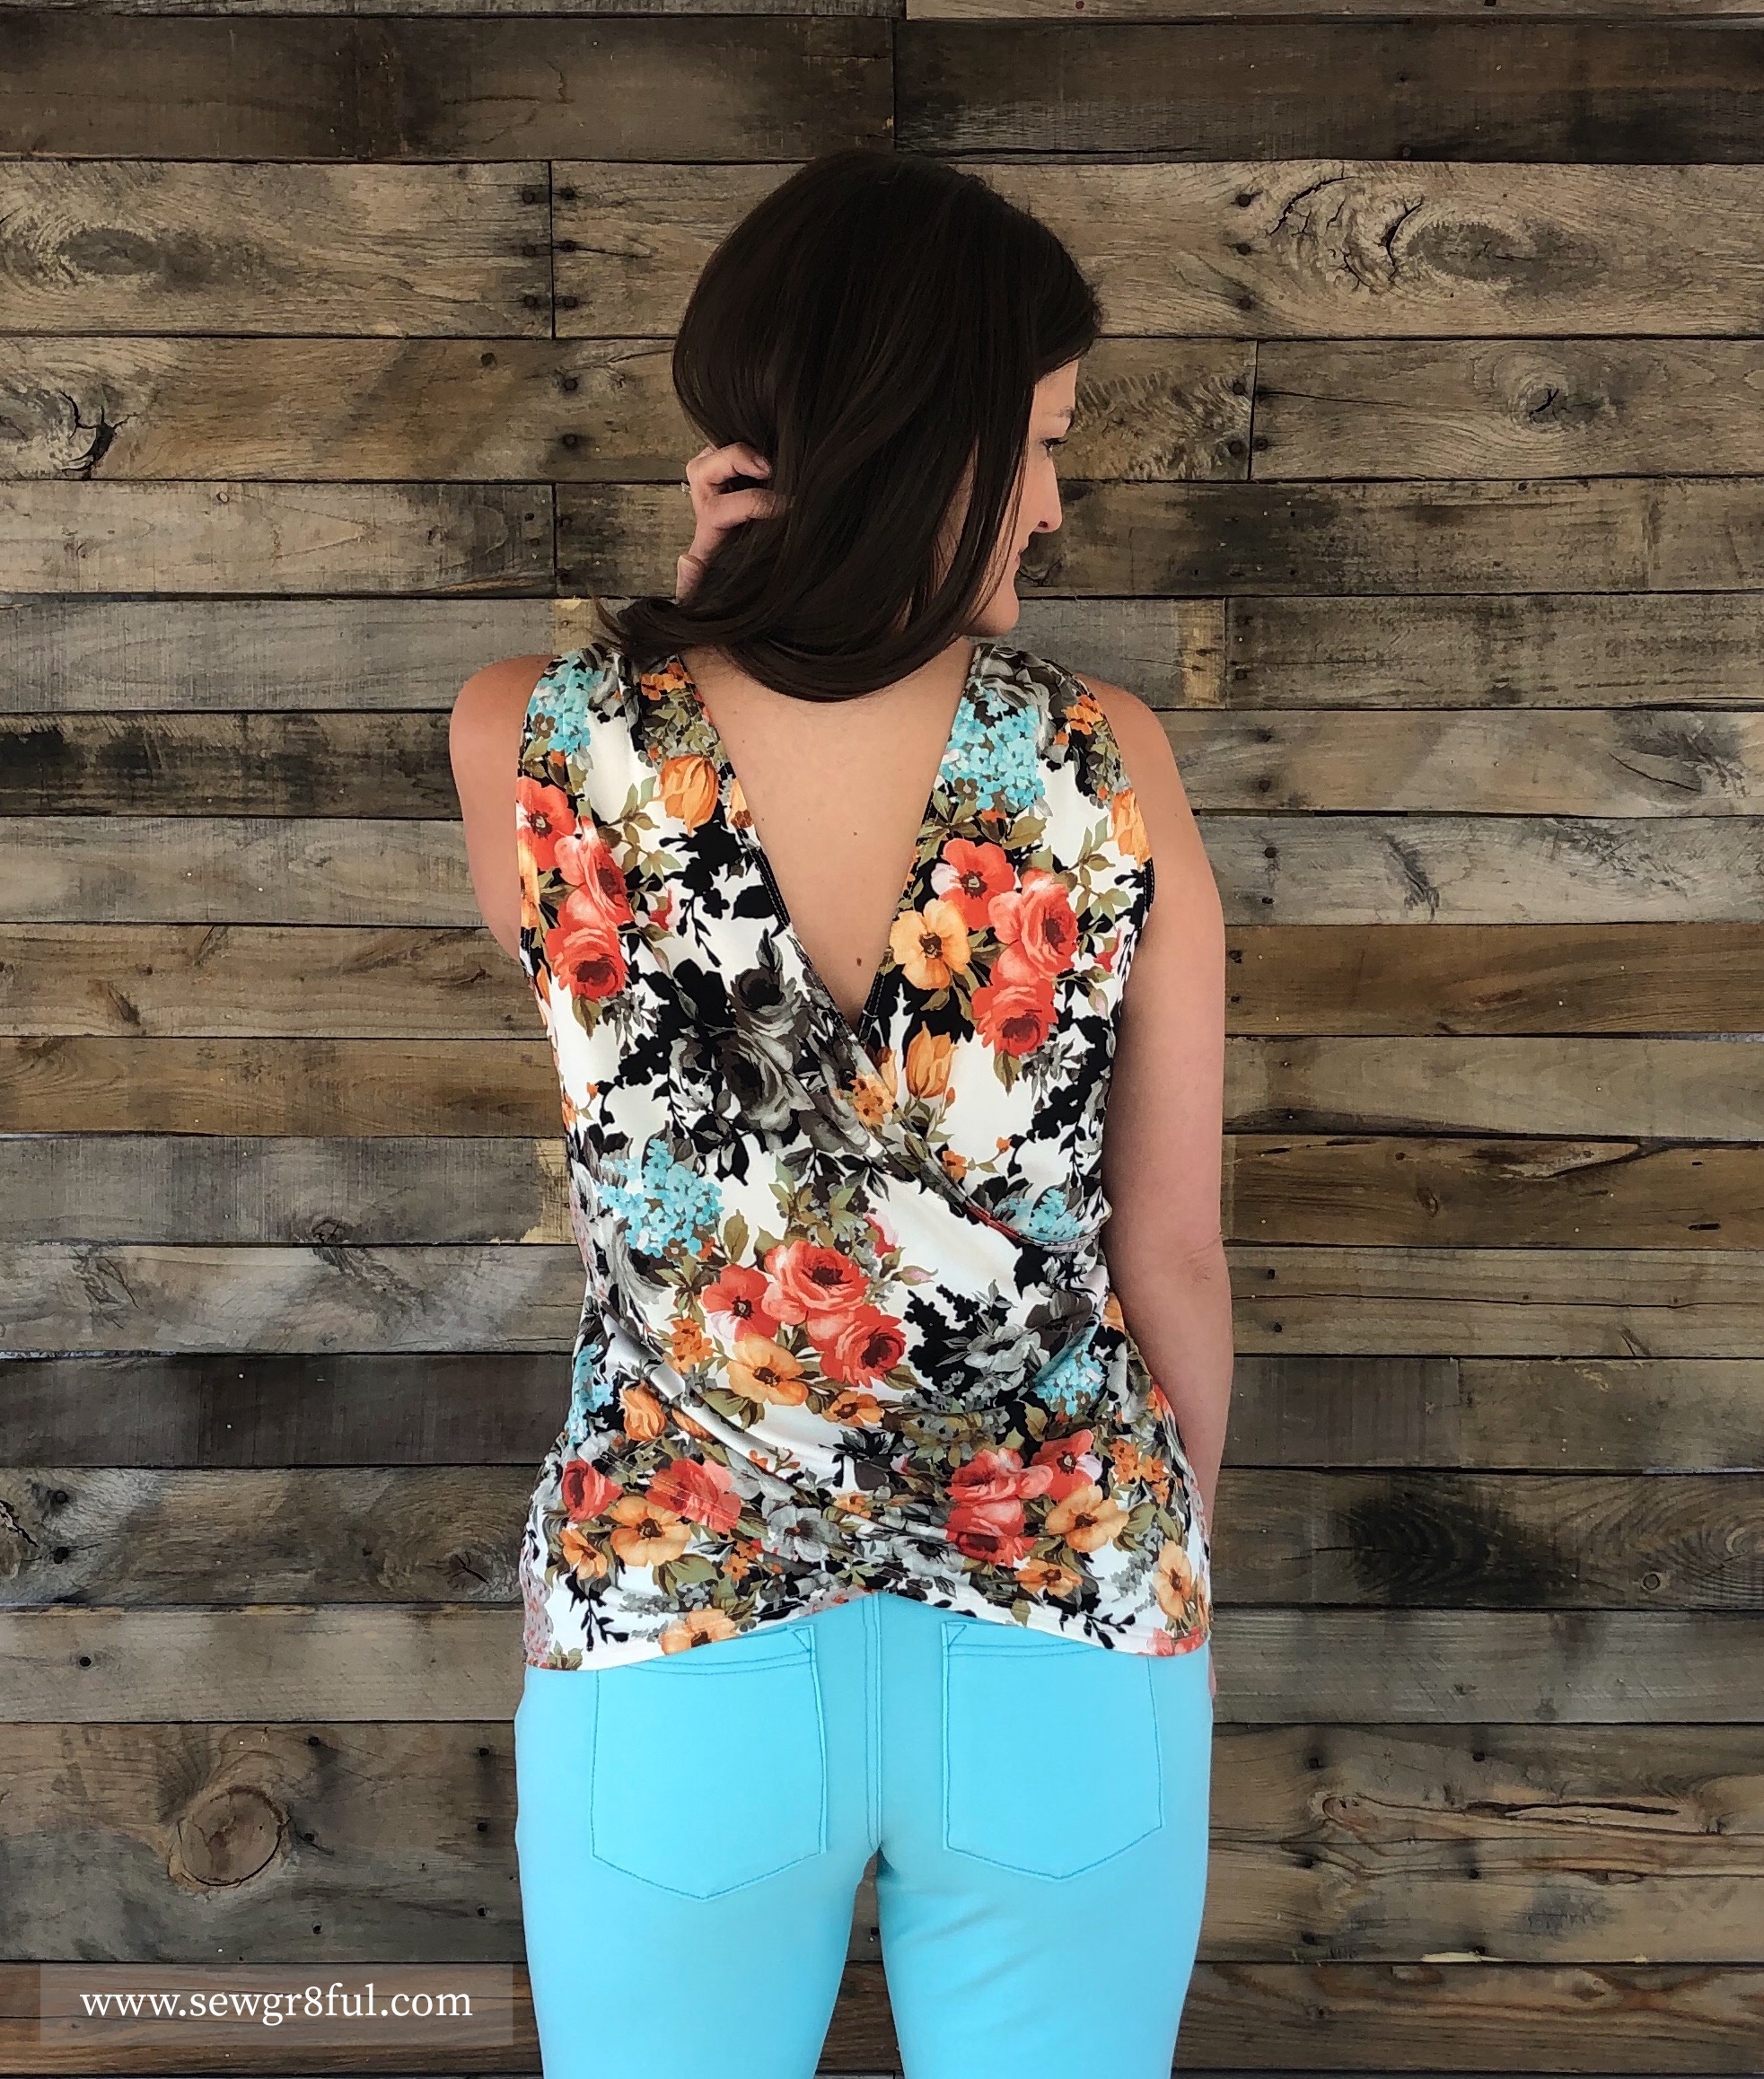
As you all know, we live in sunny Arizona and because of that, I usually avoid layers in the summer. But this top really needed the layers so I wanted to use a lightweight fabric that I knew would allow me to breathe, even with two layers.

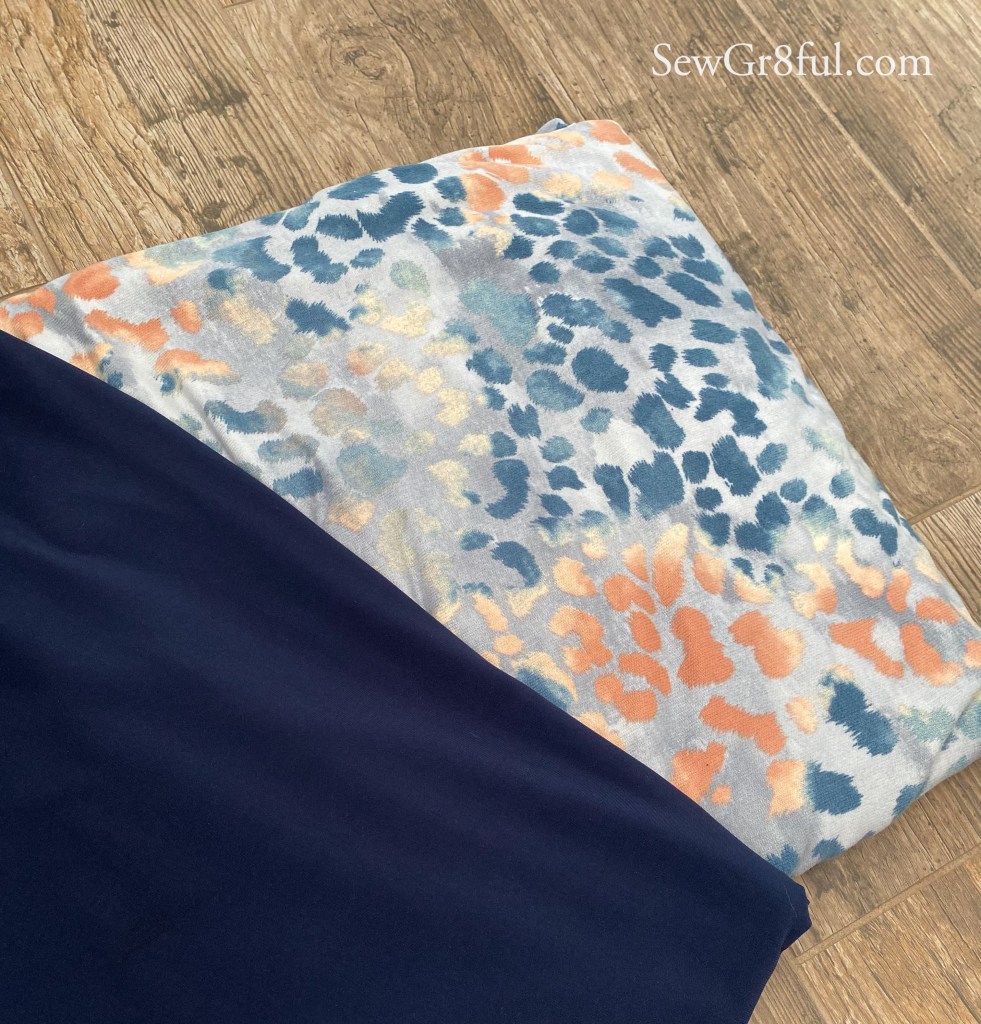
I found a 150gsm solid red modal for the cami. I ended up ordering two different fabrics for the blue tank, a modal Ponte and an ITY. I wasn’t sure which I would prefer with the red modal, so I got both. When my package arrived, I didn’t care for the feel of the modal ponte over the red modal and I ended up with a different fabric instead of the ITY. The fabric I got was an almost exact weight to the red modal, and I’d say it’s either a lightweight modal or a rayon spandex. I chose to use the mystery fabric because it had the perfect drape I wanted for the stripes and didn’t cling weird to the red modal. So blessing in disguise šŸ˜‰

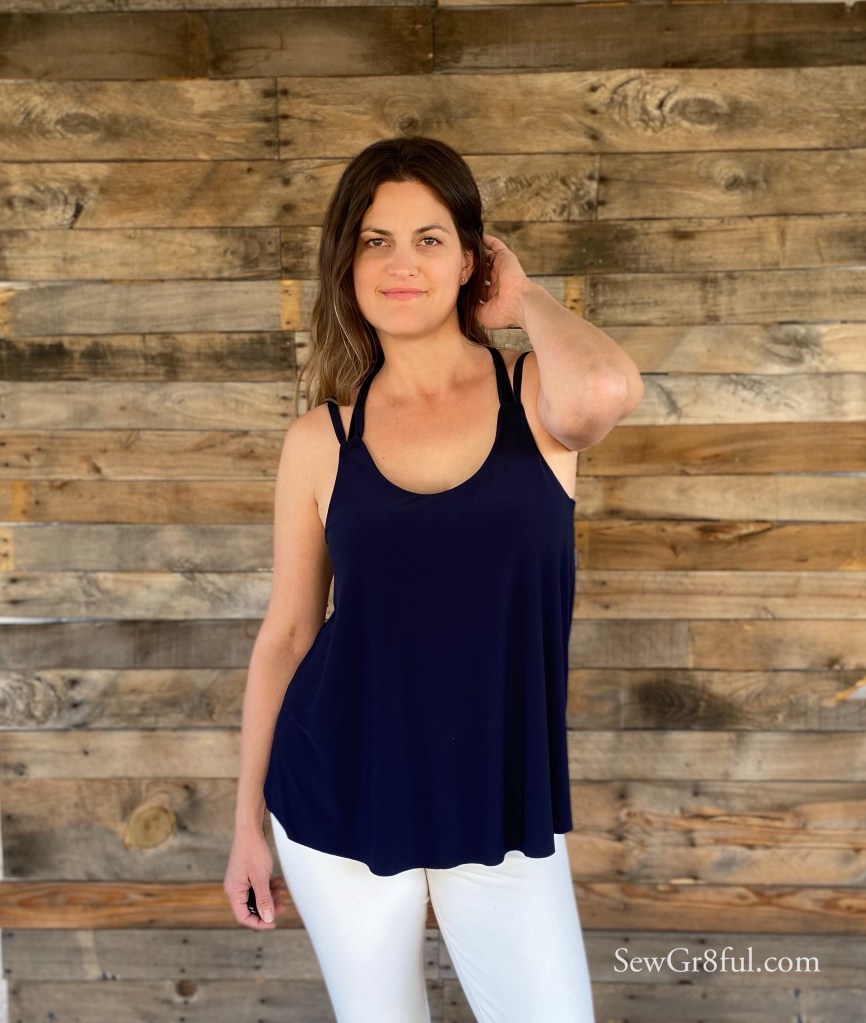
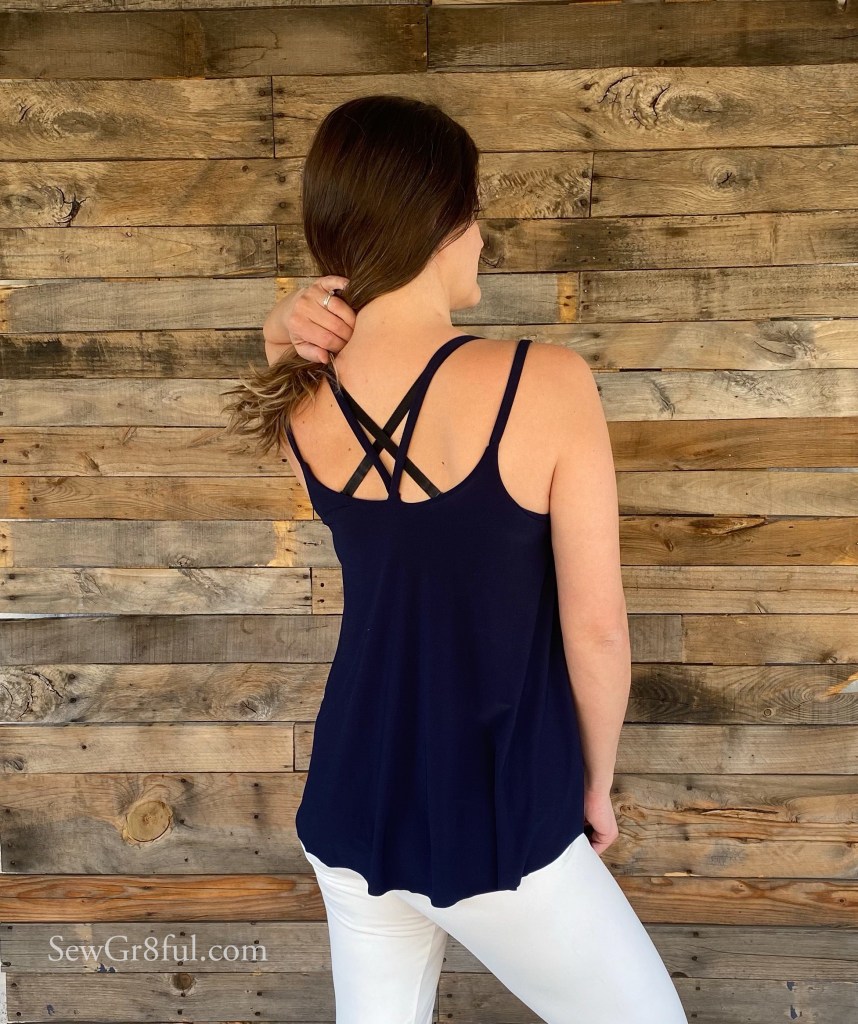
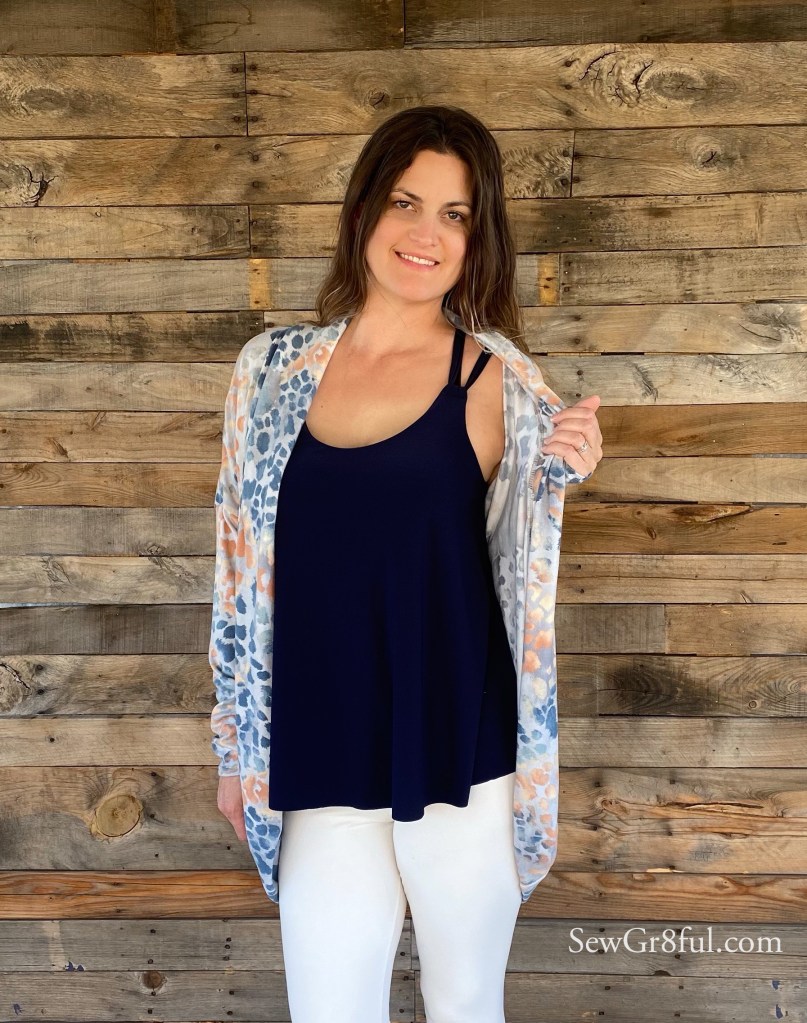
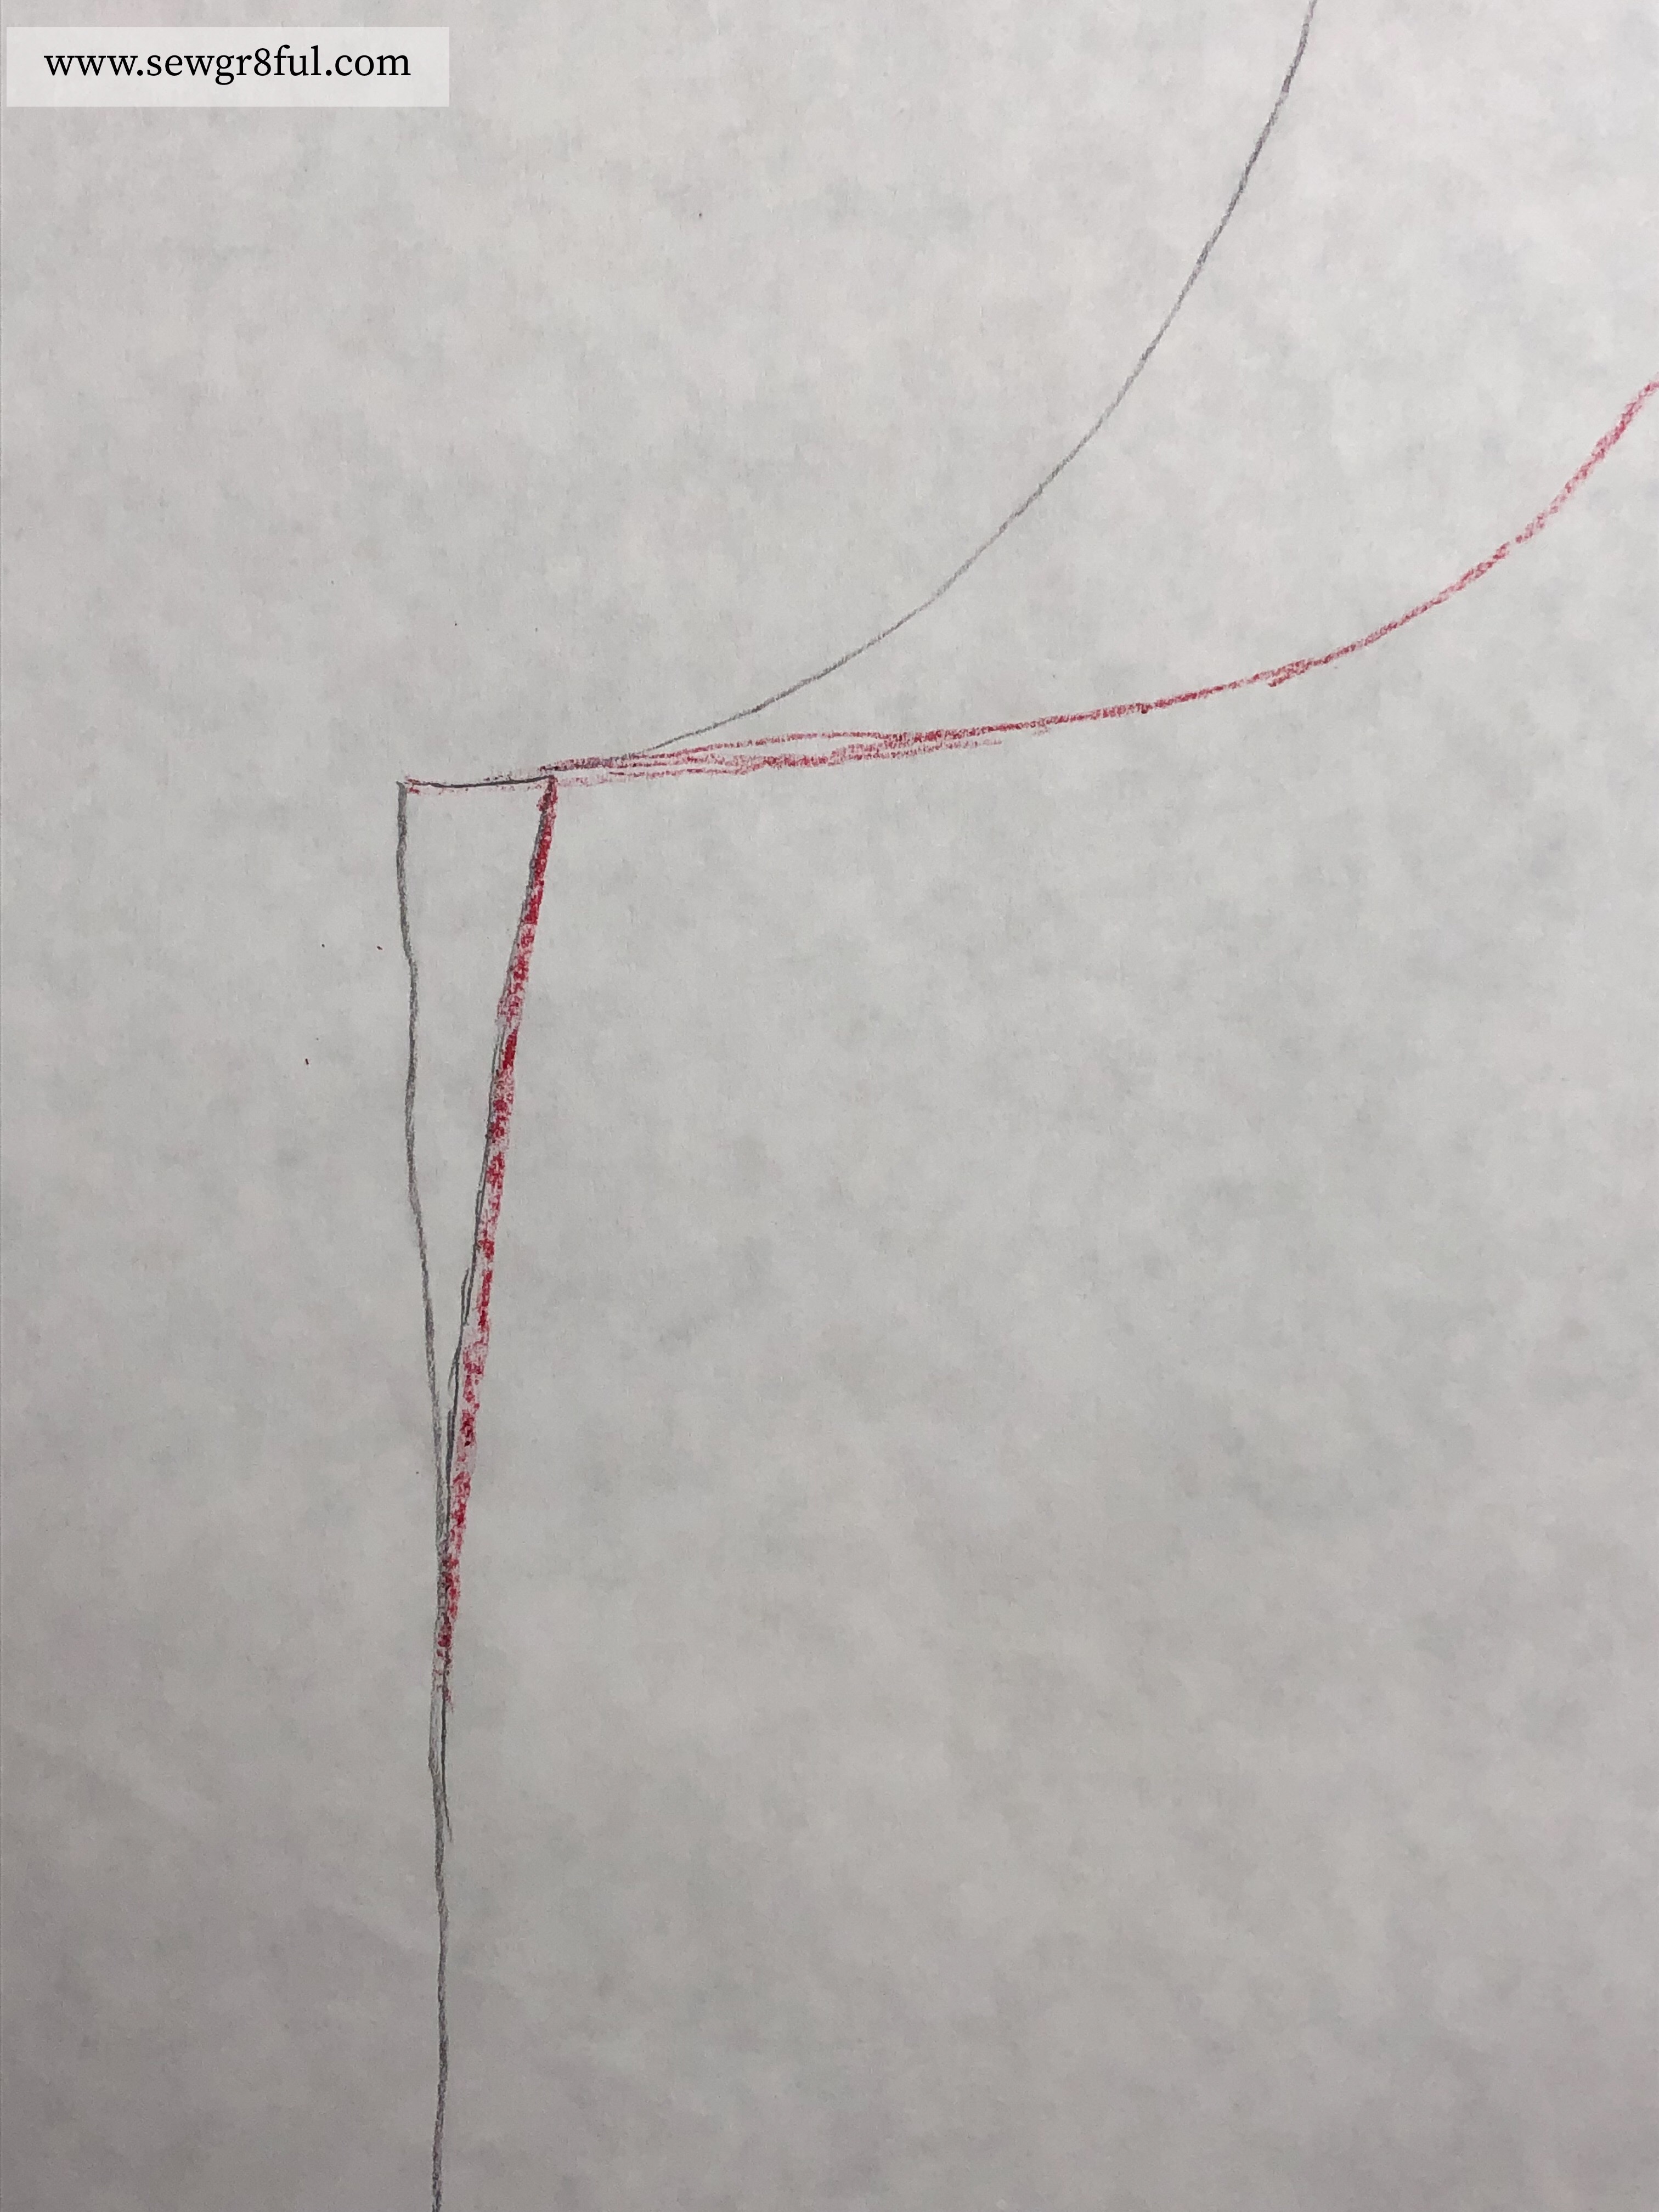
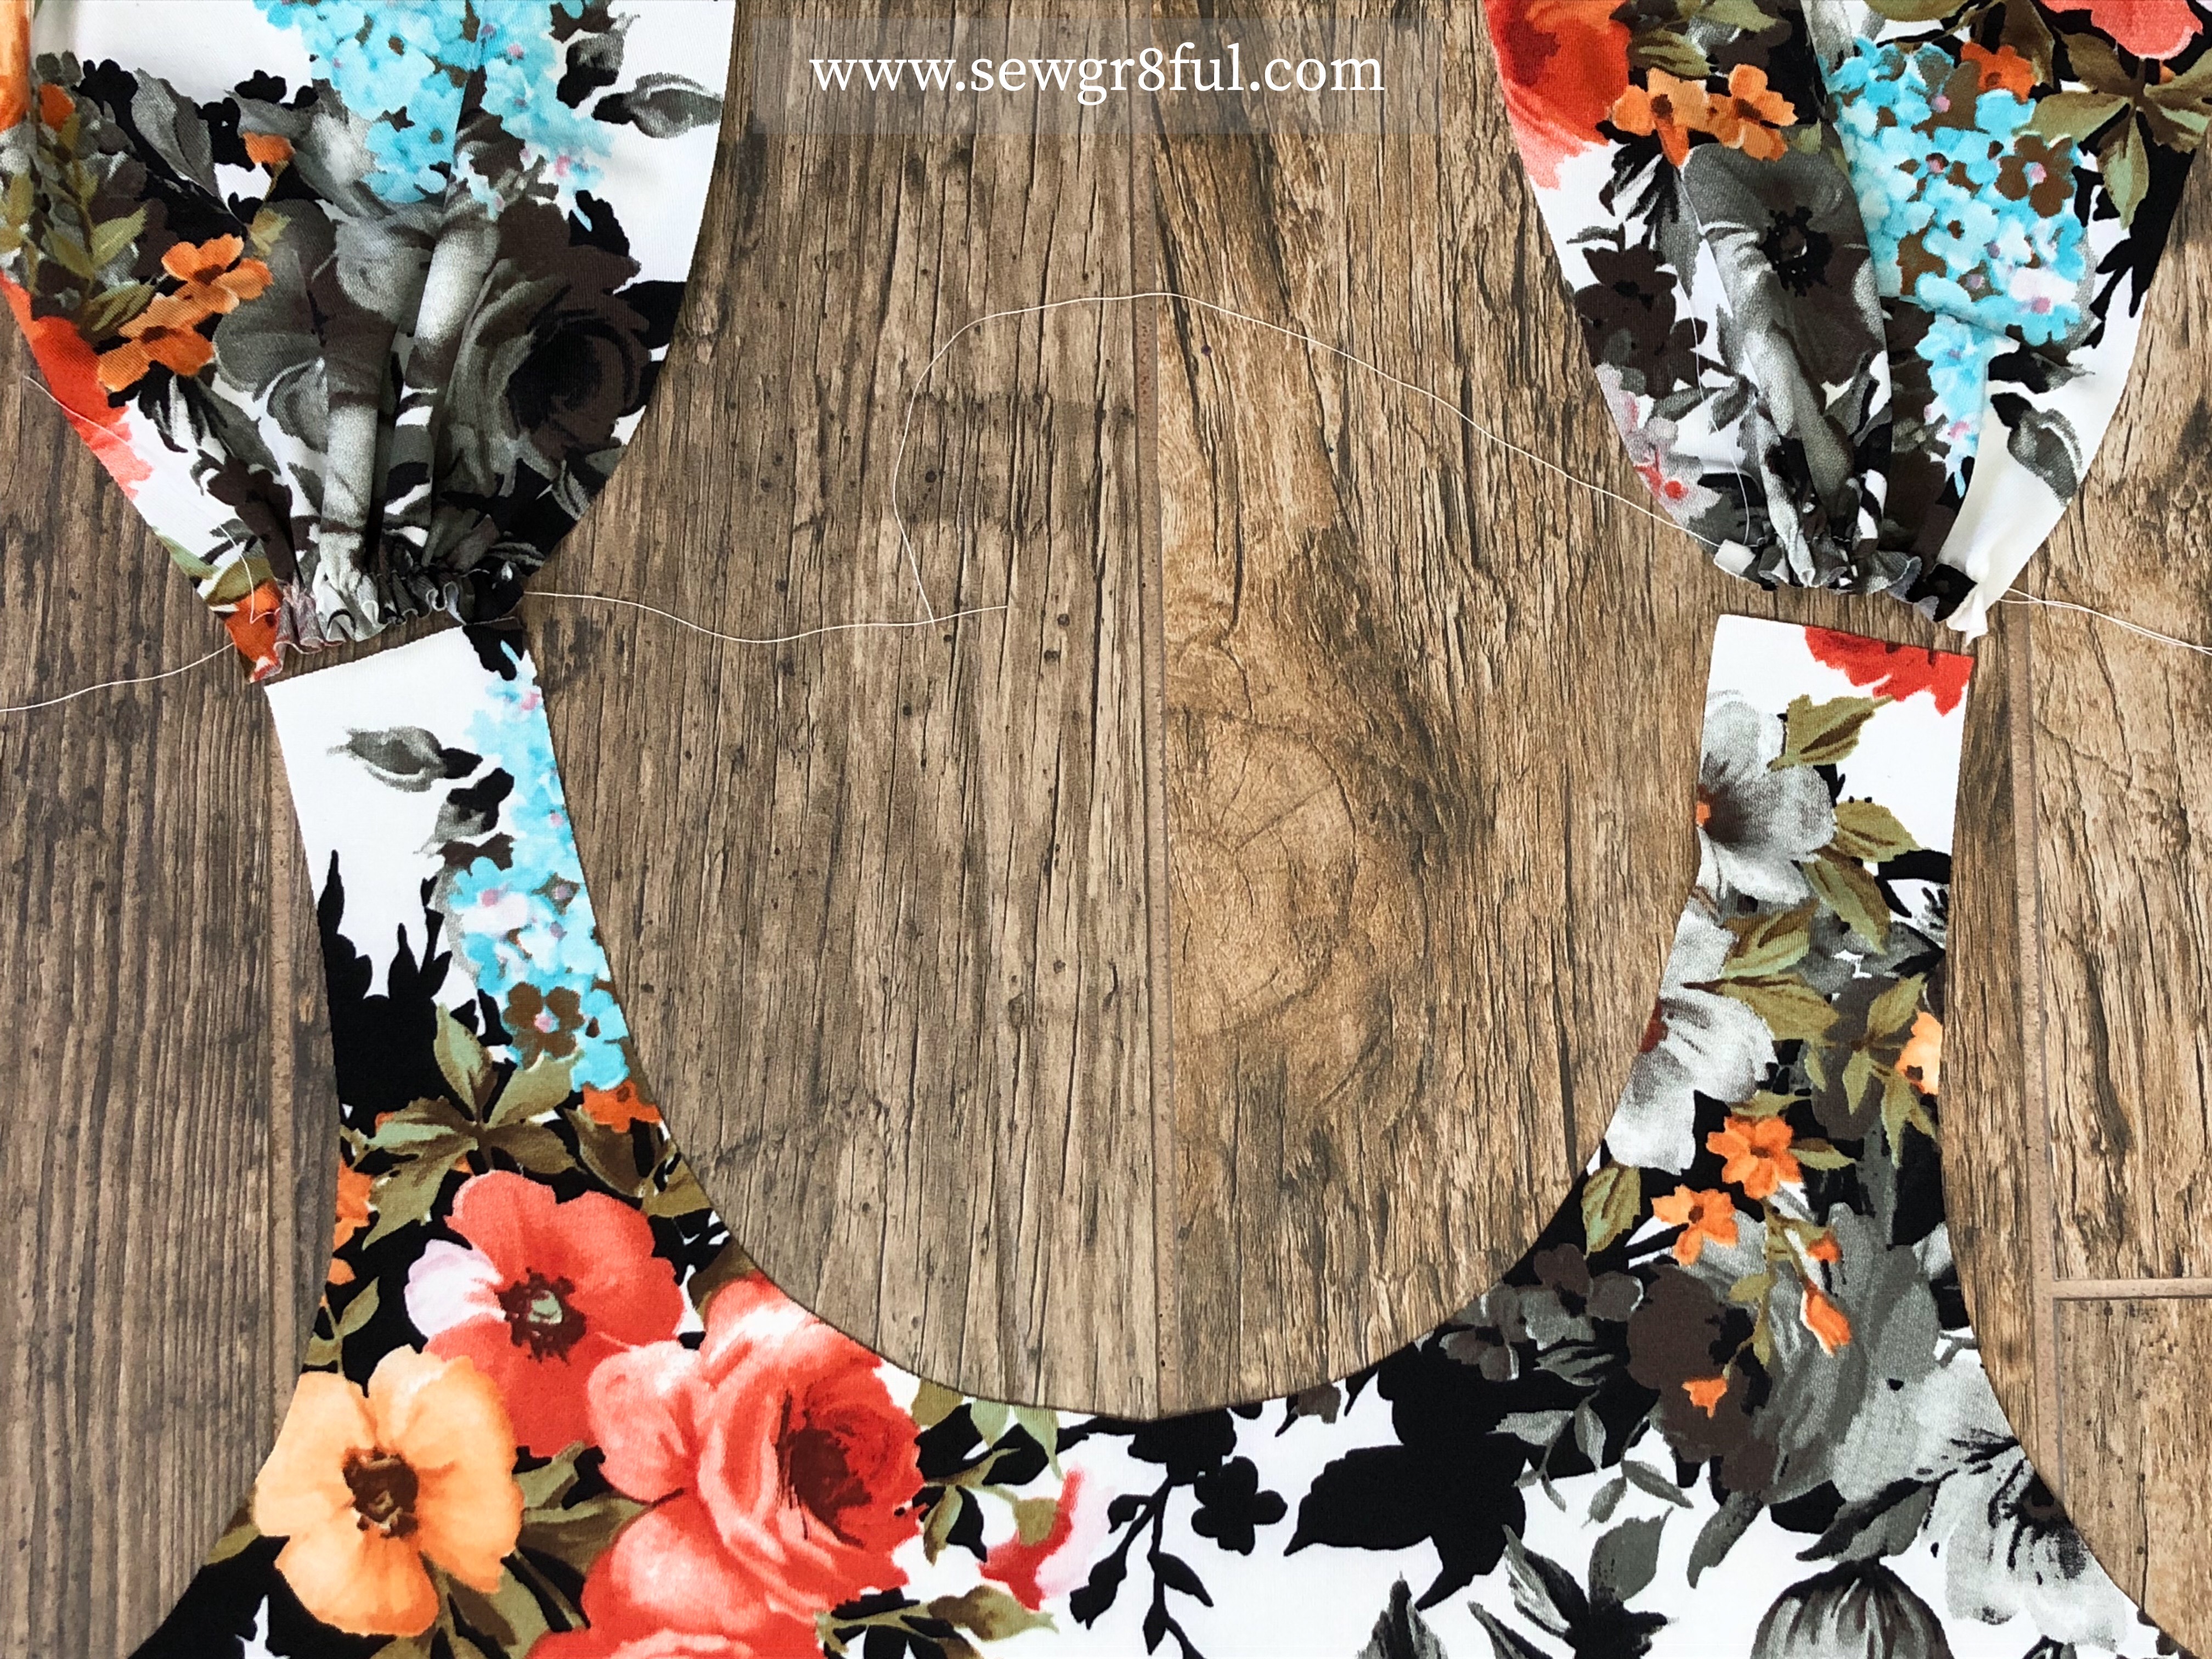
I knew the perfect patterns for the two tops would be the Cross My Heart Cami and Essential Tank, both from Patterns For Pirates. Both tops have several options so for my recreation I went with the high X front and regular back on the cami. For the Essential Tank, I chose the full back, curved hem, with bands. I wanted to have my front neckline lower to show off the front X a bit more, so I just cut a lower “V” and blended it into the original neckline.

I recalculated the neckband by measuring the new opening and multiplying it by 90%. I kept the original neckband width, and when sewing the band on, I let it smooth out the V so it wasn’t as pointy.

I made no other changes to the patterns and sewed up both before creating the design on the Essential tank. I wasn’t sure exactly where I wanted the placement to be so I waited until I had made it and tried it on to determine.

Once made, I tried it on, and marked with two clips where my waist hit. I didn’t want the lowest stripe cutout to be lower than my waist, so the two clips were a simple marking tool.

Then came the fun part, the Stars and Stripes. I did some internet searching and came across a free star printable from First Palette. I used their various sized star template and picked the smallest ones on it. They are about 1″ in size. I needed to print two sheets, to have enough for the design I wanted, and I just cut them out and placed them on the back of the tank.

For the stripes I used the remaining pieces of paper, and cut out 1″ strips, three at 4″ long, one at 7″ long, and the last two at 8.5″ long. I placed the strips about 3/4″ apart and all lined up on the right side.

Once I had the stripes and stars in the placement I wanted, I used my marking chalk and roughly chalked the outline of each.

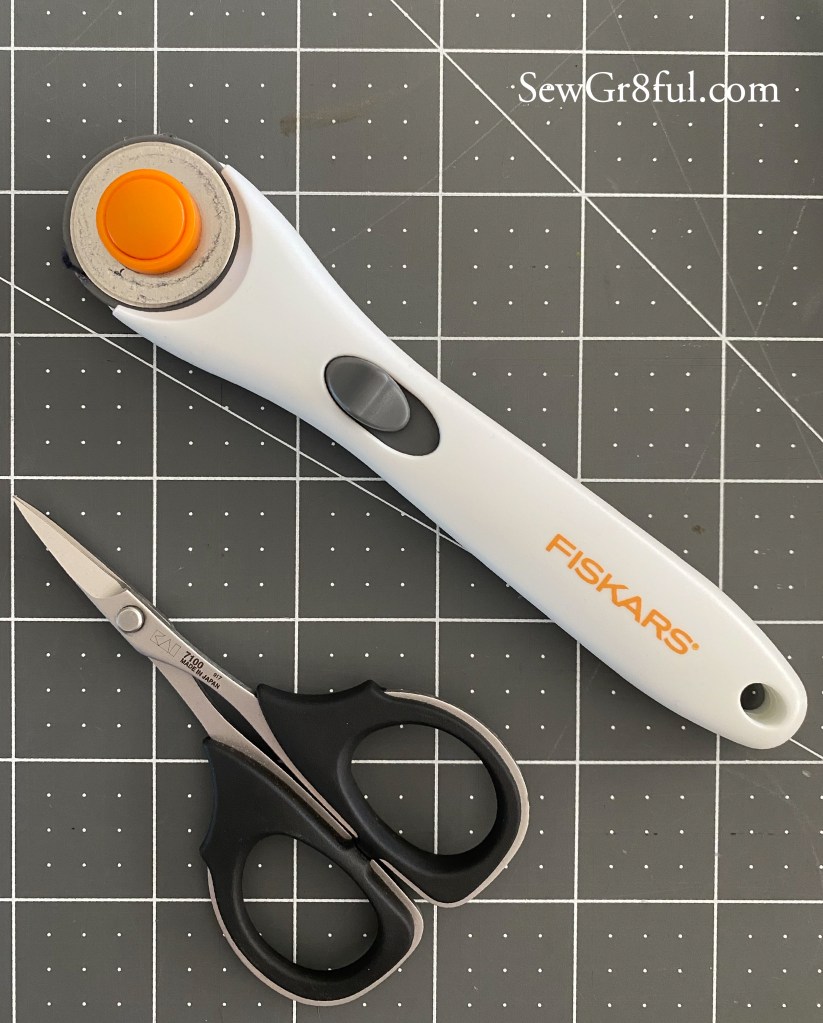
To cut them out, I used my small 28mm Fiskars rotary and my favorite Kai scissor (7100) thread snips.

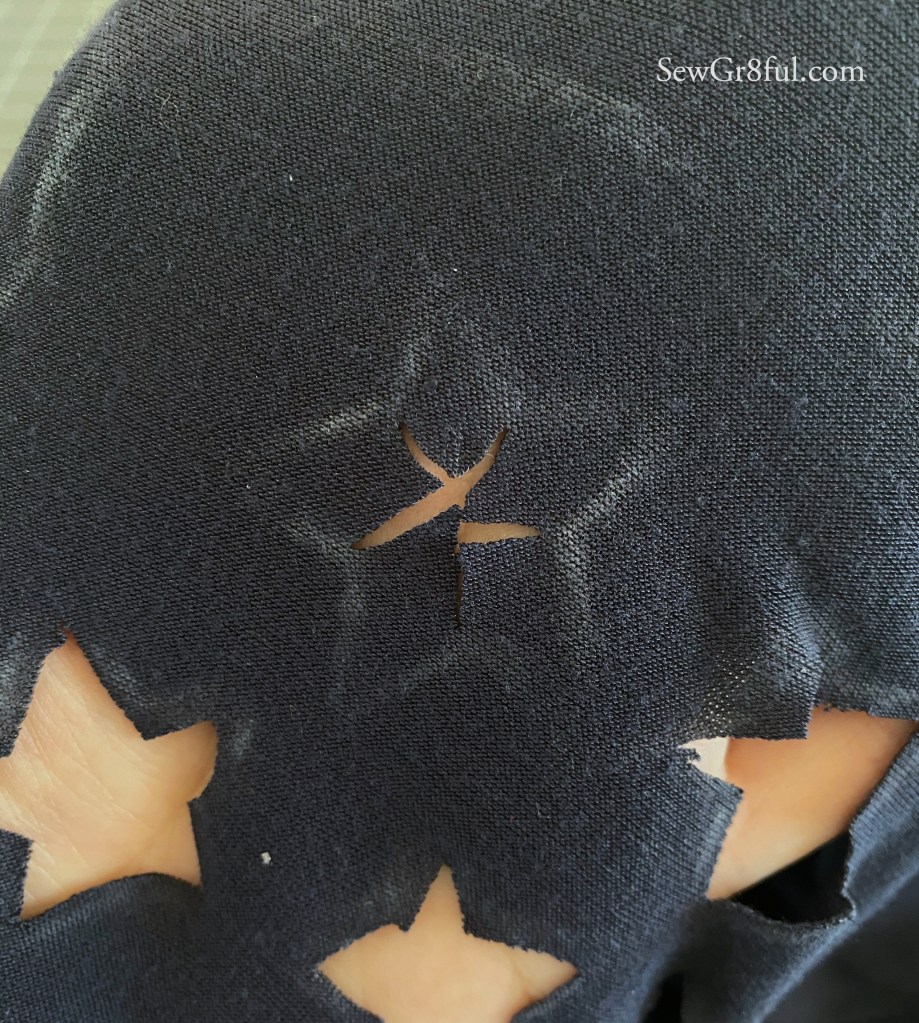
I started with the stars and found that it was easiest to cut the star out by creating a tiny snip in the center first. Then I cut out to each inner point, which allowed me to just cut out to the outer point and the remaining V.

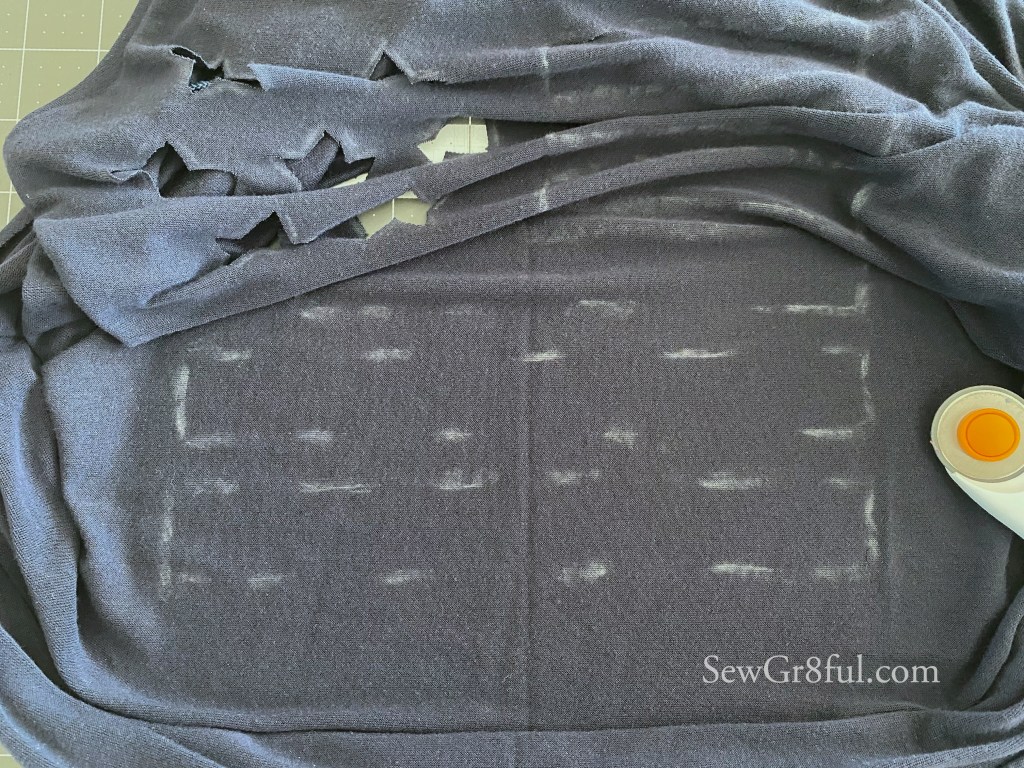
For the stripes, It got a little tricker since the shirt was already assembled. I ended up bunching up the front of the shirt towards the neckline, almost as if I was turning it inside out. This allowed me to lay the back portion flatISH on my cutting mat. Starting at the bottom stripe I cut the top and bottom horizontal lines with my rotary and straight ruler, then using my kai snips, I cut up the two sides. I worked from bottom to top to have more room and avoid rubbing off my markings.

Once I had finished cutting it all out I noticed the stripes didn’t have as much drape as I wanted and the stars were a little too nice looking for what I had in mind, so I tossed it in the washer. Not only did the washer give it that little extra I was hoping for, but it also removed all my markings for me. I gave both tops a good press and was done.

As I was cutting the starts and stripes out, I really had feelings of apprehension and like I had lost my mind 🤣. Making a shirt, only to cut it up, was a whole new experience for me.

Patterns are the Essential Tank from Patterns For Pirates and the Cross My Heart Cami from Patterns For Pirates.

Fabric is both from So Sew English, the Red 150gsm Modal is here, the blue is not on the site.

Star printable is from First Palette.

šŸ’™šŸ‡ŗšŸ‡øThank you to all who have served and paid the ultimate sacrifice. šŸ‡ŗšŸ‡øā™„ļø

Layering for Winter in Arizona

Desert living really has it benefits in the winter. We do get our cold storms, but on a typical day I can start out wearing cool weather clothes, transition into tanks and even shorts, and end up back in the cool weather clothing by evening. Because of this and my circulation problems, I really love wearing pants, tanks, and cardigans. I have found myself grabbing that combo from my closet, more and more, so I decided to make myself a new set.

I recently discovered a fabric base called Oakley. I love it for cardigans! It is soft and squishy, and has a slight brushed feel. BUT, it doesn’t grow like some sweater knits, it’s easy to sew, and it is available in some really fun prints. This print in particular caught my eye and I just couldn’t pass it up.

Then came the coordinating tank fabric. I really wanted something I could wear into spring and summer, but wanted something a little “dressier” than a modal or rayon spandex. I particularly like ITY (interlock twist yarn) for dresses and tops, because it has great drape, and can keep me cool in the heat, so I started looking there. I came across this solid navy ITY and took a chance it would match the Oakley print, and ordered. The fabric matched !!

I knew before ordering, exactly which patterns I intended to use for this combo. For the tank I used the Catalina tank from So Sew English Fabrics. I liked the look when it released, but didn’t get a chance to try it out, and now was the perfect time. Since I prefer to wear my regular bra, I decided to omit the elastic for the included shelf bra, and treat it as a liner. Because of my height and my side waist length, I added an inch in the length of the bodice, and also added an inch to the “shelf bra” length.

A few things to note: I am 5’9″ with a side waist length of 9″. Most patterns are designed for a height of 5’5″, and an 8″ side waist length. I have found that adjusting my 1″ for side waist length difference, is usually enough for tops, based on where I carry my height. However, in this case, I would have needed to add 2″ to both the shelf bra and the bodice, versus the 1″ I did, if I had made the pattern as drafted and used the elastic, and hemmed the bodice (which I didn’t do, for the look I wanted). The Catalina is drafted for a height of 5’5″. If I had used a heavier fabric or one that grew, I could have left it with just adding 1″.

Since the “lining” was designed to be a shelf bra, it comes in to your body and has more negative ease. I found that this helped keep the “lining” in place and gave me a really clean silhouette, with no visible lines.

I particularly like the extra strappy look I got on the back, wearing it with my regular bra.

For the cardigan, I chose the Patterns for Pirates, Cocoon Cardi. I had a happy accident the last time I made the pattern and ended up with 10″ bands versus the 5″ or 13″ options in the pattern. I also sized it up one, from my measured size, and the combo was love. For this cardigan, I did the same.

These two have been on wear, wash, repeat since making, and I foresee the tank being worn with shorts, into summer.

ombre leopard print Oakley patterns for pirates cocoon cardigan and Navy ITY So sew English Fabrics cocoon cardigan

The links in this post are not affiliate links.

Shorts, Shorts, and more Shorts

My daughter keeps growing and her wardrobe is in an almost constant rotation. Just when I think she has what she needs, she comes walking out of her room and I hear, “Mom, I grew again!”.

It’s usually when we are trying to run out the door or leaving on a trip, never the best times to sew. Fortunately, she likes the fit of the free Ginger Shorties from Sew Like My Mom. I can usually do a quick remeasure, reprint the few pages, cut and sew, and she has a new pair of shorts in under an hour. So the last time the scene played out, we went fabric shopping and I made her a few pairs, to hopefully buy some time.

This first pair was made from a Black Rainbow Foil Liverpool from So Sew English. She loves glitter and rainbow so these were a huge hit. I made her a coordinating Patterns for Pirates Jolly Roger Raglan in a purple French Terry I’ve had in my stash for a while.


This next pair was made from scraps from my recent Iris shorts ( you can see the sew along I did for them here). When she saw my shorts she fell in love with them and I was so happy I had enough scraps left to make her a pair of shorts, plus we got matching scrunchies, made by her. This fabric is a Scuba from So Sew English.

She picked a neon pink bullet from Sincerely Rylee for her third pair. She loves how it looks with her Sassy shirt and the bunny shirt she made for her birthday, back in April. She raided my stash for a coordinating fabric to make herself a headband too.


I am so glad that these are such quick sews!! You can see my time lapse of the scuba pair here.

Maybe these three pairs will last her through the rest of our warm weather, fingers crossed.

This post may contain affiliate links. This means if you make a purchase through that link, I may get a % back, at no additional cost to you.Ā 

And now, her list

If you read my last post, it was about my son’s clothing list he “needed”. My daughter’s list was a little more conservative in its length, but now that I have completed it, she seems to need additional things. I kind of feel like she is playing me. Oh, just make a few things Mom. Oh, would you look at that, guess I need this now and ohh what about that?? Hey Mom, what is that fabric for? Oh do you think you could make me something in it too?? Oh Mom, that is so soft, it’s like your hugs… Okay, I made that last one up. You get the point though. She loves my makes and that is such an awesome feeling.

My kids love the fabric options from So Sew English almost as much as I do, so when she was making her list, she asked if she could shop for fabric on their site. She made her list, complete with fabric choices, and this is what she picked.

16A697F9-86FB-404C-BEE8-C5226F1DB85A

First up is this super fun Lilac Unicorn print Double Brushed Poly. Not only does it have unicorns all over, but it also has the foil stars. I tried so hard to get good pictures of the stars, and just couldn’t quite get it. She wanted a shirt to wear with leggings and jeans, but requested something a little different than what we had done before. I showed her the patterns I had already but hadn’t made for her yet, and she picked the Spice Cake Dolman from Pattern for Pirates.

8655B8C6-9C0F-48BA-A855-FA326A2C66D0

The Spice Cake is the girls version of their Pumpkin Spice Dolman for women, which just so happened to be one of the first tops I made myself. The pattern can be made with a short sleeve, 3/4 sleeve, or a long sleeve. You can choose a straight shirt length, curved tunic length, or a banded option with short or tall bands. For her unicorn shirt, she picked the long sleeve, curved hem tunic length.

For fun I did a quick time lapse video, sewing up this Spice Cake Dolman.

After my last time lapse, I had a few questions regarding the clipping I did to my seams when hemming. You can see it at about 1:32 in this current time lapse. Since I took my coverstitch out of time out and have been giving it another chance, I have found that I get less skipped stitches, if I clip into my seam allowance, and split my hems opposite directions. I do not clip all the way through, just up to the left needle thread. This also helps when I am hemming sleeves or pants, as it allows me fold at exactly the right amount. One other note about this time lapse. I usually iron my curved hems while I am folding them. I just did a finger press on this one, since my iron was out of commission. Ironing before stitching is definitely something I don’t like to skip, especially when doing curved hems.

To finish off her “first” list, she asked for two new pairs of leggings. She wanted something really colorful with lots of pattern, that she could wear with solid tops. She picked the Navy “knit print” double brushed poly for this pair.

9918772A-DF09-4278-94A6-275E842293CB

And for the second pair she picked this pretty Lilac scales print double brushed poly. The lilac dbp is only available in a bundle now, but there are some colorways of the French Terry scales, in yardage.

0D8DE8A8-5DDB-4DD6-B38E-75D54F65A7D9

For both pairs of leggings we used the Bonny leggings from Made for Mermaids. This is a pattern we have been using for her for a while, and she just loves how they fit. The pattern is free, has several length options, and also comes with a skirt, which she loves as well.

I should have known her list was going to grow, once I found the piles of clothing they hid when making their need lists. Guess I should start working on those “extras” soon. Although, I do have a few things on my “need” list, so maybe they will be next. šŸ˜‚

This post may contain affiliate links. This means, if you make a purchase through that link, I may get a % back, at no additional cost to you. Let’s be honest, we all know it goes right back to adding to my fabric stash. All opinionsĀ on this blog are my own.


I went Pinterest “shopping”, again

Pinterest scrolling led me to this fun outfit and I just knew I needed to recreate it.

IMG_9268 2

I already had a similar looking fabric in my stash for the top, but nothing for the leggings, so I went fabric shopping. My shopping led me to The Fabric Fairy and their supplex category. I know people commonly use supplex for workout clothing, but I have found it can also be great for other things. Some supplex I have used in the past, has a kind of slick feel to it, but this was a little different. It had a smooth side and a slightly brushed feeling on the other side. This one is called Beyond Cream Supplex Lycra Jersey, and the description on their website says it is high wicking with a microsuede back. It sounded intriguing so I decided to give it a try. The fabric shipped pretty quickly ( I even got a fun pen! ), it washed up well, and sewing began.

I used the Patterns for Pirates Peglegs for these leggings. I like how quick they are and they had the right look for this outfit. Bonus, they are free. I like using the low rise on the pants, with the contour high rise waistband, from their add-on pack (also free). They keep things secure, I get no rolling, and they aren’t so tight that I get uncomfortable when I have health flares. I made a time lapse video, sewing up this pair, that you can see on my youtube.

Something to note, the Pegleg pattern, has negative ease like most legging patterns. I wasn’t sure how see through these would be, with that negative ease, but I figured with the longer sweater, it would be okay. I will definitely not be wearing these with anything other than nude underwear, ha ha ha, but even with the stretch, things stay G rated.

8585A986-682A-47AE-979B-DA43E17BB132

To make the top to wear with them, I used the Nora from the DIBY Club. I was fortunate to have tested this pattern when it first came out a while ago and I still wear the two versions I made then. I knew one of the options it had was the split hem I wanted for this look, and with a little tweak to make it more of a high low split hem, it was perfect. I measure in a few different sizes, but since this has a bit of ease and I was under the finished measurements for the SZ 8, I just made a straight 8 for this look. I picked the 8 based on my upperbust measurement. I did my usual 1″ addition, for my 9″ sidewaist, and then added an additional 4″ to the back hem.

91109053-4BAF-432F-8DCC-E71F4194AFEA

I used some Burgundy Honeycomb Sweater Knit from So Sew English Fabrics, that I got last year. It is super soft and has that almost heathered look to it, that was like my pinspiration picture.

E65AE960-86B2-499D-A4FD-DC6377BA6FA2

Another pinspiration, made mine, and now I need to find some calf high, grey boots, and maybe a few more colors of that supplex šŸ˜‰.

This post may contain affiliate links. This means if you make a purchase through that link, I may get a % back, at no additional cost to you. Let’s be honest, we all know it goes right back to adding to my fabric stash. All opinionsĀ on this blog are my own.


April Spring Capsule Challenge, in May

When I sew, I usually try to make complete outfits or separates that I can add to my current wardrobe. I see it as a way to freshen up my wardrobe or allow it to transition into another season without too much effort. I have never made a full capsule, unless you count my, “I’m going on vacation and need new clothes”, as a capsule.

When So Sew English Fabrics hosted a Spring Capsule Challenge last month, the idea appealed to me but I decided to skip it since I already had my sewing list for the month. If you are a list maker like me, you know how it is always longer than the time we have to sew.

Then, when I was scrolling facebook one afternoon, my daughter was reading over my shoulder and piped up with, “Ohhh a capsule wardrobe? That sounds like fun! Mom, can you do one for me? My clothes don’t fit.” Off we went to shop the site and see what she could put together. I let her pick her fabric, patterns, and how she was going to wear them together. The rules were that you had to make 6 items, one of which needed to be a bottom (pants, skirt, shorts, etc). This is what she picked.

F7886EC2-0C76-47EB-81B8-11AA3583BB14

The fabric arrived. life happened , my health struggled, and the fabric sat. In a pretty, cordinated, freshly washed and folded pile, it sat. Just when I was getting caught up, my machines started acting up. But finally, it happened, her capsule was done, and only a month after the challenge. šŸ˜†

She didn’t have any comfy shorts so she chose two pairs for her capsule. I used the same free pattern for both,Ā The Ginger Shorties from Sew Like My Mom. This was our first time using one of their patterns and it sewed up quickly. She wanted a rolled hem look, so that was a slight modification to the pattern, otherwise we did it as written.

7649A3D2-8201-4EB3-9760-340ED1919051

For this first pair we used cotton spandex heavy french terry, the same I used for my leggings in this post. This fabric is no longer in stock, but there is another that is equally amazing still available. She paired it with the Patterns for Pirates heart breaker cami, in lavender cotton modal spandex. The heartbreaker cami has a few different strap and ruffle options as well as different lengths. There is even a matching adult version. This fabric was super easy to sew up and with the cotton content it will be a great top for summer.

B9FAB1A7-1347-4EA8-909C-E2B9C8C1201F

She really loves the addition of the front ruffle and how it took a simple tank to a dressier look. Pssst, it was super simple to do too.

29A24740-50C0-40A7-95EF-2D1461519E09

She picked the Made for Mermaids Kelli Kimono in this gorgeous lavender beth wool dobby woven, to wear over the tank and short outfit. She gets chilled easily so she wanted to have a lightweight option to add to it.

For the second shirt she picked lilac cassidy venezia ITY. This is her first shirt from ITY and she kept talking about how smooth and cool it felt, ha ha ha. Yes dear, that’s why I like it so much. We used the Kaitlyn tank from CKC Patterns. This is a repeat pattern for us both, and this newest one didn’t disappoint.

To wear her ITY top again, she added the second pair of Ginger shorties. For this pair she chose solid fuchsia ponte. I offered to add some pockets to this pair but she opted for some on her “next pairs”. I think I’ve created a monster.

D35E67BF-D35C-4E20-93C1-885DBCA13FB9

She also asked for a rolled up hem on this Ponte pair.

068DC8DC-927C-4297-B6E3-E995AA720141

When she was shopping for fabric she fell in love with this white butterfly floral venezia ITY. She wasn’t sure what ITY was at first, so I took her to my closet and showed her a few of my ITY items. She gasped and said, “That dress!! Can you make me one like that?”. Fortunately the pattern I used for my dress, also comes in girls sizes, so I was able to make that happen. I used the Annelaine girls Lexington. The Lexington has a few length options for the skirt and some different sleeves as well. For this one, we did the tank option with the high-low hem skirt.

I have to mention that both these ITY’s have such vibrant colors, but the butterfly floral one, it’s almost as though the print is popping off the fabric. They are just so beautiful!

I am really quite impressed with how she picked her outfits and the patterns she chose for each one. I kind of want to copy them for myself now. šŸ˜†

B16628CD-8D54-4610-8060-ACE6E47778A7

All fabrics were from So Sew English Fabrics.

This post may contain affiliate links. This means if you make a purchase through that link, I may get a % back, at no additional cost to you. Let’s be honest, we all know it goes right back to adding to my fabric stash. All opinionsĀ on this blog are my own.


Wearing my stripes – The Jordan dress

When I was younger I took an etiquette type class. This class covered things from how to set the table, all the way to dressing and walking. I learned quite a few things from that class, some I think are silly and some I actually still utilize to this day. One of the things I learned about was colors and shapes, when worn different ways, changing how your body looks. Ways to emphasize or downplay certain things and draw the eye up or down, for example. Now, don’t get me wrong, I think you should wear whatever you enjoy and feel comfortable in, there are no hard and fast rules when it comes to dressing (except the obvious ones of birthday suits šŸ˜‰ ), but these little tricks are nice to know and have in your back pocket if you want to utilize them.

When it came to stripes, I learned that they can draw the eye in whichever direction they run. So, as an adolescent girl I shied away from horizontal stripes, because I had a fear of looking wider, and vertical stripes because I was already 5’9ā€ and hated being tall. Stripes were very rarely found in my wardrobe, and that was the case until recently. I was seeing all these stripe fabrics and everyone making such cute outfits with them, and I wanted to try some for myself. Like any normal sewist, I went to pinterest and started searching for stripe outfits. I found some I loved and over this last year, I have made them, and more.

1E06644C-6867-4BDA-99C5-F8717E2DDCC2

What do you know, I actually liked them. So much so, that I seem to forget the eye boggling dizzy reaction I get when working with most of them. Ā Raise your hand if you know what I’m talking about!

Then I got the opportunity to test a new pattern for Made for Mermaids, the Jordan. I must admit, I have been applying to test for them and Patterns for Pirates, since I started sewing. I just recently got in; excuse me while I freak out over here for a few minutes. Okay, I’m good, now about the test. The Jordan is a top and dress, with a bunch of options. The top hem options are straight or split hem with a slight high low. You can do sleeveless, short, 3/4 or long sleeves, with an optional thumbhole cuff. There are also the options of a lined or unlined hood, kangaroo pocket, and a drawstring.Ā  As soon as I read the options, a specific picture popped up in my mind that I wanted to make. I picked the sleeveless dress with an unlined hood, drawstring, and a kangaroo pocket. And guess what? I made it fully out of horizontal stripes ā¤

DT Blue with Indigo waist 2

These stripes are a gorgeous rayon spandex from So Sew English fabrics. If I remember right, they were part of a mystery box, which is a super sweet deal!

DT Blue with Indigo waist 4

Can we take a moment to appreciate the stripe matching on this pocket? I spent a good bit of time when cutting to ensure it matched. Pro Tip: Using wash away wonder tape to place the pocket on the dress is super simple. You don’t put any holes in your fabric from pins, and if your machine is picky like mine, the extra stability it gives when sewing, is usually just enough to avoid the fabric from being eaten.

Curious how this dress sews up? You can see my time lapse video on my youtube channel here.

DT Blue with Indigo waist 6

I am so happy that the picture that popped in my mind came to fruition, and that I had these stripes in my stash to make it happen. I can see myself getting lots of wear from this dress this summer.

DT Blue with Indigo waist

The Jordan pattern is available for the entire family here. Did you enjoy the time lapse video? Leave me a comment to let me know if I should make more ā¤


This post may contain affiliate links. This means if you make a purchase through that link, I may get a % back, at no additional cost to you. Let’s be honest, we all know it goes right back to adding to my fabric stash. All opinionsĀ on this blog are my own.


Mint Pants and My Marbella/Valencia Mash

At the end of last summer I scored an awesome bundle from So Sew English Fabrics. The bundle had this beautiful mint ponte and the perfect complement of this Alyssa ITY.

BTPI1174

Being the end of summer, I decided to wash it and put it away for this coming spring. Fortunately where I live, the time from summer ending and spring beginning feels relatively short, and it was here before I knew it.

I was indecisive as to making shorts or pants with the ponte, but decided to go with the pants so I could try out a new to me pattern. I picked the Patterns for Pirates, SOS skinny leg pants, and instead of doing the pattern waistband, I used the contour waistband from the Peglegs.

0960D3D2-BC87-43F1-A36E-120714A12A74

I decided to go with the contoured pegleg waistband for that extra stomach support and my personal comfort preference, due to my health stuff. Ā I also chose the back pocket, faux fly, and front pocket options. I wanted them to look like pants even if they felt like leggings. Want to see the pants being sewn up? You can view my time lapse video here. An item to note: I did my pocket construction a little different than the pattern instructs.

For the Alyssa ITY, to wear with the pants, I pulled out a pattern mash I did last year. I actually have done it twice already, but this time I decided to write up how. It felt like the perfect springy, complement to wear with mint pants. I mashed the crossback version of the New Horizons Designs, Valencia, with the sleeveless fit of their Marbella tank.

C47FDBDD-8BCD-45F9-9F52-14887B9B5E4B

You could probably do something similar with another tank pattern you may have, but I went with this combo for a few reasons. First, I had both patterns already. The second reason was with them being from the same company, I figured they would have similar design fits, making the mash easier. The final reason I chose these two was because I had made the Marbella tank several times previously and loved the easy neckline and armscye finish, which I wanted to incorporate into this shirt.

Want to make your own Marbella/Valencia mash? Here are the steps I did to make mine.

Let’s start with the back piece first. I laid out my Valencia crossback pattern and put my Marbella pattern on top, matching up the top shoulder seam.

AXQS7788

I then transferred the Marbella armscye to the Valencia and blended it into the original curve of the Valencia.

WUGF6897

At this point you have a few options, since the opening is bigger than the Marbella you can determine how much gap and drape you want. Ā I made one with some drapy rayon spandex and took out Ā½ā€ . It worked well for showing off my cute bralette under the arms and on the back. Ā For this ity version, I wanted a little less drape and to wear with my regular bra, so I took out about Ā¾ā€. Whatever amount you choose, make sure you taper that in to the original side seam of the Valencia. If you aren’t sure on the amount you want, start with a smaller reduction, as you can always take out more later on, before finishing your arm topstitching.

AFKD8271

Now that our armscye is done, we can move to the crossover portion. I wanted extra gathering and drape on my crossover pieces so I extended the shoulder seam of the crossback Valencia, 2ā€.

WOYO1934

I tapered that and blended it in to the original cut line about 12ā€ down.

ILIL9360

We will be gathering the shoulder piece in a future step, but if you don’t want to gather or have that extra drape on the back, you could skip this 2ā€ addition and just make the back shoulder piece match the front shoulder piece. Total personal preference.

For the front pattern piece, again lay your Marbella pattern on top of the Valencia, lining up the shoulder seam and front fold line.

ENRC9718

Transfer the Marbella armscye to the Valencia pattern, blending in to the original Valencia cutline.

KKQM4129

Remove the same amount you did on the back piece, and taper it to blend in to the original Valencia side seam.

XBFR7602

Cut one of your new front pieces on the fold and two of the new back pieces, mirrored.

NYNF0865

If you want to have a back strap like the original Valencia, you would cut that as well. I like it to have more movement so I opt to skip the strap. If you have your shoulder straps normally slipping off your shoulders, you may want to add the strap, to keep things in place. Now that we have all our pieces cut, we can assemble.

If you added the 2ā€ to the back shoulder, you will now sew a gathering stitch along the shoulder seam, and then gather it to match the front shoulder seam width.

BLPJ8692

Repeat with the other back shoulder seam. I would recommend gathering with your sewing machine vs your serger, just to minimize the bulk for future steps.

CODE0400

Lay your front piece, right sides together, with the two back pieces and sew the shoulders.

PXLR1484

You will have all three pieces connected at the two shoulder seams.

Starting with one back piece, fold over the crossover edge 3/8ā€, and work your way around the neckline, ending at the other back crossover edge. Topstitch.

Fold up the bottom hem on the front and both back pieces, Ā¾ā€, and topstitch.

Lay your front piece right side up. Cross over the right back piece, aligning the left bottom edge with the left bottom edge of the front piece and the right upper edge with the armpit of the front piece. Right sides together, and clip in place.

YCED5788

Cross over the left back piece, on top of the right one, align the edges and clip in place.

APXQ7959

Sew the sides together, starting at the underarm and ending at the hem. At some points you will have three layers so be sure to catch them all.

IKQA5381

Press and fold the seam allowance towards the back of the bodice and stay stitch.

QBIW5415

I like to fold up and tuck my serger tails in, before I fold the seam allowance and stitch. Like this.

If you decided to add a back strap, now is when you would do so.

If you opted for no back strap, you will fold over the armscye 3/8ā€ and topstitch. Repeat with the other side.

KUJP6881

You are done! As slow of a seamstress as I am, I actually find this mash to be relatively quick.

80AFE78C-28F7-479A-B0E8-21739B5D986A

Since this is a cross back with two back pieces, it uses a little more fabric than a single tank with only the front and back piece. I started with a little over 2 yards and ended up with a full ½ yard plus another ½ yard that was about half the width of fabric. I probably could have done better at cutting it out but I was cutting distracted and didn’t pay attention, oops.

0DAEF0CD-A2E6-4217-A99B-E7DB48548C06

To see the other included options and get your New Horizons Designs patterns, you can here- Marbella and Valencia. You can get the Patterns for Pirates SOS pants here. Both fabrics were purchased fromĀ So Sew English Fabrics.Ā  They just stocked a bunch of solid Ponte and some gorgeous ITY’s so be sure to check them out.


This post may contain affiliate links. This means if you make a purchase through that link, I may get a % back, at no additional cost to you. Let’s be honest, we all know it goes right back to adding to my fabric stash. All opinionsĀ on this blog are my own.