10 outfits, a pinspiration win, and Pockets

You read that right, I have 10 new outfits from about a week of sewing. I used the brand new Iris Shorts from Sonia Estep Designs for all these outfits. If you are curious about how they looked and fit with all the different fabrics I used, you can read my comparison post with side by side pictures, here.

Outfit number one.

E1EE608A-FE0D-4EA0-93A9-CE6C607A7218

This is the brand new Tennessee Tee from Sonia Estep Designs, subtle overlap v neck, flutter sleeves. I used a heavy rayon spandex from So Sew English fabrics. This pair of Iris shorts has the 5″ inseam length, front pockets, and higher waistband, in Liverpool from Sincerely Rylee. I’ve had both fabrics in my stash for a while and they are just perfect together.

Outfit number two.

DFD274E0-8824-4667-9613-CDD1A6DB4056

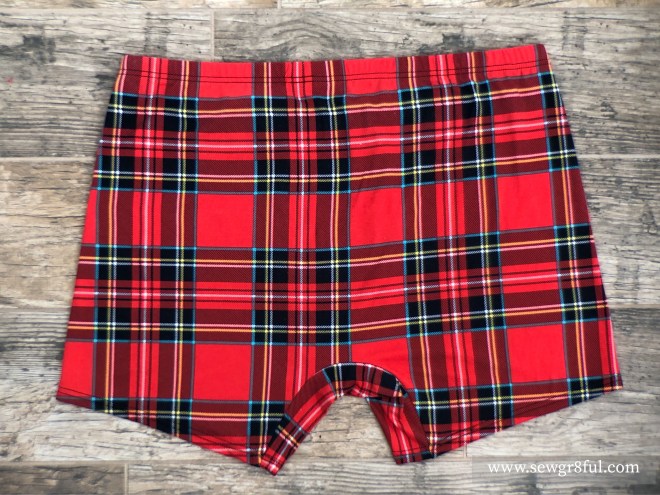
This combo is the Iris shorts in this rocket pop FT with a DBP waistband. This is the 3.5″ inseam length, with the higher waistband. The same as all the following pairs. No pockets on this one, but I think I will add the front ones on my next FT pair. I am wearing Ā it with this brand new Tennessee Tee in red micro modal spandex. This is the scoop neck with regular sleeves. Both fabrics are from So Sew English.

Outfit number three.

6039C023-C34B-4AA1-98CB-4912679FC70E

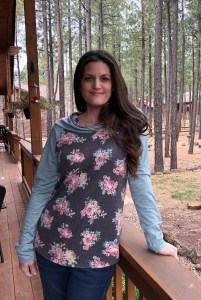
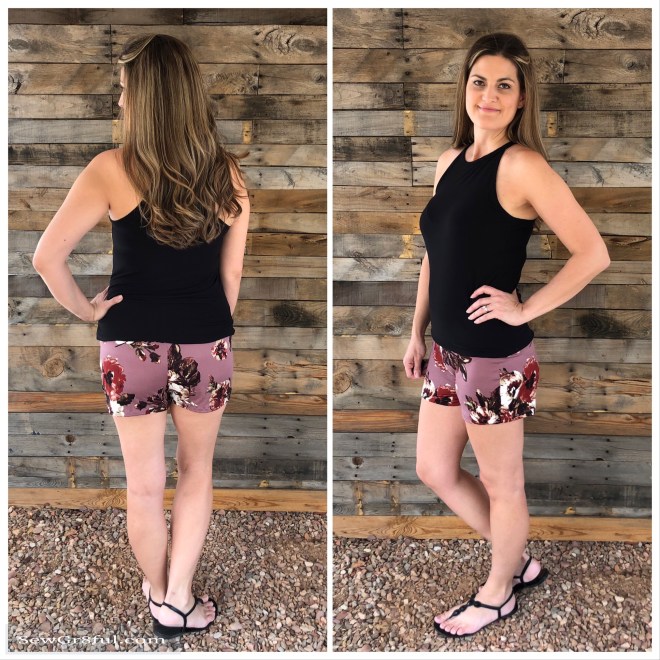
I just love this deep purple pair of Iris shorts! This pair has the front pockets and I used Ponte from Boho Fabrics. It is a different ponte than my usual in that it is lighter weight, with less stretch, but it sewed up beautifully and is super comfy. I’m wearing it with a rayon spandex Hey June Union St. Tee, from my closet.

Outfit number four.

682A7C8C-7617-444A-9687-FEF42AFA3098

This pair of shorts was so hard to photograph. It is a charcoal black and has a subtle animal print, which I love, since I can wear it with so many different colored tops. It was my first experience with refined ponte and I think I’m going to make a pencil skirt with the left over fabric. I am wearing it with another newer fabric for me, cotton modal spandex. I used it the first time to make my daughter a top and it worked so well, I decided to make myself one to go with these shorts. The top is the CKC Kaitlyn. Both fabrics are from So Sew English.

Outfit number five.

22B64883-67A4-4E3B-AEB5-2993DA8BAE9D

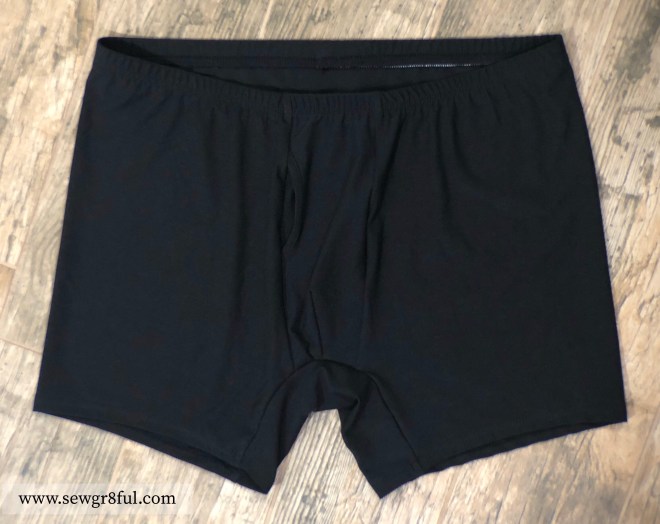
I know solid black shorts are kind of boring, but they are such a must have for me. This pair has both the front and the back pockets. I used my go to ponte from So Sew English, and would you believe I got it from a 22″ x wof scrap? It’s true, I did. I am wearing it with my coral Tennessee Tee.

I found this pin a while back and thought it was a good combo for Fall feels with Summer weather.IMG_7354

Which brings me to outfit number six.

899C0777-31BD-4C4E-B8DD-2CE5BF4B8827 2

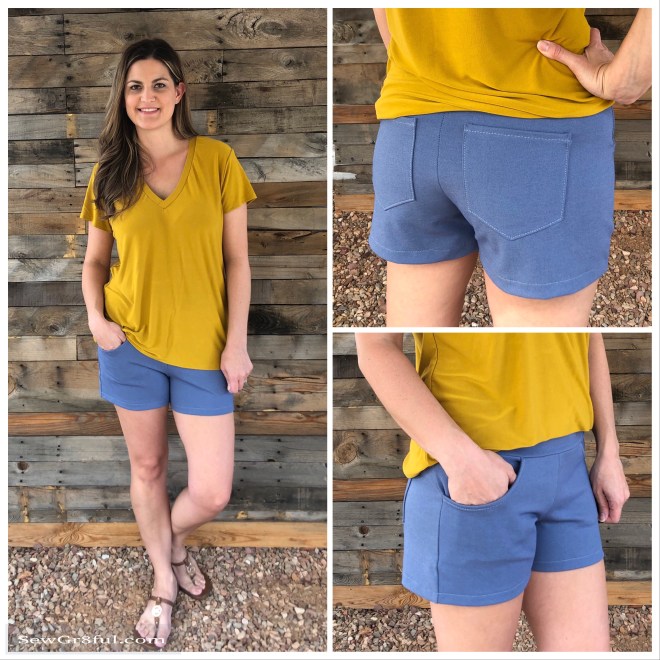
I branched out last year and tried two mustard colored things and liked them. So I decided to give this shade a try. Ā The top is my third Tennessee Tee, overlap v neck with regular sleeves. I used a modal spandex from Surge fabrics. It was my first order from them and I was impressed with the quality of the fabric. My Iris shorts are in a heavy ponte from Sly Fox fabrics. It has less stretch than my favorite ponte, but since this pattern doesn’t take much, it worked well.Ā  This is a perfect example of taking inspiration and then tweaking it to your style. I’m totally calling this a Pinspiration win.

Outfit number seven.

0AFE6BF8-2E9D-4C82-AA03-7071B1EAB706

Confession. I got a three yard bundle of this fabric and since this pattern only takes minimal fabric, I have made three pairs in it and have a bunch leftĀ šŸ˜‚. In my defense, two were test fits, but they all work and I wear them all. I am actually wearing one of them as I write this up. I had never used this type of double knit before and I really love it! It’s so soft and so comfy. I’m wearing it with a Union St Tee from Hey June Handmade, from my closet. This shirt is two years old, I wear it weekly, and it looks brand new. Mad kudos to So Sew English Modal!

Outfit number eight.

600AA7C3-ABC4-4A5E-8FB2-B0CBB15C725C

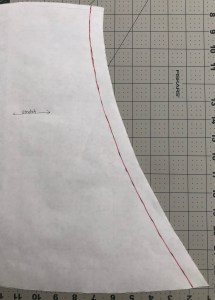
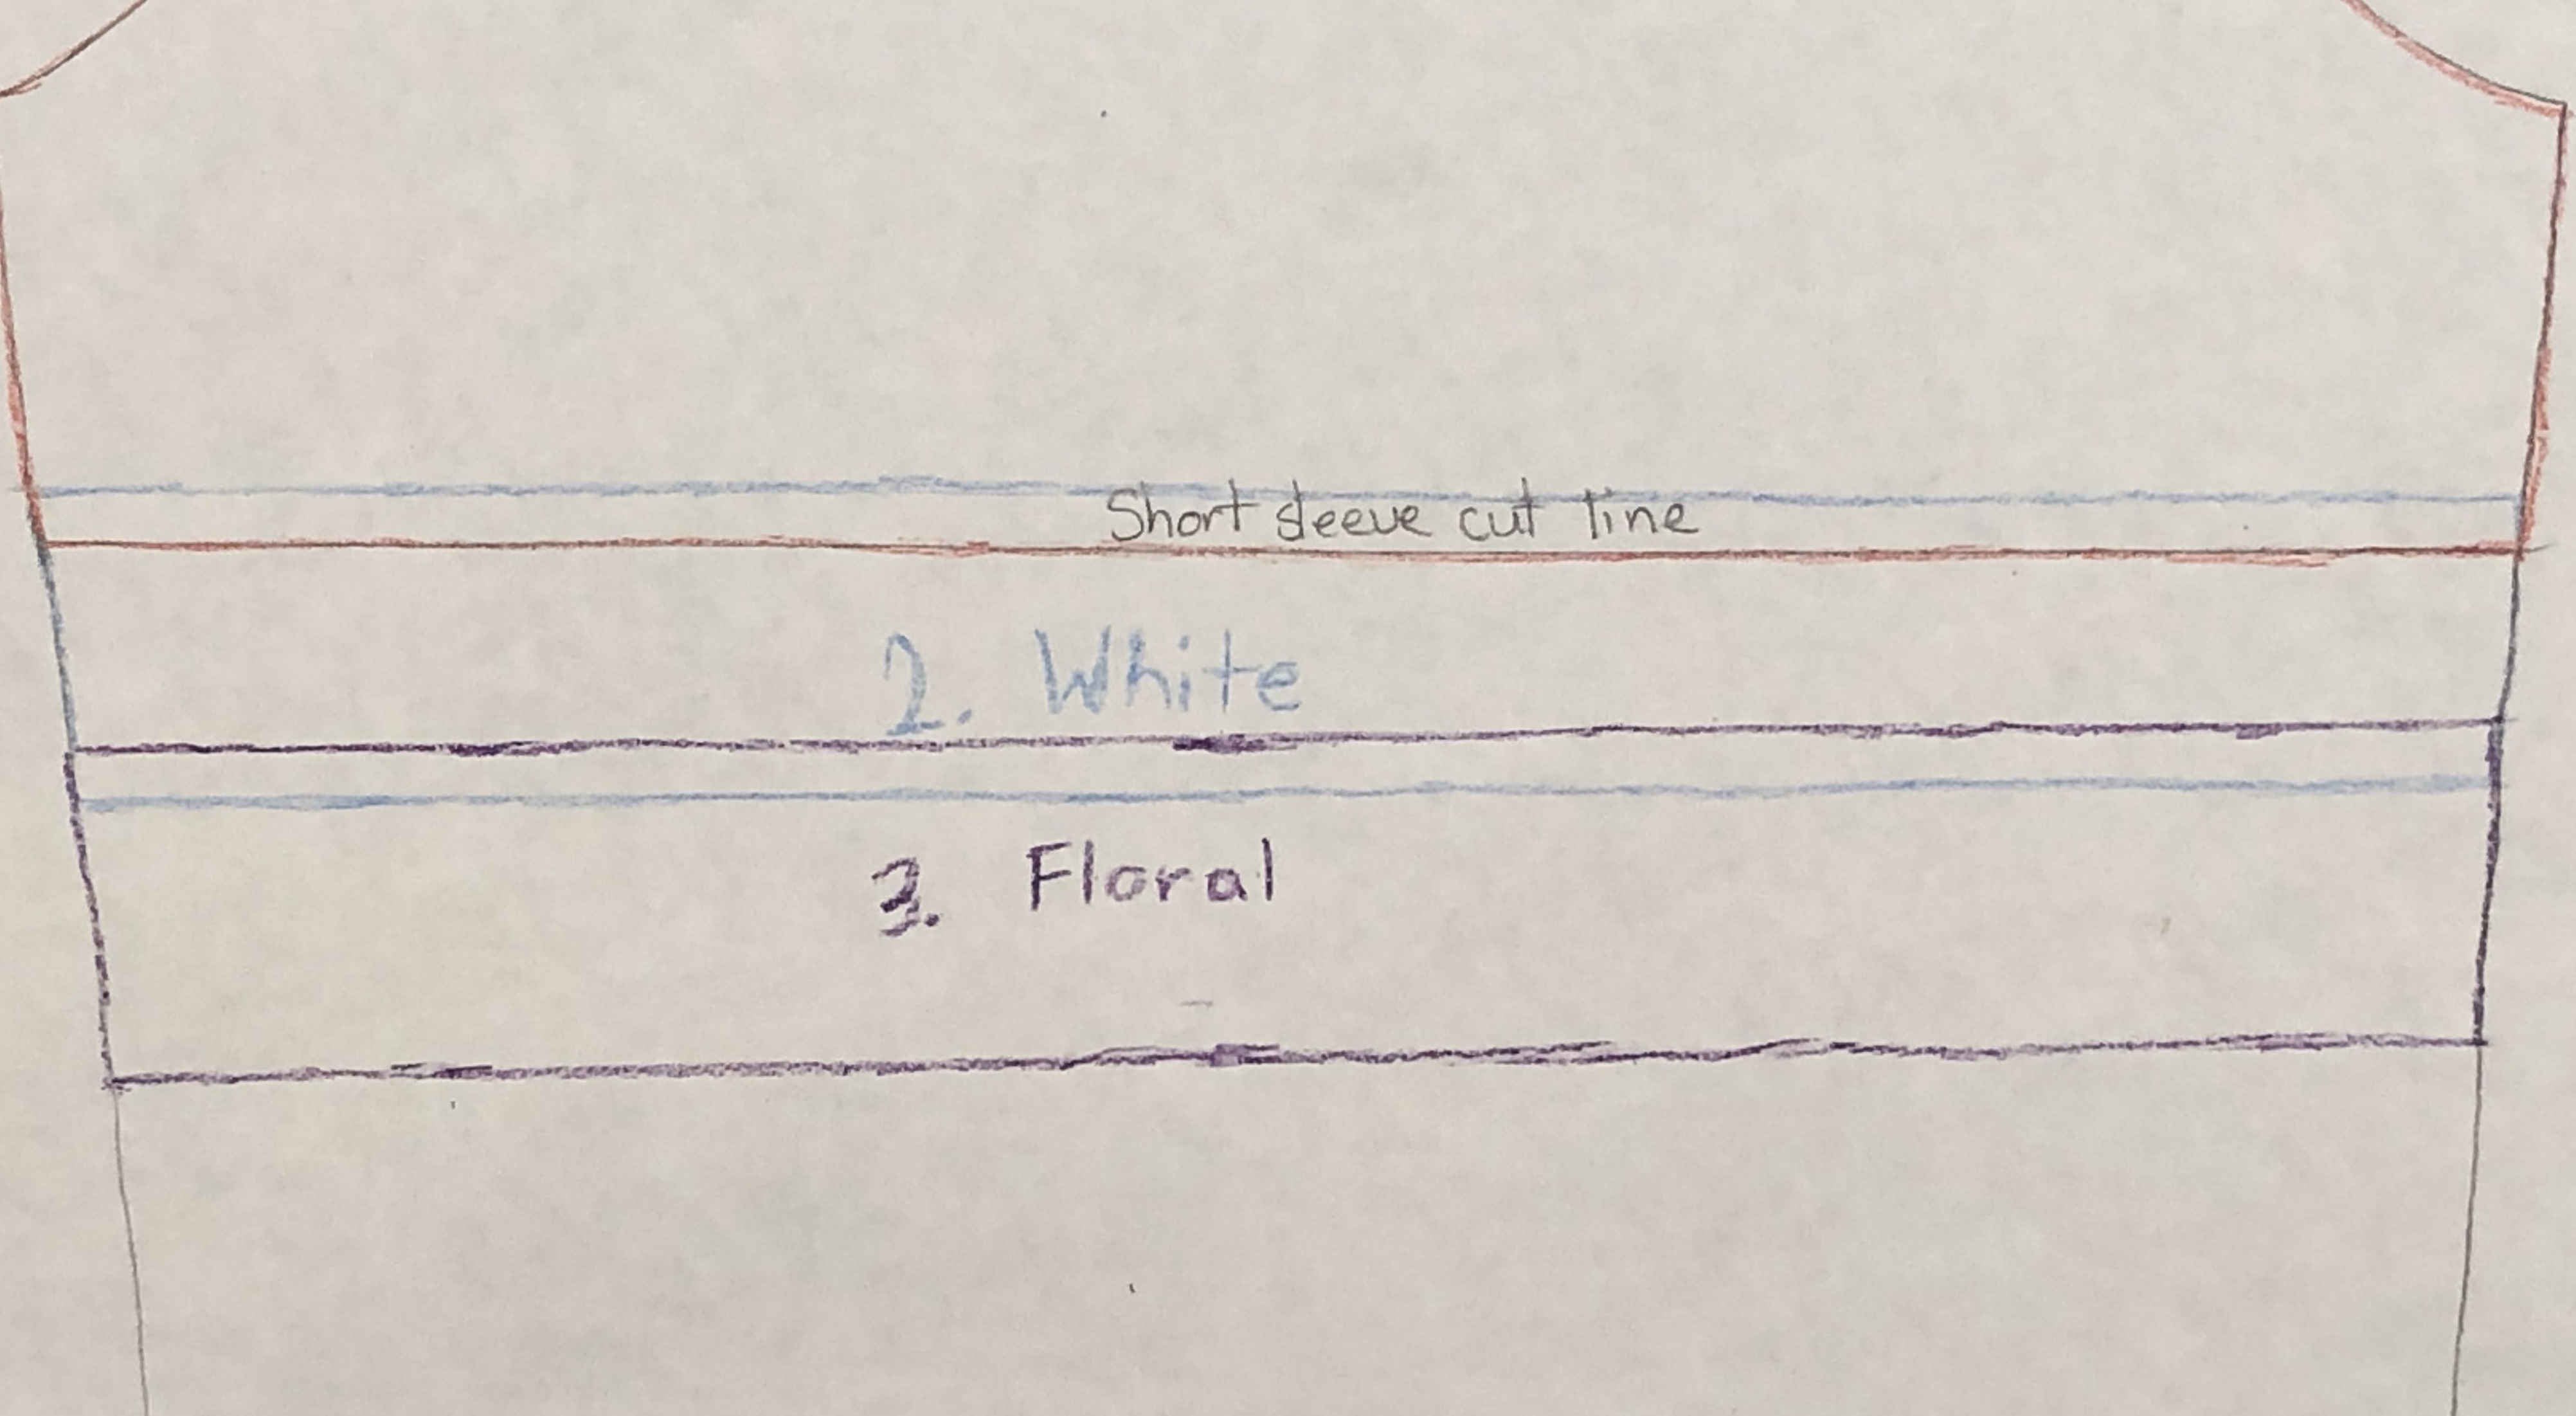
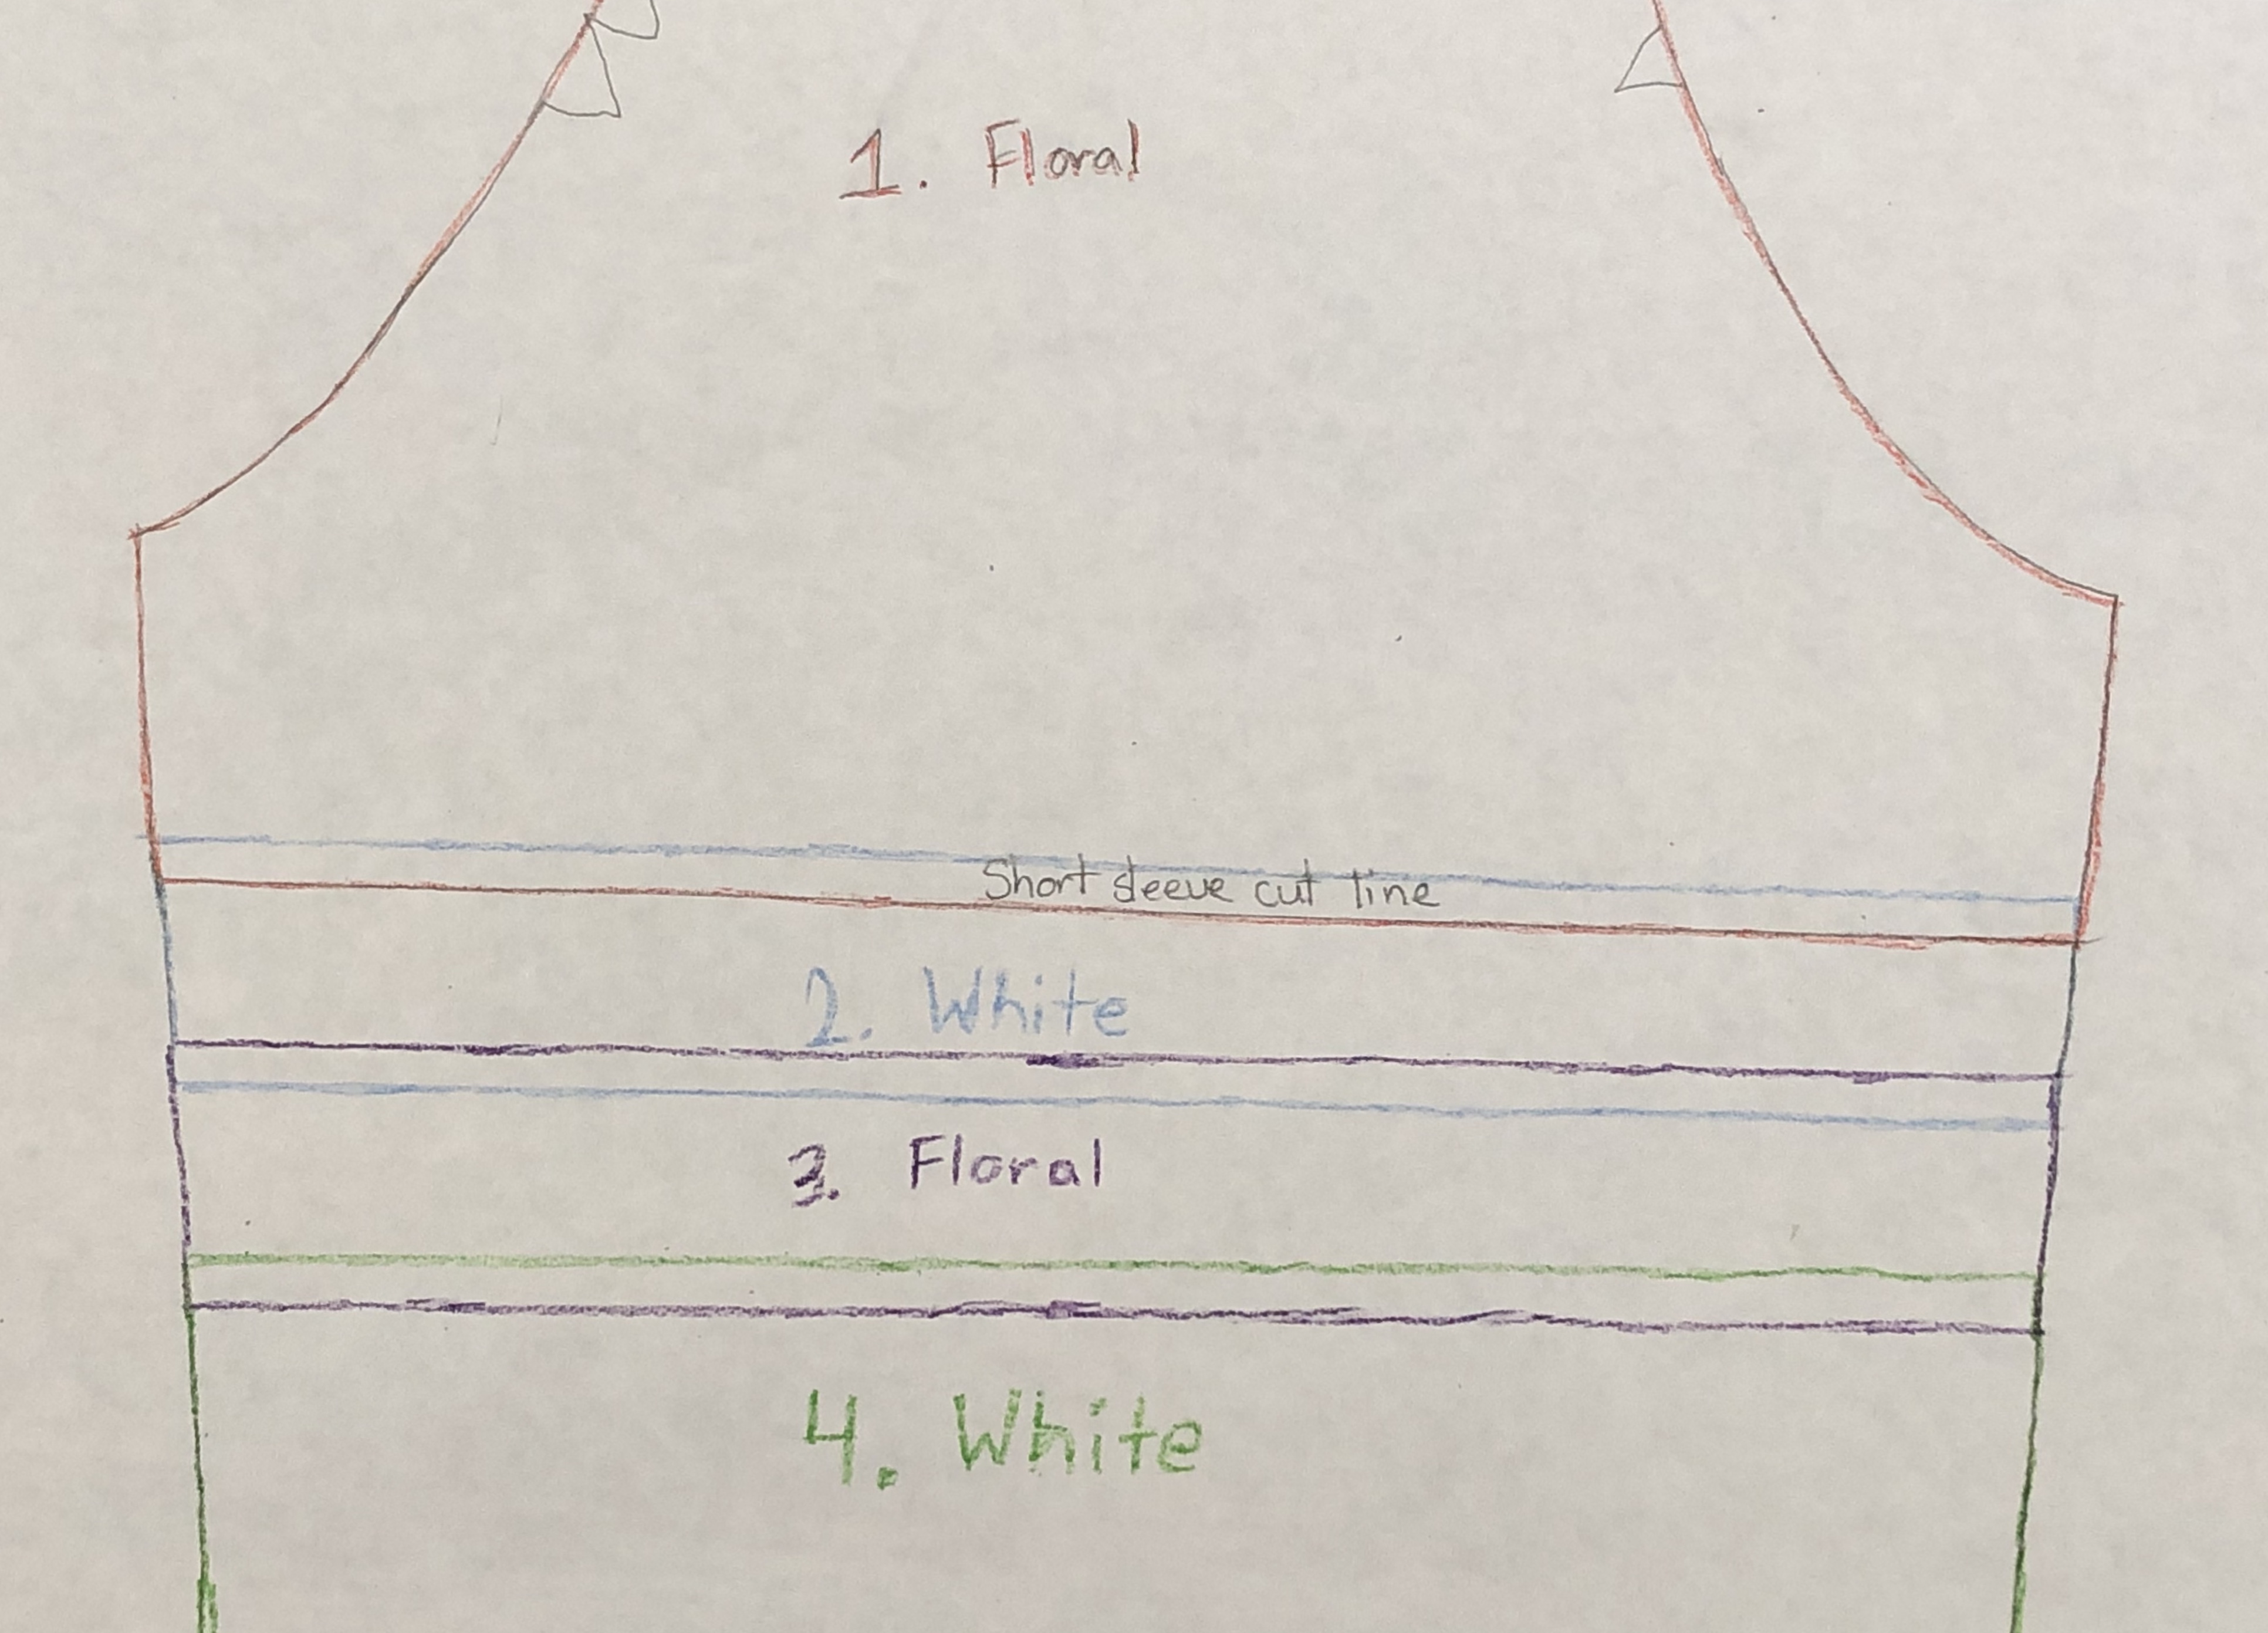
I had fun with this pair of Iris shorts! Instead of rolling the hem under, I rolled it out and stitched it, to give it a cuffed look. Then I decided to do something extra with the back pockets and make a little topstitch design. If you have never tried something like that, I highly encourage you to try. You can free hand a design or do a quick internet search for designs.

I trace one side of the design with chalk, lay it on the pocket and trace the other side of the design to transfer it to the pocket. Then you take the side you just traced, place it down on the other pocket, trace the line again, and it is mirrored on your other pocket. Then topstitch it on your sewing machine. Really simple and now I have custom pockets. This pair was made with denim cotton FT (the same I used for these leggings). It has sold out but they have a new one that I’m hearing is even better. I am wearing it with my red Tennessee tee. Both fabrics are from So Sew English.

Outfit number nine.

25FD51DC-ED13-4A3A-B4DE-160EACB089F3

Y’all know I love camo. This pair was another try at a new fabric base and I am so happy with them! I used a Camo jacquard double knit from SSE. There is another color way of this print available too and I think I may need to grab some. I’m wearing it with a CKC Kaitlyn in modal, from my closet.

Outfit number ten.

1C7CF38E-45AC-472E-8953-460F6B029EB3

Did I mention how little fabric this shorts pattern takes? This pair of Iris shorts was another scrap buster for me with some left over Chloe DBP. I was planning on using them for sleeping or for lounge shorts, but I was surprised with how non lounge they actually looked. They are super comfy so I will definitely be making more in DBP for sleeping, but I like that I can still wear them for errands.

I can’t pick a favorite, I tried, but I love them all and am so happy to finally have my perfect everyday knit shorts pattern.

Enabler Alert – Both the Iris shorts and Tennessee Tee are on new release sale for 50% off.

This post may contain affiliate links. This means if you make a purchase through that link, I may get a % back, at no additional cost to you. Let’s be honest, we all know it goes right back to adding to my fabric stash. All opinionsĀ on this blog are my own.


Wearing my stripes – The Jordan dress

When I was younger I took an etiquette type class. This class covered things from how to set the table, all the way to dressing and walking. I learned quite a few things from that class, some I think are silly and some I actually still utilize to this day. One of the things I learned about was colors and shapes, when worn different ways, changing how your body looks. Ways to emphasize or downplay certain things and draw the eye up or down, for example. Now, don’t get me wrong, I think you should wear whatever you enjoy and feel comfortable in, there are no hard and fast rules when it comes to dressing (except the obvious ones of birthday suits šŸ˜‰ ), but these little tricks are nice to know and have in your back pocket if you want to utilize them.

When it came to stripes, I learned that they can draw the eye in whichever direction they run. So, as an adolescent girl I shied away from horizontal stripes, because I had a fear of looking wider, and vertical stripes because I was already 5’9ā€ and hated being tall. Stripes were very rarely found in my wardrobe, and that was the case until recently. I was seeing all these stripe fabrics and everyone making such cute outfits with them, and I wanted to try some for myself. Like any normal sewist, I went to pinterest and started searching for stripe outfits. I found some I loved and over this last year, I have made them, and more.

1E06644C-6867-4BDA-99C5-F8717E2DDCC2

What do you know, I actually liked them. So much so, that I seem to forget the eye boggling dizzy reaction I get when working with most of them. Ā Raise your hand if you know what I’m talking about!

Then I got the opportunity to test a new pattern for Made for Mermaids, the Jordan. I must admit, I have been applying to test for them and Patterns for Pirates, since I started sewing. I just recently got in; excuse me while I freak out over here for a few minutes. Okay, I’m good, now about the test. The Jordan is a top and dress, with a bunch of options. The top hem options are straight or split hem with a slight high low. You can do sleeveless, short, 3/4 or long sleeves, with an optional thumbhole cuff. There are also the options of a lined or unlined hood, kangaroo pocket, and a drawstring.Ā  As soon as I read the options, a specific picture popped up in my mind that I wanted to make. I picked the sleeveless dress with an unlined hood, drawstring, and a kangaroo pocket. And guess what? I made it fully out of horizontal stripes ā¤

DT Blue with Indigo waist 2

These stripes are a gorgeous rayon spandex from So Sew English fabrics. If I remember right, they were part of a mystery box, which is a super sweet deal!

DT Blue with Indigo waist 4

Can we take a moment to appreciate the stripe matching on this pocket? I spent a good bit of time when cutting to ensure it matched. Pro Tip: Using wash away wonder tape to place the pocket on the dress is super simple. You don’t put any holes in your fabric from pins, and if your machine is picky like mine, the extra stability it gives when sewing, is usually just enough to avoid the fabric from being eaten.

Curious how this dress sews up? You can see my time lapse video on my youtube channel here.

DT Blue with Indigo waist 6

I am so happy that the picture that popped in my mind came to fruition, and that I had these stripes in my stash to make it happen. I can see myself getting lots of wear from this dress this summer.

DT Blue with Indigo waist

The Jordan pattern is available for the entire family here. Did you enjoy the time lapse video? Leave me a comment to let me know if I should make more ā¤


This post may contain affiliate links. This means if you make a purchase through that link, I may get a % back, at no additional cost to you. Let’s be honest, we all know it goes right back to adding to my fabric stash. All opinionsĀ on this blog are my own.


Wardrobe Staples – Tank tops

Wardrobe staples are just that, staples. They are such great building blocks that can take a simple outfit up a notch or allow you to quickly expand your current wardrobe. Since I live in a pretty warm climate, year round, the wardrobe staple I use the most, are tank tops. When I got the opportunity to test the new Greenstyle Creations Staple Tank, I was excited. I enjoy testing and helping out pattern designers, but it can be a lot of work, fabric, and time. So when the item I’m testing, happens to be something I will get a lot of wear from, it’s a huge plus.

This particular tank is great to wear solo, layering over a sports bra, layering under a jacket or even a loose fit slouchy top. Ā It fits the bust nicely and allows for a little breathing room throughout the rest of the bodice. The staple tank is available in the size range of XXS – 3XL. It has a pretty scoop back, perfect for showing off those fun bra straps if you wanted to.

3845068C-24EF-4843-9009-EE426A9165E9

Another thing I love about this tank, is the option to finish your neck and arms with either a band or binding. Ā I’ve become fond of binding on my clothes. I really like the low profile look it gives and I don’t find it more or less difficult to do than a traditional band.

C55C908B-9E27-45F4-BB33-0AA2ED91A48A

I used the binding method in the pattern for both my tanks. Yup, you read that right, I have already made two, and have a few more planned. Did I mention these are fast sews and don’t take up much fabric?? Ā Both of my tanks were made from leftover fabric from my camo leggings and ombre maxi. I did my exact size per the chart and added my usual length for my height. Boom, done.

For the camo tank, I used double brushed poly, from So Sew English. I really love camo and I’m enjoying the addition to my wardrobe. I was so pleased with the versatility of this tank that I couldn’t stop trying different ways of wearing it. I kind of wonder what my neighbors were thinking as I paraded in and out of my house with all these outfit changes, ha ha ha.

For this outfit, I paired the tank with a new pair of Greenstyle Stride tights, in Supplex, and my black tennis shoes. This was super comfortable when I rode on my recumbent bike and for running around with the kiddos. This supplex was my first and I got it from So Sew English (SSE). It has a GSM of 440 and has totally been squat proof, plus it was a dream to sew up.

I changed my shoes into my white tennis shoes and threw on my cuffed sleeve jean jacket. Perfect for those cool mornings and evenings, or whenever I want to pretend that I don’t live in tanks and leggings most days. There is just something about the jean jacket and camo combo I can’t get enough of.

Change the shoes. Switch to some stretchy jeans and add a long necklace. Tucked in or left out. With a cardigan (This one is the Coffee & Tea from Annelaine, in a ribbed sweater knit from SSE) or without. Another three looks! SERIOUSLY!!Ā  5 looks so far and I didn’t even get to take pictures of this tank with my slouchy tops, darn laundry.

B5D40813-2C55-45FA-B03F-2CF2357EFBB7

ITY is one of my favorite fabrics to wear for summer here. It has a cool touch to it and it feels so flowy that I wanted to try it as this tank. This particular ITY is the blue ombre Venezia from So Sew English. It’s only been available in bundles recently, but they do have other Venezia ITY options. I hung on to my three yard cut for a while and finally used it for my recent maxi. I was left with around two yards of not quite half the width of fabric. Turns out it was the perfect amount to make this tank. I really like how it looks with the white shorts. I’m thinking I need to add pair of loose leg white pants to my wardrobe soon. Wouldn’t that be cute??

1A685726-7A6F-498E-9CE7-0404B3C1C5B9

The Staple Tank is available from Greenstyle Creations and is on release sale right now, ending Wednesday, March 27th.Ā  How would you wear your staple tanks??


This post may contain affiliate links. This means if you make a purchase through that link, I may get a % back, at no additional cost to you. Let’s be honest, we all know it goes right back to adding to my fabric stash. All opinionsĀ on this blog are my own.

The great boxer brief debate

One of my sewing goals this year was to sew more for my husband. I have made a few things for him on my sewing journey and some he has loved and others, meh. I really want him to enjoy custom fitting clothes too. Plus all the fabric options out there, maybe he would like something more than just a regular cotton t-shirt.

I decided to start by making him some boxer briefs. I used the Walbrook boxer briefs from Greenstyle Creations (available in boys and mens). The pattern has a few options to choose from like a functioning or non- functioning fly, an encased elastic waistband or an exposed elastic waistband, and two different lengths. The sizing range is S-XXXL (28ā€- 50ā€ waist). To make these fully his, I had him pick the options he wanted. He chose functioning fly, encased elastic waistband, and the longer length. Whew, progress.

Now for the fabric. I didn’t know what kind of fabric he would prefer and people swear by different ones, so why not make a few. He is working hard on learning fabrics but I figured I’d play it safe and slim down his choices. We ended up with a cotton spandex (ice cream cones, I know right?!? He is such a trooper), double brushed poly (plaid), and MVC (Micro Viscose Cotton, black). When talking breathability and softness I see these three come up quite often so I figured this would be a good comparison for them.

F28F68FF-B708-4391-A4C4-FFE3BD0627D6

Let’s talk sewing first. I much preferred sewing the DBP. The MVC was a close second, with the Cotton Spandex bringing up the rear (wink wink). The pattern requires at least 50% stretch, and while they all have that, a few parts were a bit more tricky with the MVC (wanting to roll) and Cotton Spandex (a bit more bulky) vs the DBP. I sewed up the Cotton Spandex pair completely first and then switched my thread, (yes I am one of those that need matching thread) and sewed up the DBP and MVC at the same time. The MVC was harder for me to tell the right from the wrong side so I marked them once cut, to keep things correct. While I used the same options for all pairs, I’m not exactly sure what happened to the fly on the DBP pair. It is still ā€œfunctioningā€ but it is more of a functioning air vent, shall we say?, vs a functioning access port. Ha ha ha. Seriously no idea.

When I gave the three pairs to my husband I also gave him a spreadsheet questionnaire to give me feedback. Ā Ya’ll my husband is so awesome! Not only did he fill out my stupid questions but I told him I was going to write up a blog post about it so I needed honest feedback. The man totally gave each a good solid wear! He went running in them. He went to work in them. He did housework in them. He slept in them. He even washed and dried them and wore them again. I had him rate them on a scale of 1-5 for a few categories and then an overall rating, plus any notes he wanted to share. This is how they ranked, and honestly I was surprised with his choices.

His overall least favorite was the Cotton Spandex (ice cream cone) pair ranking at a 3 out of 5. He gave it a 4 for fit and support. A 3 for breathability and it ranked a full 5 for access. It lost points in the overall comfort and came in at a 2. His reasoning was because the fabric felt too thick and bunched up easily.

A2ECE933-A558-4818-B58A-D1ED62C2E107

Next up was the MVC (black) pair which ranked at a 3 out of 5 as well. The differences here that pushed it ahead of the cotton spandex pair was in the support (a full 5) and over all comfort (4). The reason this pair didn’t come out on top was because he felt it twisted and turned into a wedgie too easily.

8DB54923-F05C-4E3E-9E5C-69747193B38C

His favorite pair was the DBP (plaid) with a full 5 for overall preference. He gave it a 5 in breathability, a 5 in overall comfort and a 4 in support. His only complaint was the access, which got a 2. I guess he wasn’t a fan of the ā€œair ventā€. He felt that the DBP was the most comfortable fabric as well and score, he even asked for a few more pairs.

4B718F3F-A2C9-4E32-9B34-B7EEE6B7B285
Front
1841F4CC-5A91-467E-9BE5-4D20703E4AC0
Back

I plan to let him do some fabric shopping and make him a few more pairs. I also put in a request for him to reevaluate the three when summer hits and see if he still ranks them the same. I think it is pretty cool that we ranked them the same. It makes it nice when he prefers wearing the ones I preferred sewing. Now my son is asking for matching pairs, so maybe that will be next.

All fabric was from So Sew English Fabrics. The pattern I used was the Walbrook Boxer Briefs from Greenstyle Creations.

This post may contain affiliate links. This means if you make a purchase through that link, I may get a % back, at no additional cost to you. Let’s be honest, we all know it goes right back to adding to my fabric stash. All opinionsĀ on this blog are my own and I have a lot

Pinspiration – You win some and you lose some

Where do you find your sewing inspiration?

I have my own ideas (usually when I’m trying to sleep), get inspired by other seamstress makes, and ā€œshopā€ on Pinterest.  I really love ā€œshoppingā€ on Pinterest because I can save the things I like and can come back to it when I need something to sew or I find the perfect fabric. Another thing I love using pinterest for is finding examples of those late night ideas I get. I can search for things that are similar and make my notes to save them for later. Usually, when I find something I want to make, I have to search for a pattern or figure out how to hack one I already have, like I did for my first pinspiration (blogged here). In the case of these two recent pinspirations, I had both patterns already and no hacking needed, yay for saving time and money !! It also helped that I have made both patterns several times before so I knew they would be a good fit.

img_9986
Pinterest pin #1

I’ve had really great luck with my pinspiration creations and usually love the way they turn out. Unfortunately, that wasn’t the case with this purple cardigan. Let me start by saying, I love the pattern I used (Coffee and Tea from Annelaine ). It has several different options which allow for you to make a bunch of different cardigans from the same pattern. Another yay for saving money!! I have used it several times, several = 5, and each time it comes out beautifully. This time, my 6th, was no different.

I liked the fabric too. It was a Purple Hair I snagged in a bundle from So Sew English Fabrics. It washed well, sewed up well, even with the extra ā€œhairā€, and it had a unique look to it.

The problem came when I tried it on. I really did not like the way this specific combo looked on me. I tried it with several different looks and just couldn’t say I loved it. I was so bummed too. I had really wanted this to turn out. I mean, a purple fluffy sweater, who doesn’t need a purple fluffy sweater??

40ccec71-1ebd-42c2-91e4-441951883964

To get this look I used the Coffee version, length between the long and short cut lines, hemmed loose sleeves, and the slim bands. Plus pockets, because, POCKETS.

img_9987
Pinterest Pin #2

My other recent pinspiration was a solid landing in the win column. I love this pattern too (Union St. Tee from Hey June Handmade)!! I have made several, several  = 4 in this case. I like all the options the Union St Tee has, but I really found the v-neck instructions easy to follow. All three of the  v-necks I have done, have turned out great.

Then there was the fabric. It is a brushed hacci from So Sew English, and is so so SO dang soft. Soft and cuddly, and soft. It is soft ya’ll ! I tried it on and it was instant love! The hardest part was trying to photograph it to make it look like the pinspiration picture.

img_1331

I gave up, I’m not a good selfie taker, and I’m okay with that. Making my bed and cleaning the mirror is totally not worth it. I’m kidding, but seriously, selfies are hard. I applaud all of you with selfie skills!

img_0091

The options I used for this top were long sleeves and v-neck.

Pinspiration. You win some and you lose some.

Anyone looking for a fluffy purple cardigan?? I happen to have one just hanging around.

This post may contain affiliate links. This means if you make a purchase through that link, I may get a % back, at no additional cost to you. Let’s be honest, we all know it goes right back to adding to my fabric stash. All opinions on this blog are my own and I have a lot, ha ha ha.

Lining the hood of my Lane Raglan

Hoodies. Ā Ahh yes, Ā I love hoodies. There are so many different changes and hacks you can do to hoodies and it completely changes the look. One of my favorite changes is adding a lining to the hood.Ā  Unlined hoods are great when you need to use less fabric but unlined also means you can see my stitches *gasp*. Ā Unlined means the wrong side of the fabric is showing and is against my head and neck. I don’t know about you, but I usually prefer the feel of the outside of most fabrics. I particularly like to line my hoods with an accent fabric, which was the case with this recent Lane raglan hoodie I made with french terry from myĀ So Sew English FabricsĀ stash.

img_8457

I have lined hoods before but always with detailed instructions included in the patterns. The Lane raglan hood doesn’t include a lined option, yet looking around the Hey June Handmade facebook groupĀ I saw a bunch of lined versions. I read through post, after post, after post, looking for instructions on how they modified the pattern to accommodate a lined hood. I took all that information, added my past lined hood experiences, and I felt comfortable giving it a try. It turned out so cute with that accent lining and ridiculously comfortable to boot.

img_0713

This is how I lined my Lane raglan hood.

Ā I didn’t need the full 1ā€ hem that the unlined hood has around the front curve. I left in my Ā¼ā€ seam allowance, for sewing the lining to the main outer fabric, and removed the remaining Ā Ā¾ā€. To remove I took my hood pattern piece and measured Ā¾ā€ from the front edge. I marked it and continued the same all the way down the pattern piece. (dashed lines below)

img_0703

Then I connected the dashed lines to make a smooth line for cutting. (red line below)

img_0704

Cut off that extra strip and you have your new hood pattern piece.

img_0705

Using your new hood pattern piece, cut two mirrored in your lining fabric (charcoal) and cut two mirrored hood pieces in your main outer fabric (print)

*TIME SAVING TIP* Fold your fabric right sides together (RST), lay your hood pattern on top, and cut both layers at once. Placing your fabric RST here will allow it to be lined up and ready for the next step.

Place your two main outer hood pieces RST. If you used the time saving tip, this is already done. Clip and sew along the outer curve of the two. Repeat with the two lining pieces.

img_0539img_0537

Now you have two hoods, one in the outer fabric and one in the lining fabric.

img_0540

Take the outer hood and place it inside the lining hood, RST. Line up the center seams we just made. Clip and sew along the top front edge. This will make your two hoods into one.

img_0542

img_0543

Take your hood and turn it right sides out with both the lining and outer hood wrong sides together (WST). You will now have your lined hood ready to attach to your shirt. If you choose to, you can also topstitich along the front outer curve. Ā 

img_0545

I prefer not to have a drawstring in my hoodies. If you wanted to add one, this is when you would add a line of topstitching on the front curve to create a channel for the drawstring. If you didn’t make your grommet hole yet, you can also do that now, before adding the topstitching for the channel.

At this point you will follow the rest of the pattern instructions and attach the hood as though it was a single hood. Ā Look at how pretty that looks !

img_0554

The Lane raglan comes in sizes XS – 2XL and has a variety of options. Ā Sleeves can be elbow length, 3/4 length, long, or long with bands. The hem can be curved or banded. You can do a hood or regular neckband, thumb hole wristbands and even a chest pocket. Bonus for those of you who need a full bust adjustment (FBA), it includes a separate pattern piece with it built in, how cool is that? The options I used were the curved hem and long sleeves. Ā Besides the usual grading for height and width, I made no other changes to the pattern. Both these hoodies were made using French Terry from So Sew English Fabrics. ****Enabler alert – they are having a 20% off moving sale until Friday, January 25th at 12 PM PST. The code is in the So Sew English Facebook group.****

As beautiful as this hoodie turned out, you won’t see me wearing it. It was made for a friend and is happily joining her closet. ā¤Ā 

1ee2ce84-13f6-4ad6-bc3e-412576e49193

This post may contain affiliate links. This means if you make a purchase through that link, I may get a % back, at no additional cost to you. Let’s be honest, we all know it goes right back to adding to my fabric stash. All opinionsĀ on this blog are my own and I have a lot, ha ha ha.

Denim Obsession and My First Pinspiration Hack

65C2AD24-D3DA-4D37-85A4-97C6DD5110F1

I have been obsessed with searching for just the right denim fabric to make myself, and my kids, some pants. This fabric couldn’t be just any denim though. I had fabric requirements and so did my kids.

My kids requirements firstĀ My requirements first, lets be real, I need pants more than they do. This fabric needed to have stretch and lots of it. It also needed great recovery, I really HATE sagging pants after wearing for a short time. It needed to actually look like denim if it wasn’t true denim. I also needed it to be squat test approved, you know the test where you squat down and force your children or husband to tell you if it is see through? Unless of course you can contort yourself well enough to see your rear in a mirror or you get brave and decide to take a squatting booty selfie, that you promptly delete. PROMPTLY DELETE. It also needed to work for one of my favorite patterns, the Peglegs from Patterns for PiratesĀ (free with the code from their facebook group ), plus a few other patterns I have on my radar this year. I had about given up finding the right fabric when So Sew English Fabrics (SSE) got in this crazy Stretch Denim.

img_0421

I say crazy because it is Cotton Spandex Heavy French Terry, say what??? I’d never heard of it. Amanda, the owner of SSE shared a video of it in their facebook group and wow, this stuff looked amazing! It has the denim look on the inside and outside, no faux here. Plus the stretch (80% x 50%) and recovery to make my Peglegs. All I needed for it to pass my list of requirements was passing the squat test. So, like any logical seamstress, I ordered 2 yards to try it out.

The fabric arrived and I immediately loved it. I knew as soon as people started getting their orders and sewing it up, it was going to disappear quickly. I moved my pair of peglegs up on my “to be sewed” list, just in case I needed to get more. Then, Heidi, from SSE, posted her pair of peglegs, in this fabric. It was exactly what I was looking for. I got so excited! Then I realized that I wasn’t the only one who thought they were amazing. Shoot, that fabric was going to be gone fast. Naturally, IĀ got online and ordered a “few” more yards. I told you, I’m logical. I needed more for shorts, pants for my kids, and if it passed the squat test, I was going to need a few pairs of my own.

I washed up my yardage and sewed up my peglegs. I sewed them up live by the way, in the Sew Inspiring facebook group. You can see that here if you are so inclined ha ha ha. It was my first time sewing live and while it was very nerve wracking, I had a ton of fun chatting with the ladies that joined me. Back to my leggings. I tried them on and yup, I took one for the team, they absolutely pass the squat test. *cheers*

A few details about sizing in case you were lucky enough to snag some of this denim. I made my usual size peglegs that I do with ponte. This means,Ā  I size up the legs one from the chart and make my waistband my true size. I usually do that, because while I like snug fit leggings, I have health issues that cause me to get uncomfortable if it is past a certain snugness. I make my usual waistband size since ponte can relax a little after wearing and I don’t want to risk slippage. This denim has the right stretch and amazing recovery. The recovery is so good that it has a little more of a snug feel. While I really like my first pair, I will probably size up my waistband as well as my leg pieces for my next pair.

When I was looking for something to wear with my new pants, I pulled out one of my first sews, from 2016. It got me thinking. This shirt was my very first pinspiration make and pattern hack. I had seen it floating around pinterest and just knew I wanted to have one of my own. I had no idea what I was doing and it took me FOREVER to figure it out. I laugh now because it seems so simple when in reality I was doing all kinds of math and had lines all over my pattern piece. It worked though and totally gave me the confidence to try more hacks and pinspiration makes.

img_0430

For anyone wanting to make one of these sleeve stripe raglans for themselves here are the few steps I took using the Slimfit Raglan from Patterns for Pirates. I made a few pattern pieces to cut out my fabric but for the sake of this tutorial I will be drawing and marking on the same piece so you can see the effect.

Step 1. I cut out the floral using the short sleeve line. Shown below in red.

img_0385

Step 2. I measured out and marked a 1.5″ strip, overlapping the short sleeve line from step 1, by 1/4″, for the white fabric. Shown below in blue.

img_0386img_0388

Step 3. I measured out and marked a 1.5″ strip, overlapping the bottom line of step 2, by 1/4″, for the floral fabric. Shown below in purple.

img_0389img_0391

Step 4. I used the remaining bottom portion of the sleeve, adding 1/4″ to the top and overlapping the bottom line from step 3, for the white fabric. Shown below in green.

img_0393

I used 1/4″ as the overlap amount for each piece since that was the amount of seam allowance I chose. You can see below how all the pieces will go together.

img_0394

Cut out your four pieces and sew them together. You will do this twice, once for each sleeve.

  • Take the piece from step 1 and place it right sides together (RST) with the top of the piece from step 2. Sew together to create the beginning of your new sleeve.
  • Take the 1/2 piece and place it RST with the top of the piece from step 3. Sew together.
  • Take that 1/2/3 piece and place it RST with the top of the remaining piece from step 4. Sew together.

You should now have your new sleeve 1/2/3/4 all ready to assemble the rest of the pattern per the included instructions.

img_0419

There are a few other ways you can achieve a similar stripe look but I chose to go this route since it gave me the complete sleeve and clean look I was going for. This shirt was pre serger time for me and was completely sewn using my starter sewing machine. It is so neat to look back at where I started and see how much I have learned and improved.

I love the fact that my first pinspiration pattern hack from three years ago, not only looks so great with my new stretch denim leggings, but that it has held up and still looks almost brand new. Longevity sewing makes my heart and wallet happy <3.

abaaab4f-bdba-4b5b-9de3-3618608bdebf

I think it’s also safe to say that my denim search obsession has come to a close. Now I get to work on the list of denim makes I have planned with my “few” yards.

This post may contain affiliate links. This means if you make a purchase through that link, I may get a % back, at no additional cost to you. Let’s be honest, we all know it goes right back to adding to my fabric stash. All opinionsĀ on this blog are my own and I have a lot, ha ha ha.