Tie Dye Twinning – 11th Hour Gear Joggers

With the sun here, everything gets hot to the touch, chairs, swings, slides, everything. My daughter was getting frustrated with the continual “back of the thigh burn” and she asked for some longer play shorts. Her requests were to have them just above her knees, relaxed fit, and with pockets. She also wanted to match with our puppy, so she picked a beautiful royal/aqua tie dye French Terry from So Sew English Fabrics.

I recently used the 11th hour gear jogger pattern for several pairs of joggers for her and my son. She really liked the fit so I just did a length modification to it, and added pockets.

To decide the length, she tried on her joggers, and I measured down from the crotch seam, to where she wanted them. This ended up being about 6″.

I measured down the 6″ from the crotch curve on the pattern piece, and added a new cut line. Since she gave me a 2″ area she wanted them to hit, I wasn’t worried about including seam allowance or hem.

Sewing tip: before cutting, I like to place my pattern pieces together, and ensure that the modification I did to the front and the back, will match on my side seams when sewn. Once I verified that mine matched, I sewed up the pattern per the jogger instructions.

Added a matching scARF for our “little” puppy, and done!

Enabler Alert – All Pattern Niche patterns are on 30% off sale until tomorrow (March 25th) with code SPRING30

The fabric is from So Sew English Fabrics, and they have $8.50 flat rate domestic shipping, for the month of March.

This post may contain affiliate links. This means if you make a purchase through that link, I may get a % back, at no additional cost to you.Ā Thank you for supporting my sewing šŸ’•

Layering for Winter in Arizona

Desert living really has it benefits in the winter. We do get our cold storms, but on a typical day I can start out wearing cool weather clothes, transition into tanks and even shorts, and end up back in the cool weather clothing by evening. Because of this and my circulation problems, I really love wearing pants, tanks, and cardigans. I have found myself grabbing that combo from my closet, more and more, so I decided to make myself a new set.

I recently discovered a fabric base called Oakley. I love it for cardigans! It is soft and squishy, and has a slight brushed feel. BUT, it doesn’t grow like some sweater knits, it’s easy to sew, and it is available in some really fun prints. This print in particular caught my eye and I just couldn’t pass it up.

Then came the coordinating tank fabric. I really wanted something I could wear into spring and summer, but wanted something a little “dressier” than a modal or rayon spandex. I particularly like ITY (interlock twist yarn) for dresses and tops, because it has great drape, and can keep me cool in the heat, so I started looking there. I came across this solid navy ITY and took a chance it would match the Oakley print, and ordered. The fabric matched !!

I knew before ordering, exactly which patterns I intended to use for this combo. For the tank I used the Catalina tank from So Sew English Fabrics. I liked the look when it released, but didn’t get a chance to try it out, and now was the perfect time. Since I prefer to wear my regular bra, I decided to omit the elastic for the included shelf bra, and treat it as a liner. Because of my height and my side waist length, I added an inch in the length of the bodice, and also added an inch to the “shelf bra” length.

A few things to note: I am 5’9″ with a side waist length of 9″. Most patterns are designed for a height of 5’5″, and an 8″ side waist length. I have found that adjusting my 1″ for side waist length difference, is usually enough for tops, based on where I carry my height. However, in this case, I would have needed to add 2″ to both the shelf bra and the bodice, versus the 1″ I did, if I had made the pattern as drafted and used the elastic, and hemmed the bodice (which I didn’t do, for the look I wanted). The Catalina is drafted for a height of 5’5″. If I had used a heavier fabric or one that grew, I could have left it with just adding 1″.

Since the “lining” was designed to be a shelf bra, it comes in to your body and has more negative ease. I found that this helped keep the “lining” in place and gave me a really clean silhouette, with no visible lines.

I particularly like the extra strappy look I got on the back, wearing it with my regular bra.

For the cardigan, I chose the Patterns for Pirates, Cocoon Cardi. I had a happy accident the last time I made the pattern and ended up with 10″ bands versus the 5″ or 13″ options in the pattern. I also sized it up one, from my measured size, and the combo was love. For this cardigan, I did the same.

These two have been on wear, wash, repeat since making, and I foresee the tank being worn with shorts, into summer.

ombre leopard print Oakley patterns for pirates cocoon cardigan and Navy ITY So sew English Fabrics cocoon cardigan

The links in this post are not affiliate links.

Spring Fling Blog Hop – Ogden Cami

Welcome to the Spring Fling Blog Hop!Ā 

Spring Fling blog hop

First, here are all the blog hop details!! Each day there will be two bloggers, with new posts and giveaways! To enter for each giveaway, just visit each post (linked below) and add a comment to it. The blogs will be live each day by 6AM (Central Standard Time). Ā So be sure to come back daily and check out each one. If you are just joining the blog hop today, you can still go back to the previous days posts and comment there to enter for them as well. All entries need to be in by midnight, Friday, March 27. The drawings will take place on Saturday. Read all the way to the end for my giveaway details šŸ’•

Monday Sew Much Charm & Vlogger Sewing From Scratch

Tuesday –Ā  TPtheModestDoll22 & That’s Sew Venice

Wednesday –Ā  SewGr8fulĀ ( That’s me! ) & Sequoia Lynn Sews

Thursday –Ā  Let’s Go Hobby! & The Sarcastic Sewist

Friday –Ā  The Bear & the Pea AtelierĀ & Wildflowers & Whimsey

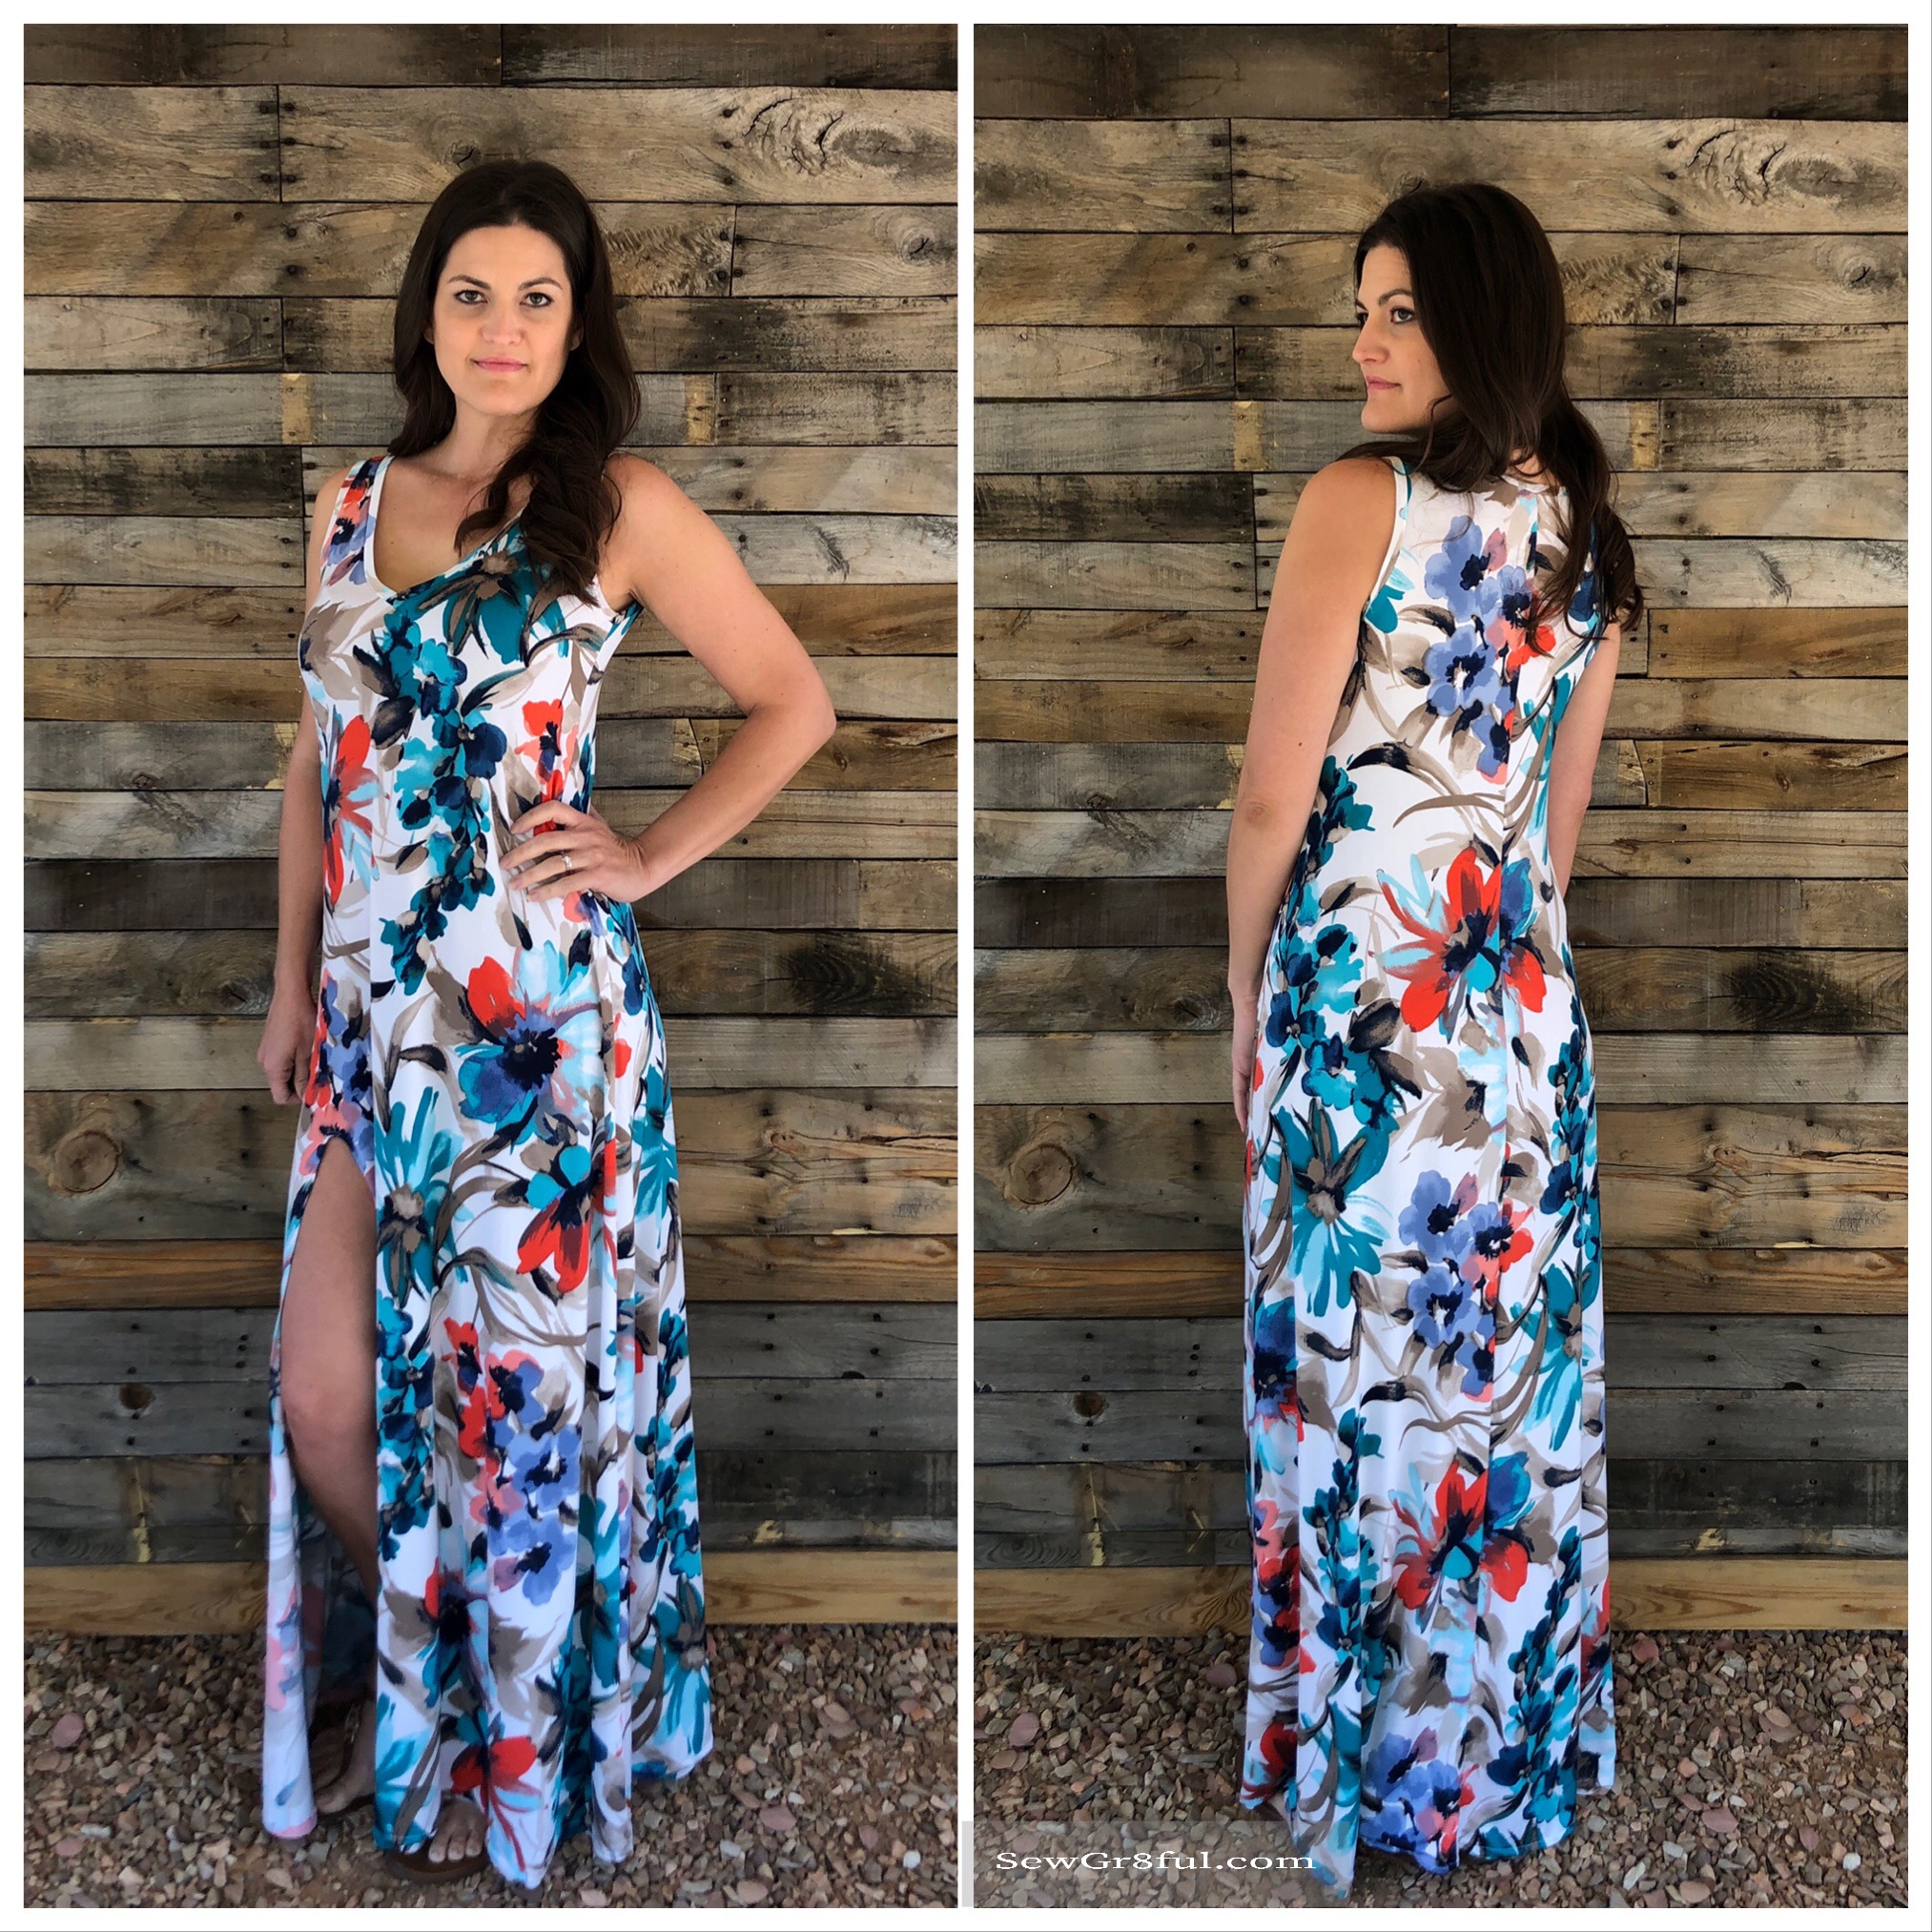
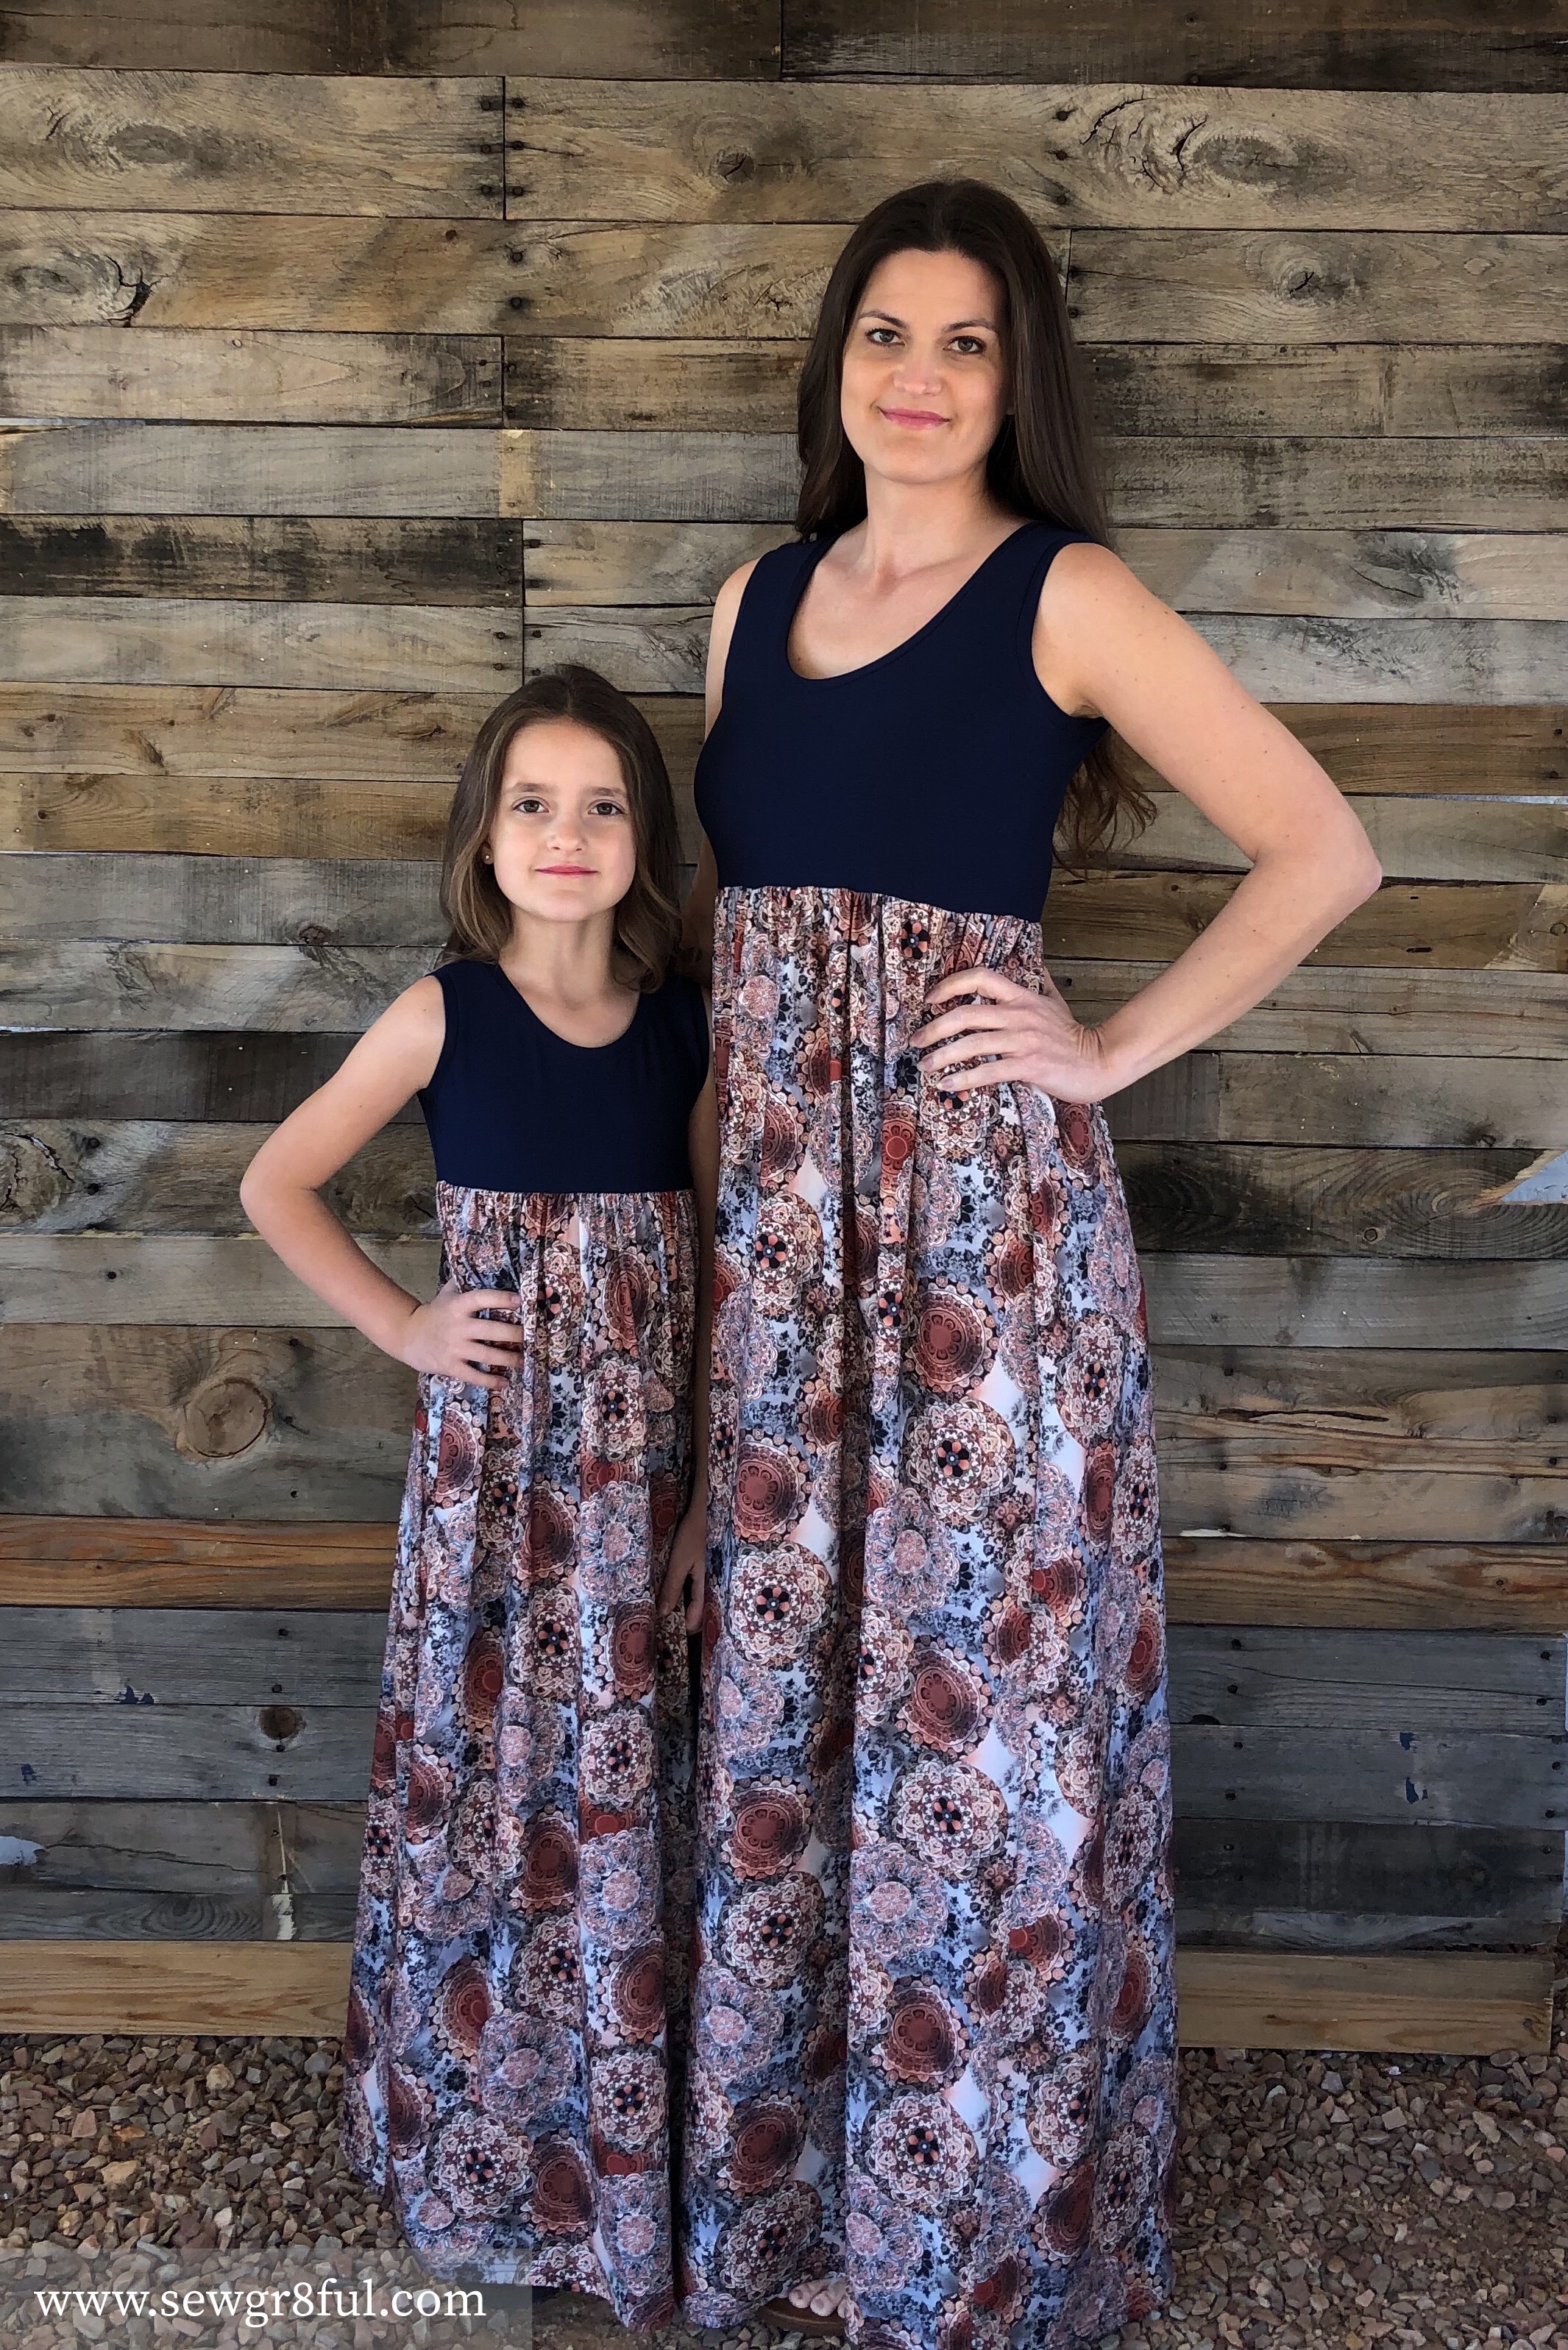
Now, all about one of my favorite patterns for Spring and Summer. I found the True Bias Ogden Cami several years ago and fell in love with its simplicity. It is a semi loose fit shirt, made from woven fabrics. If you have been following my blog for any time, you know I love to modify and hack patterns to get additional looks with them. So after I made my first few Ogden cami’s, including a matching Mini Ogden for my daughter, I decided to turn it into a flowy maxi dress a few summers ago.

0A6A5268-E4AD-4A0C-B190-6AB74D2F3541

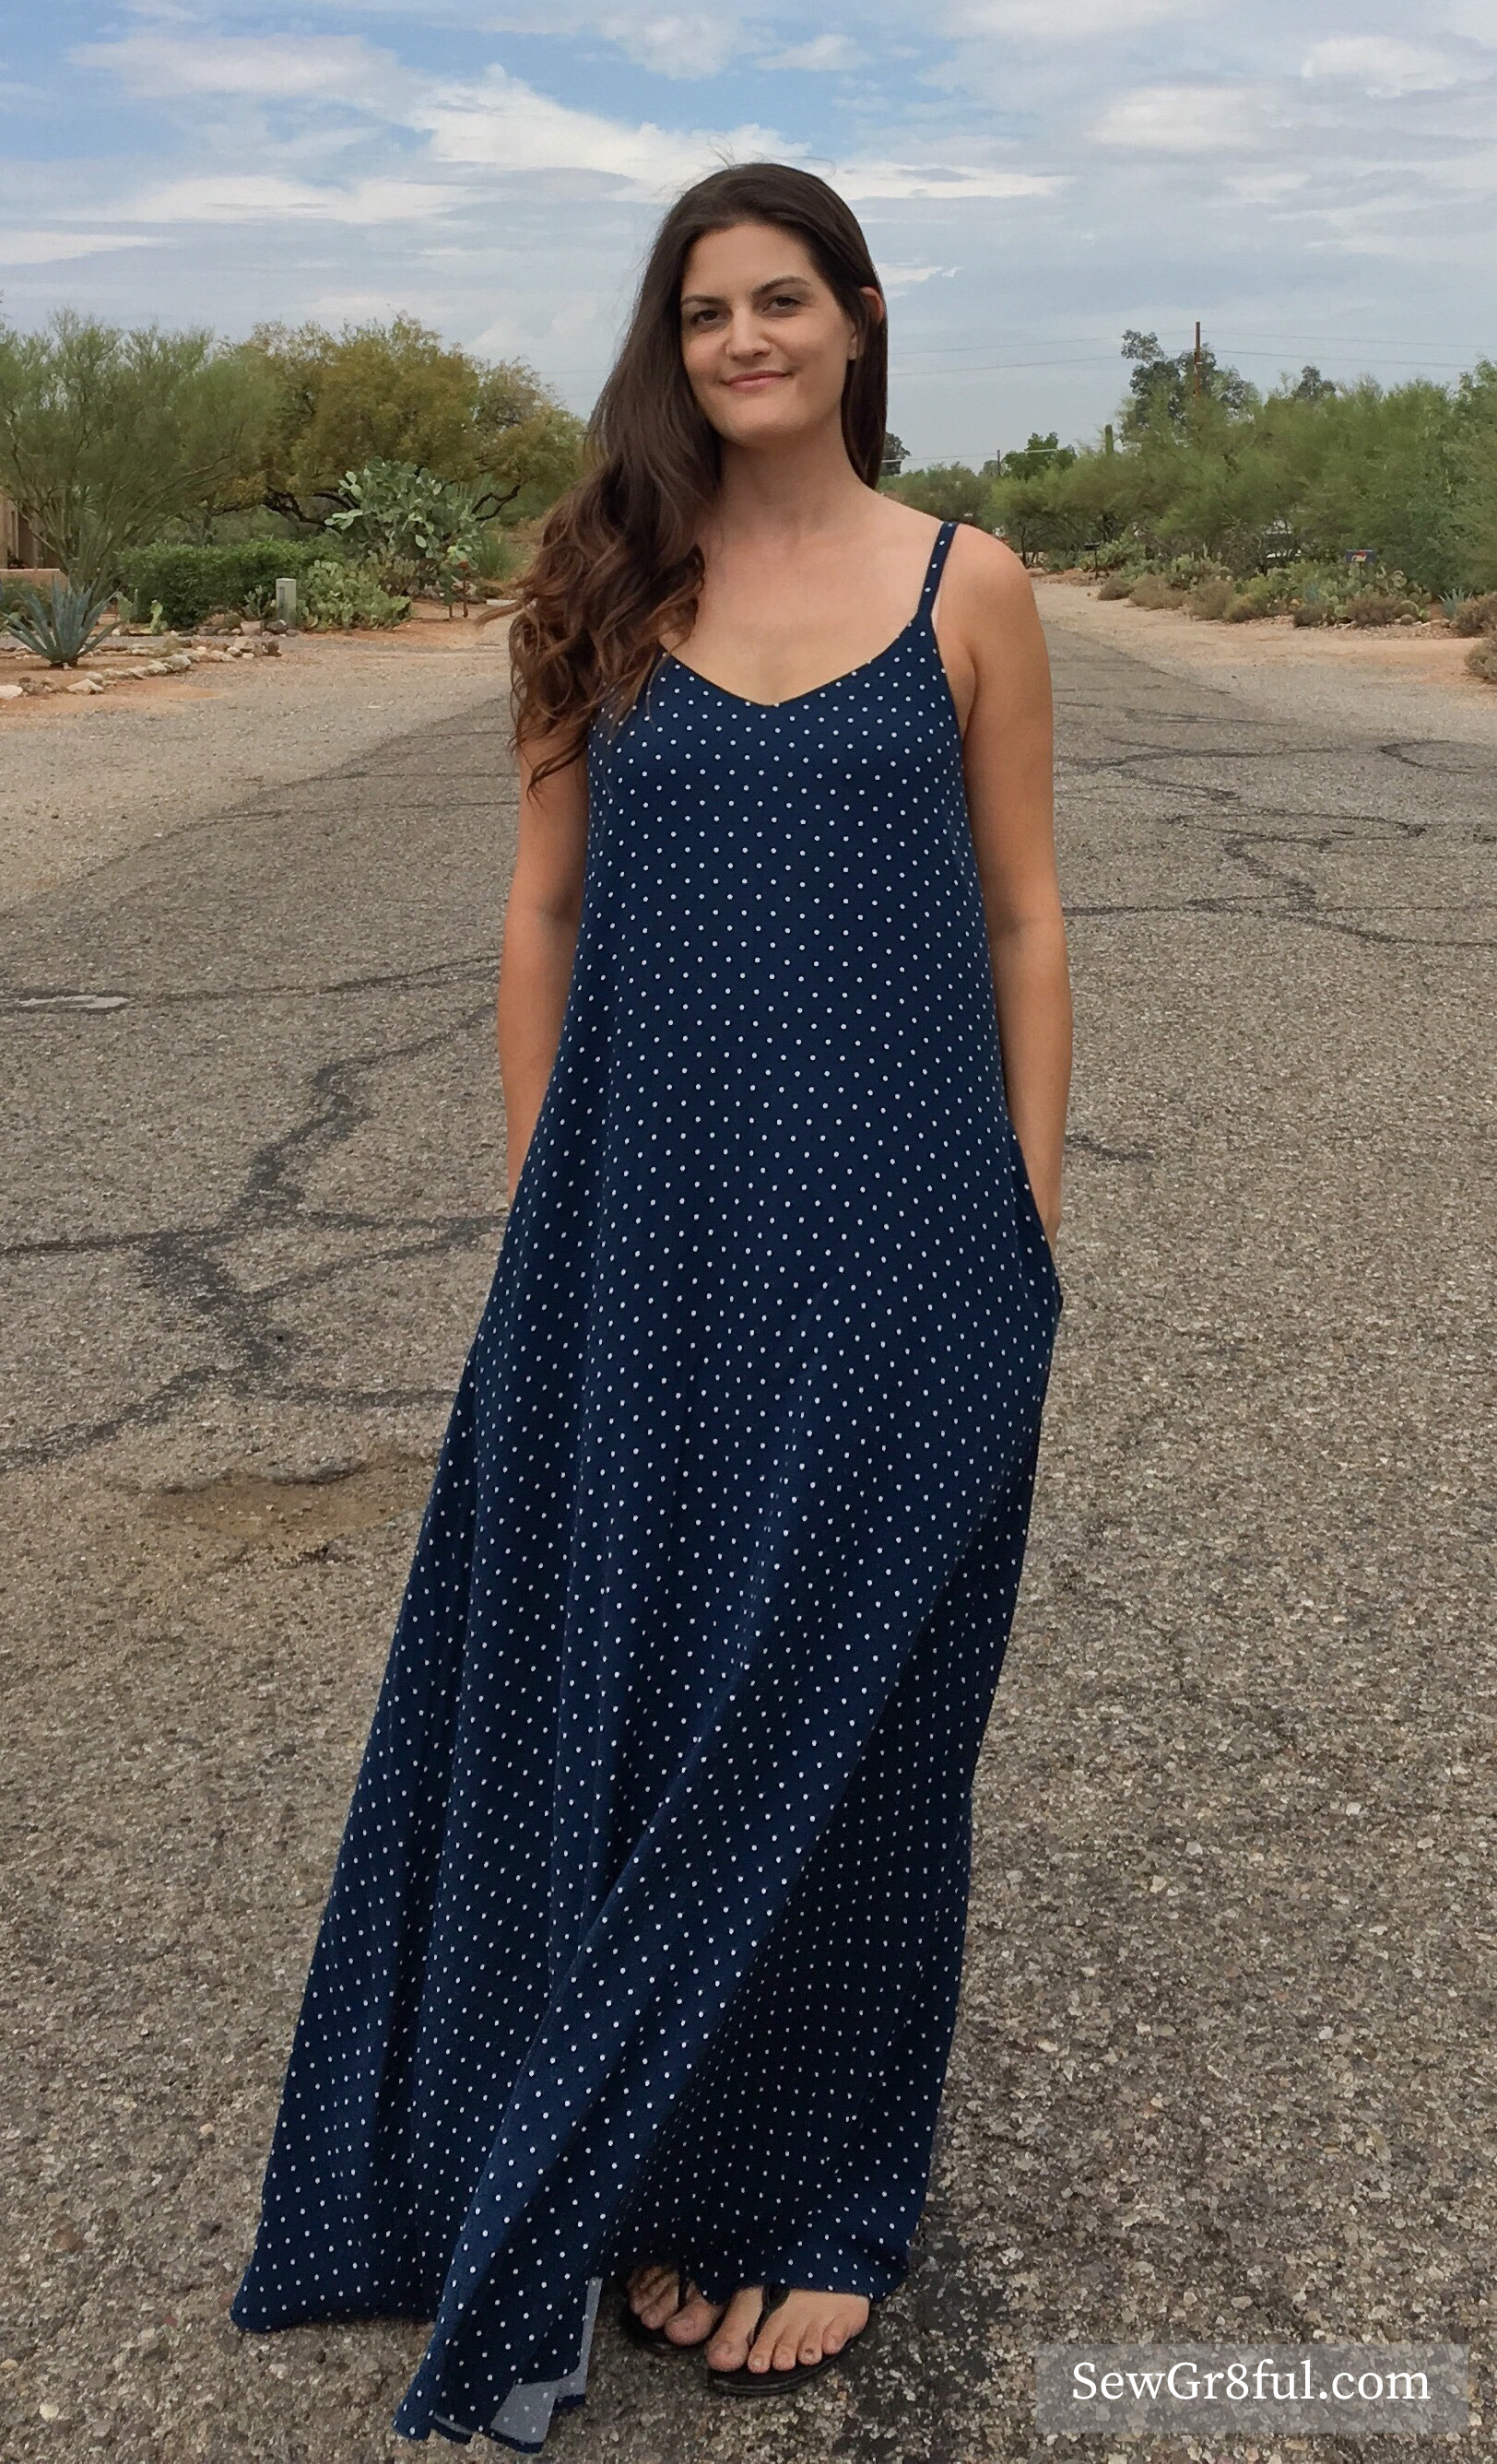
This is a simple mod to make. All I did was carry the outer seamline down to my desired length, tapering it out a bit as I went down. Slightly curved the sides up so it hung even when worn, oh, and added pockets into the side seams. I absolutely love how cool I stay when wearing this maxi, a huge bonus for me with our desert heat. I used a navy polka dot rayon challis from So Sew English for this one.

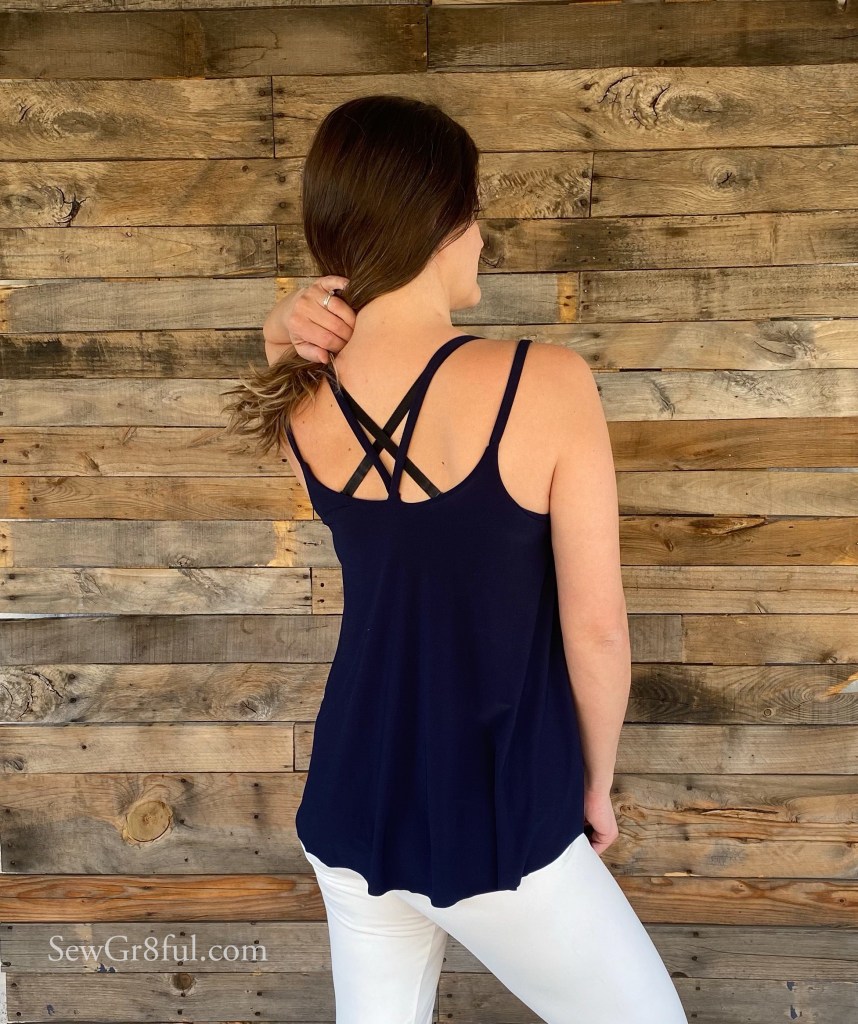
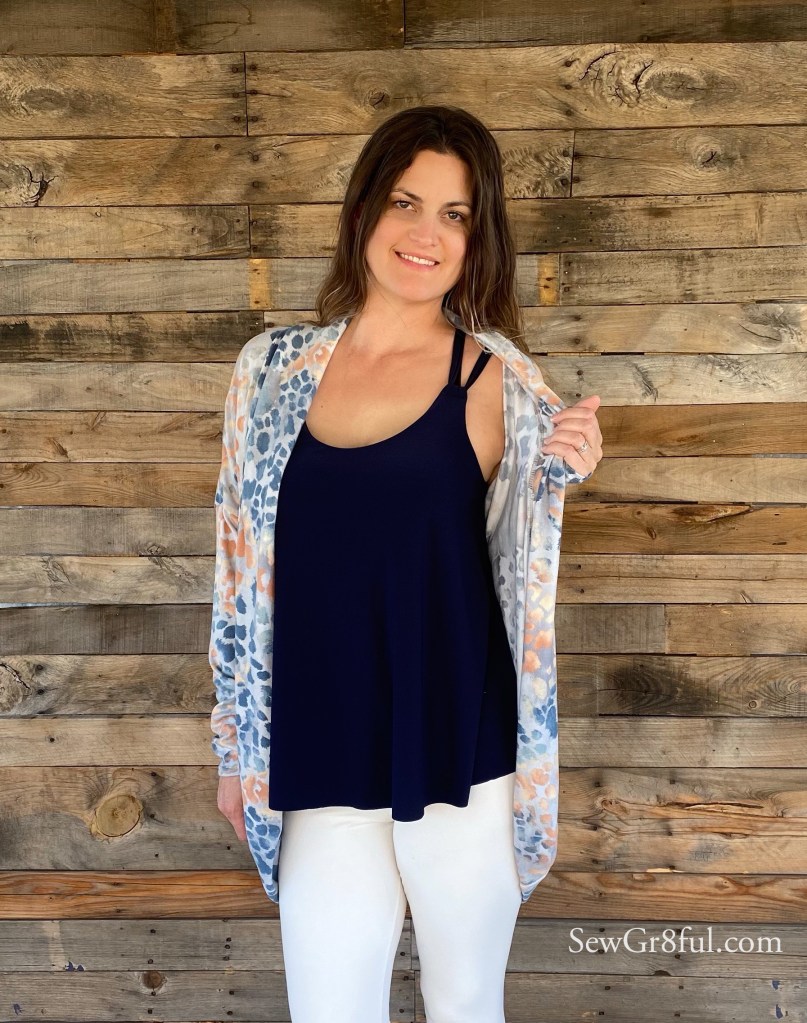
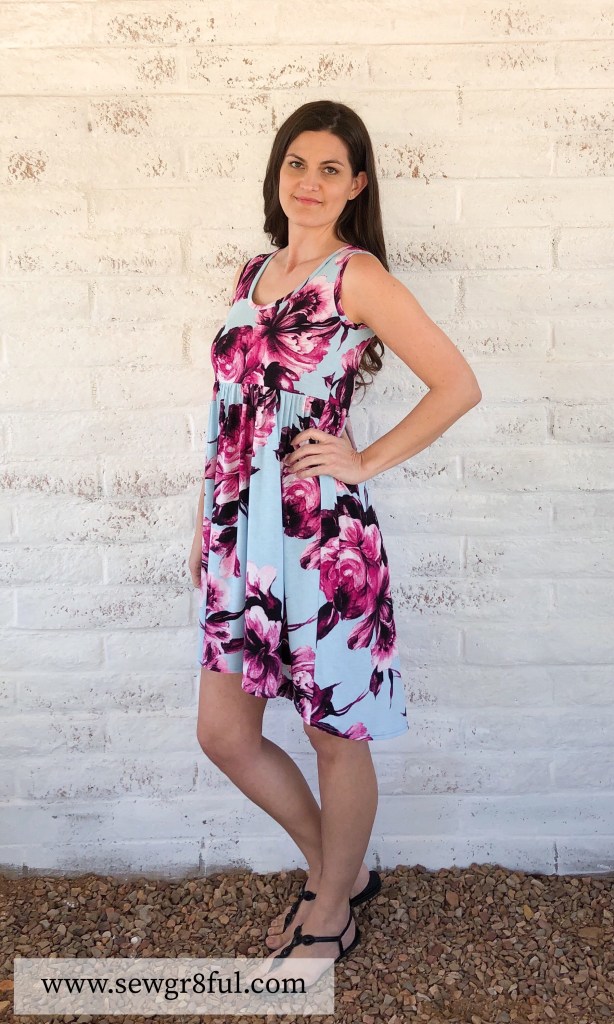
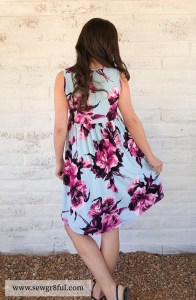
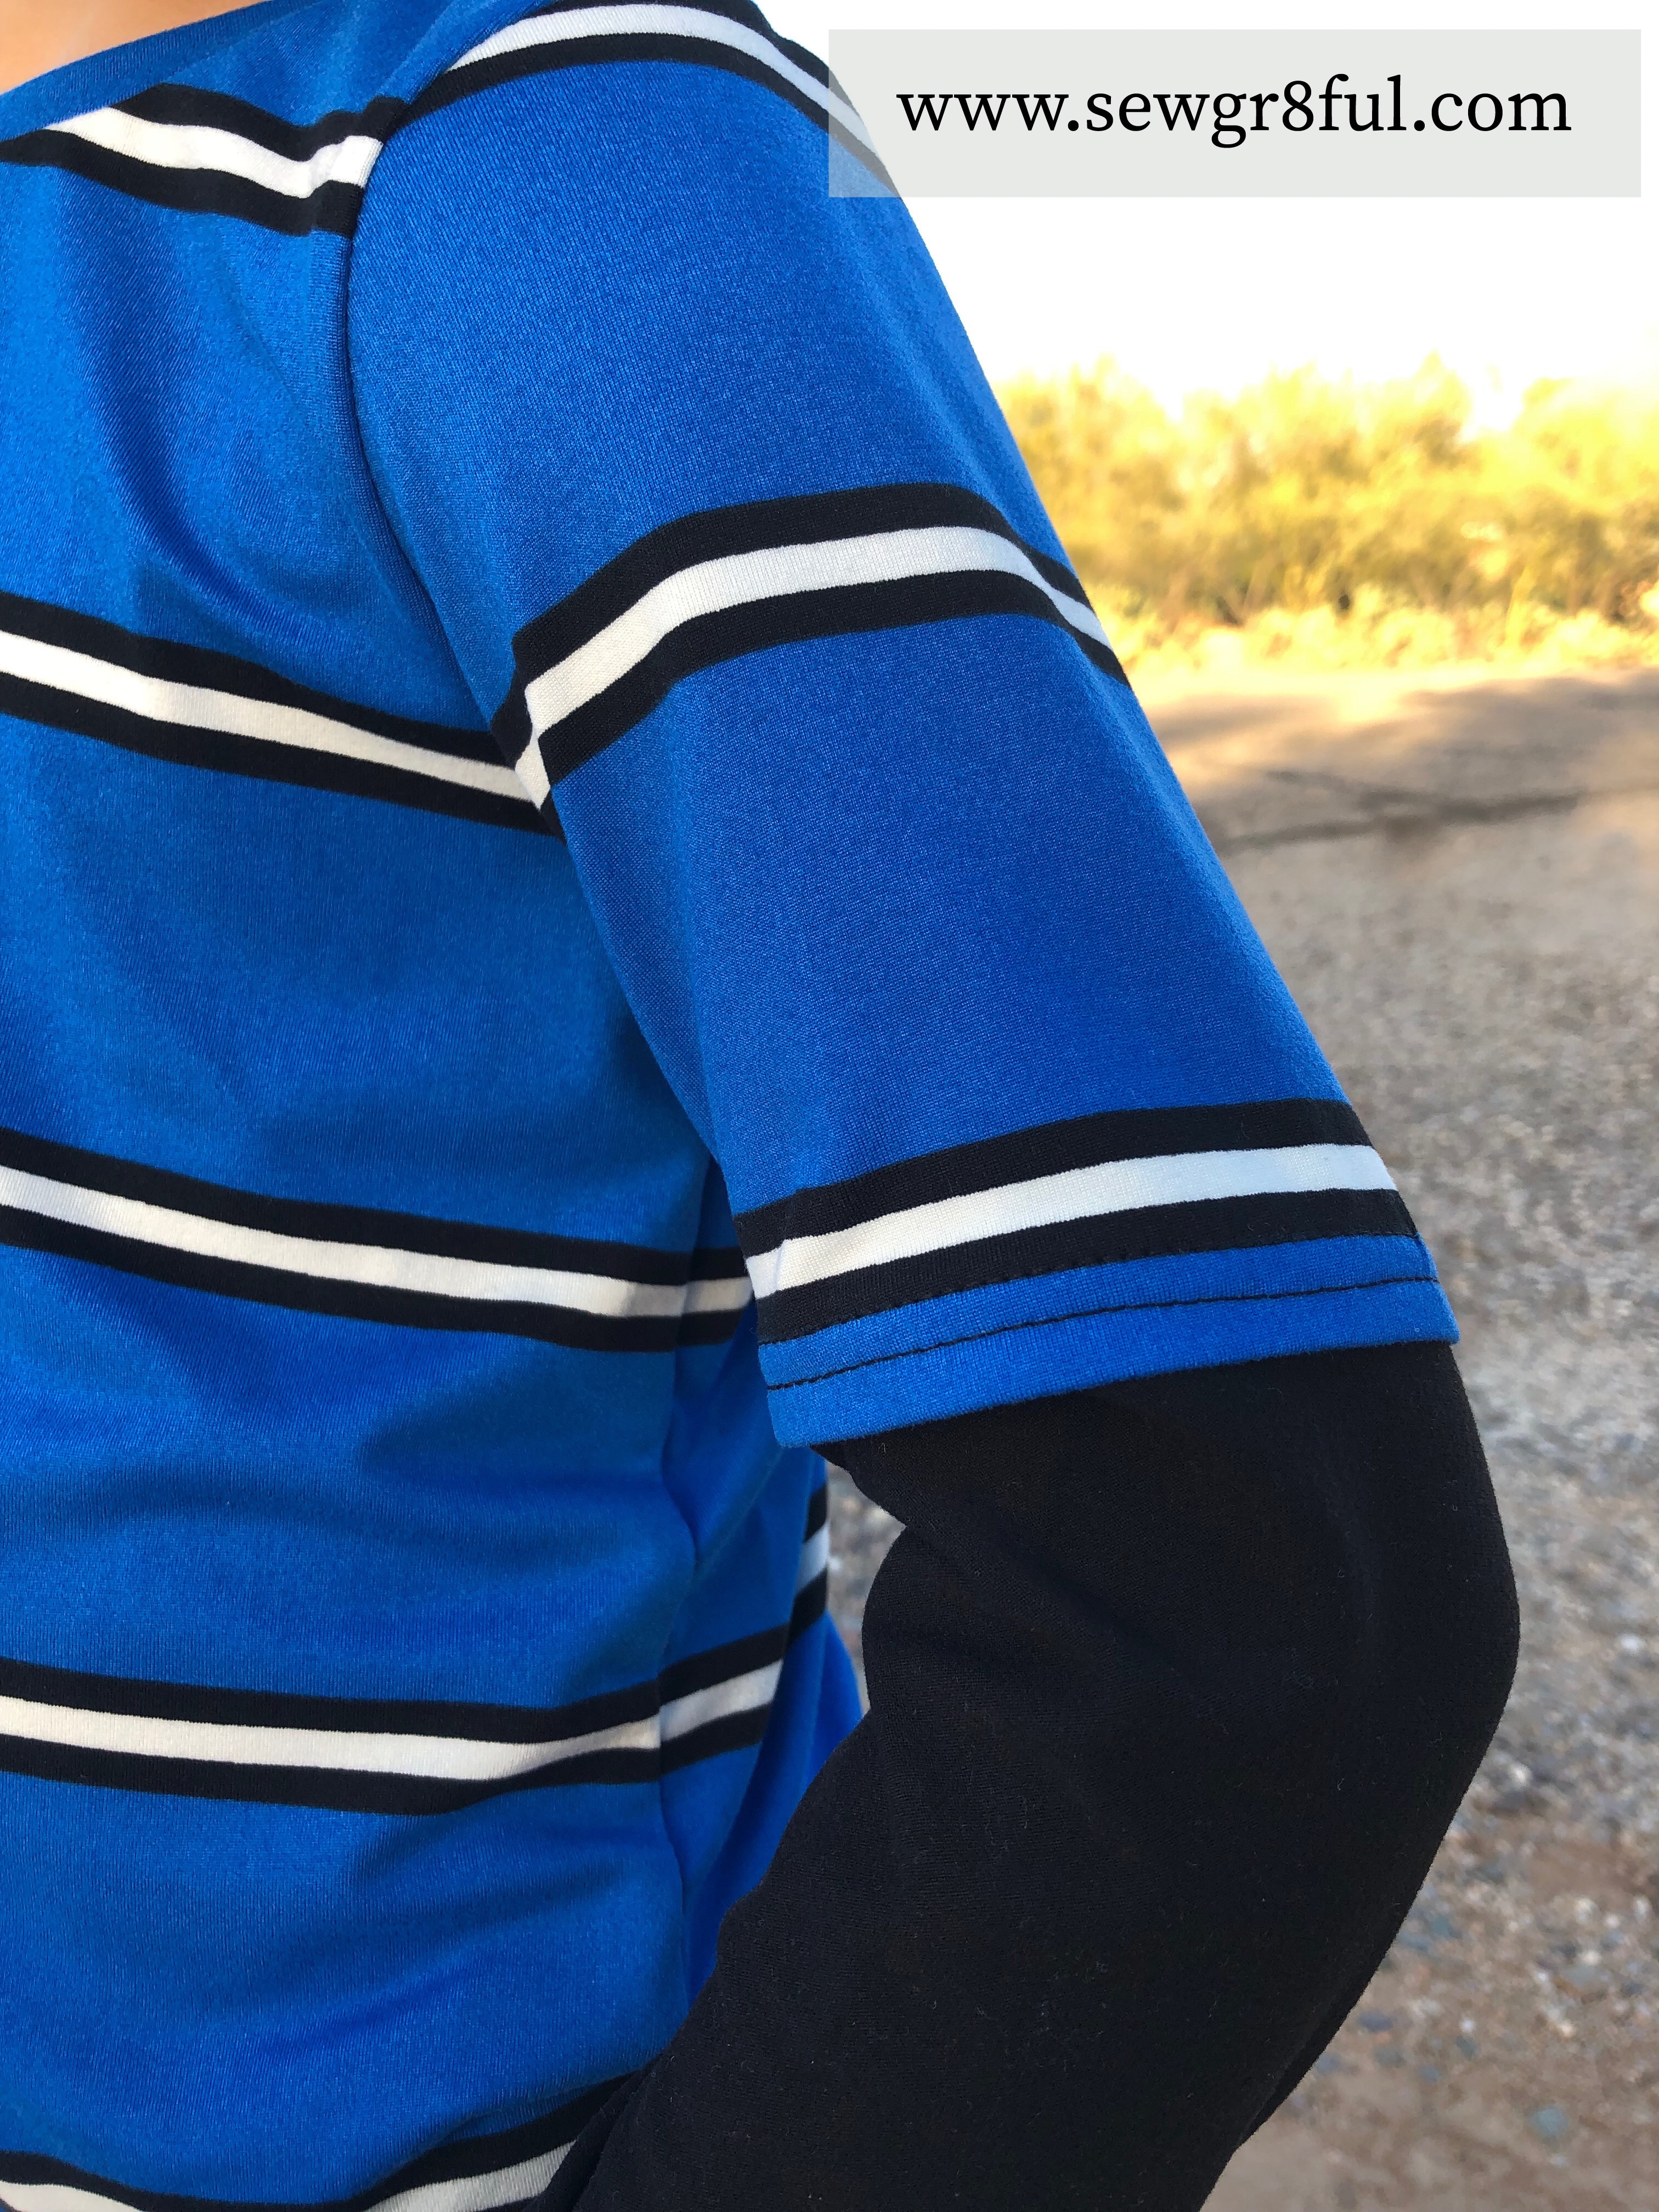
As our weather has already started to heat up here, I have been thinking of my spring/summer wardrobe and knew I wanted to add another Ogden Cami. The problem I had was deciding which one. Since I couldn’t pick, I made three. One, per the pattern, another with a grommet hack, and the third in a knit fabric.

8197AFE5-5677-4185-882D-F15DA2ADAD1D

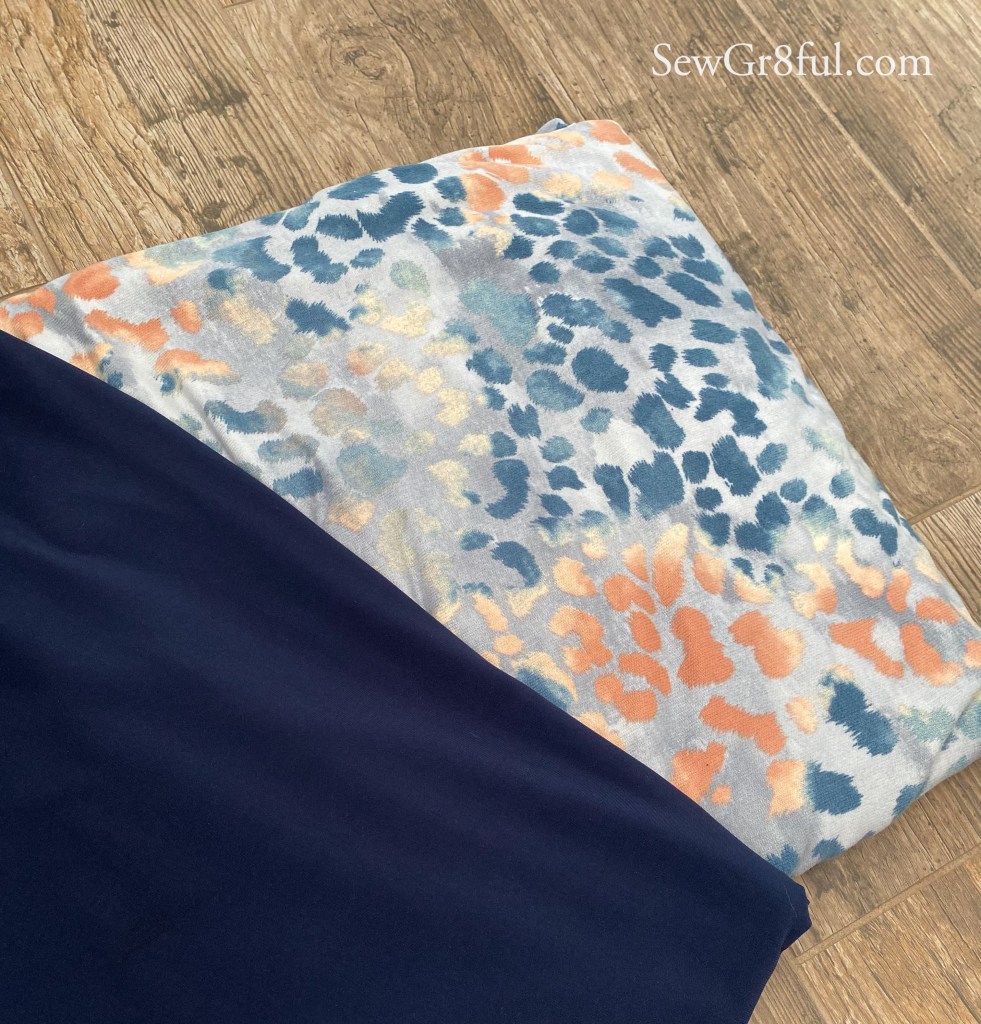
This one was made with a beautiful modal spandex from Surge Fabrics. The only change I made to the pattern when using this knit fabric, was adding an interfacing to my straps.

D8EFE3AC-6A12-470D-8766-A6C283A3C352

I didn’t want my shirt to grow and migrate down when wearing, so adding that interfacing holds it in place. With the knit having more drape than a woven, and depending on the fabric you choose, I’d definitely recommend adding the interfacing to the straps and also basting your straps in to verify the shirt hits you where you are comfortable. I used Pellon EK130 for the straps.

I also want to note that I wear a bra with all my Ogdens. You can occasionally see my nude shoulder strap, but it isn’t something that bothers me, and if you wanted to widen the straps a little, you totally could.

2C774366-DCC8-4845-BB6D-D2696C8AA73A

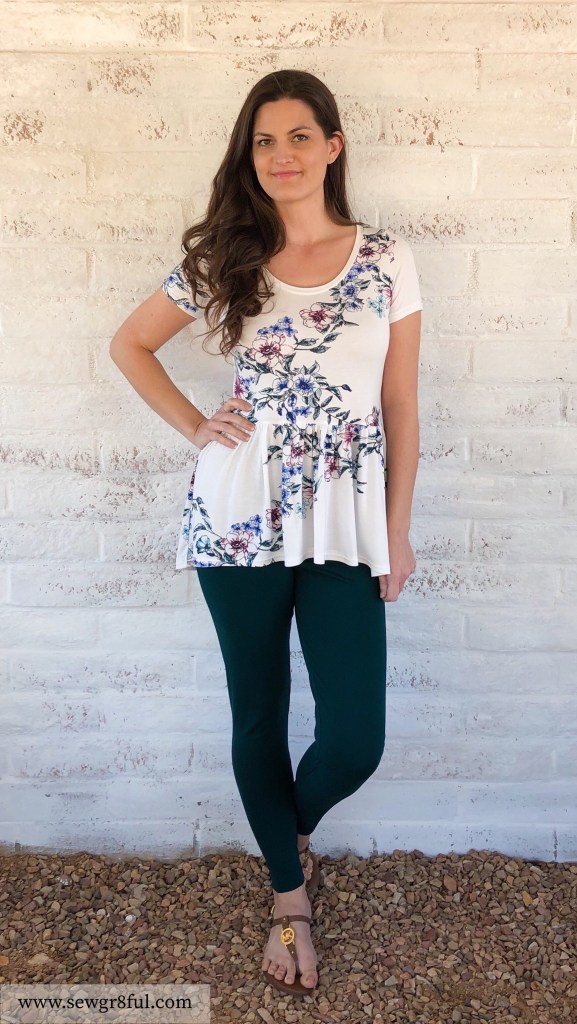
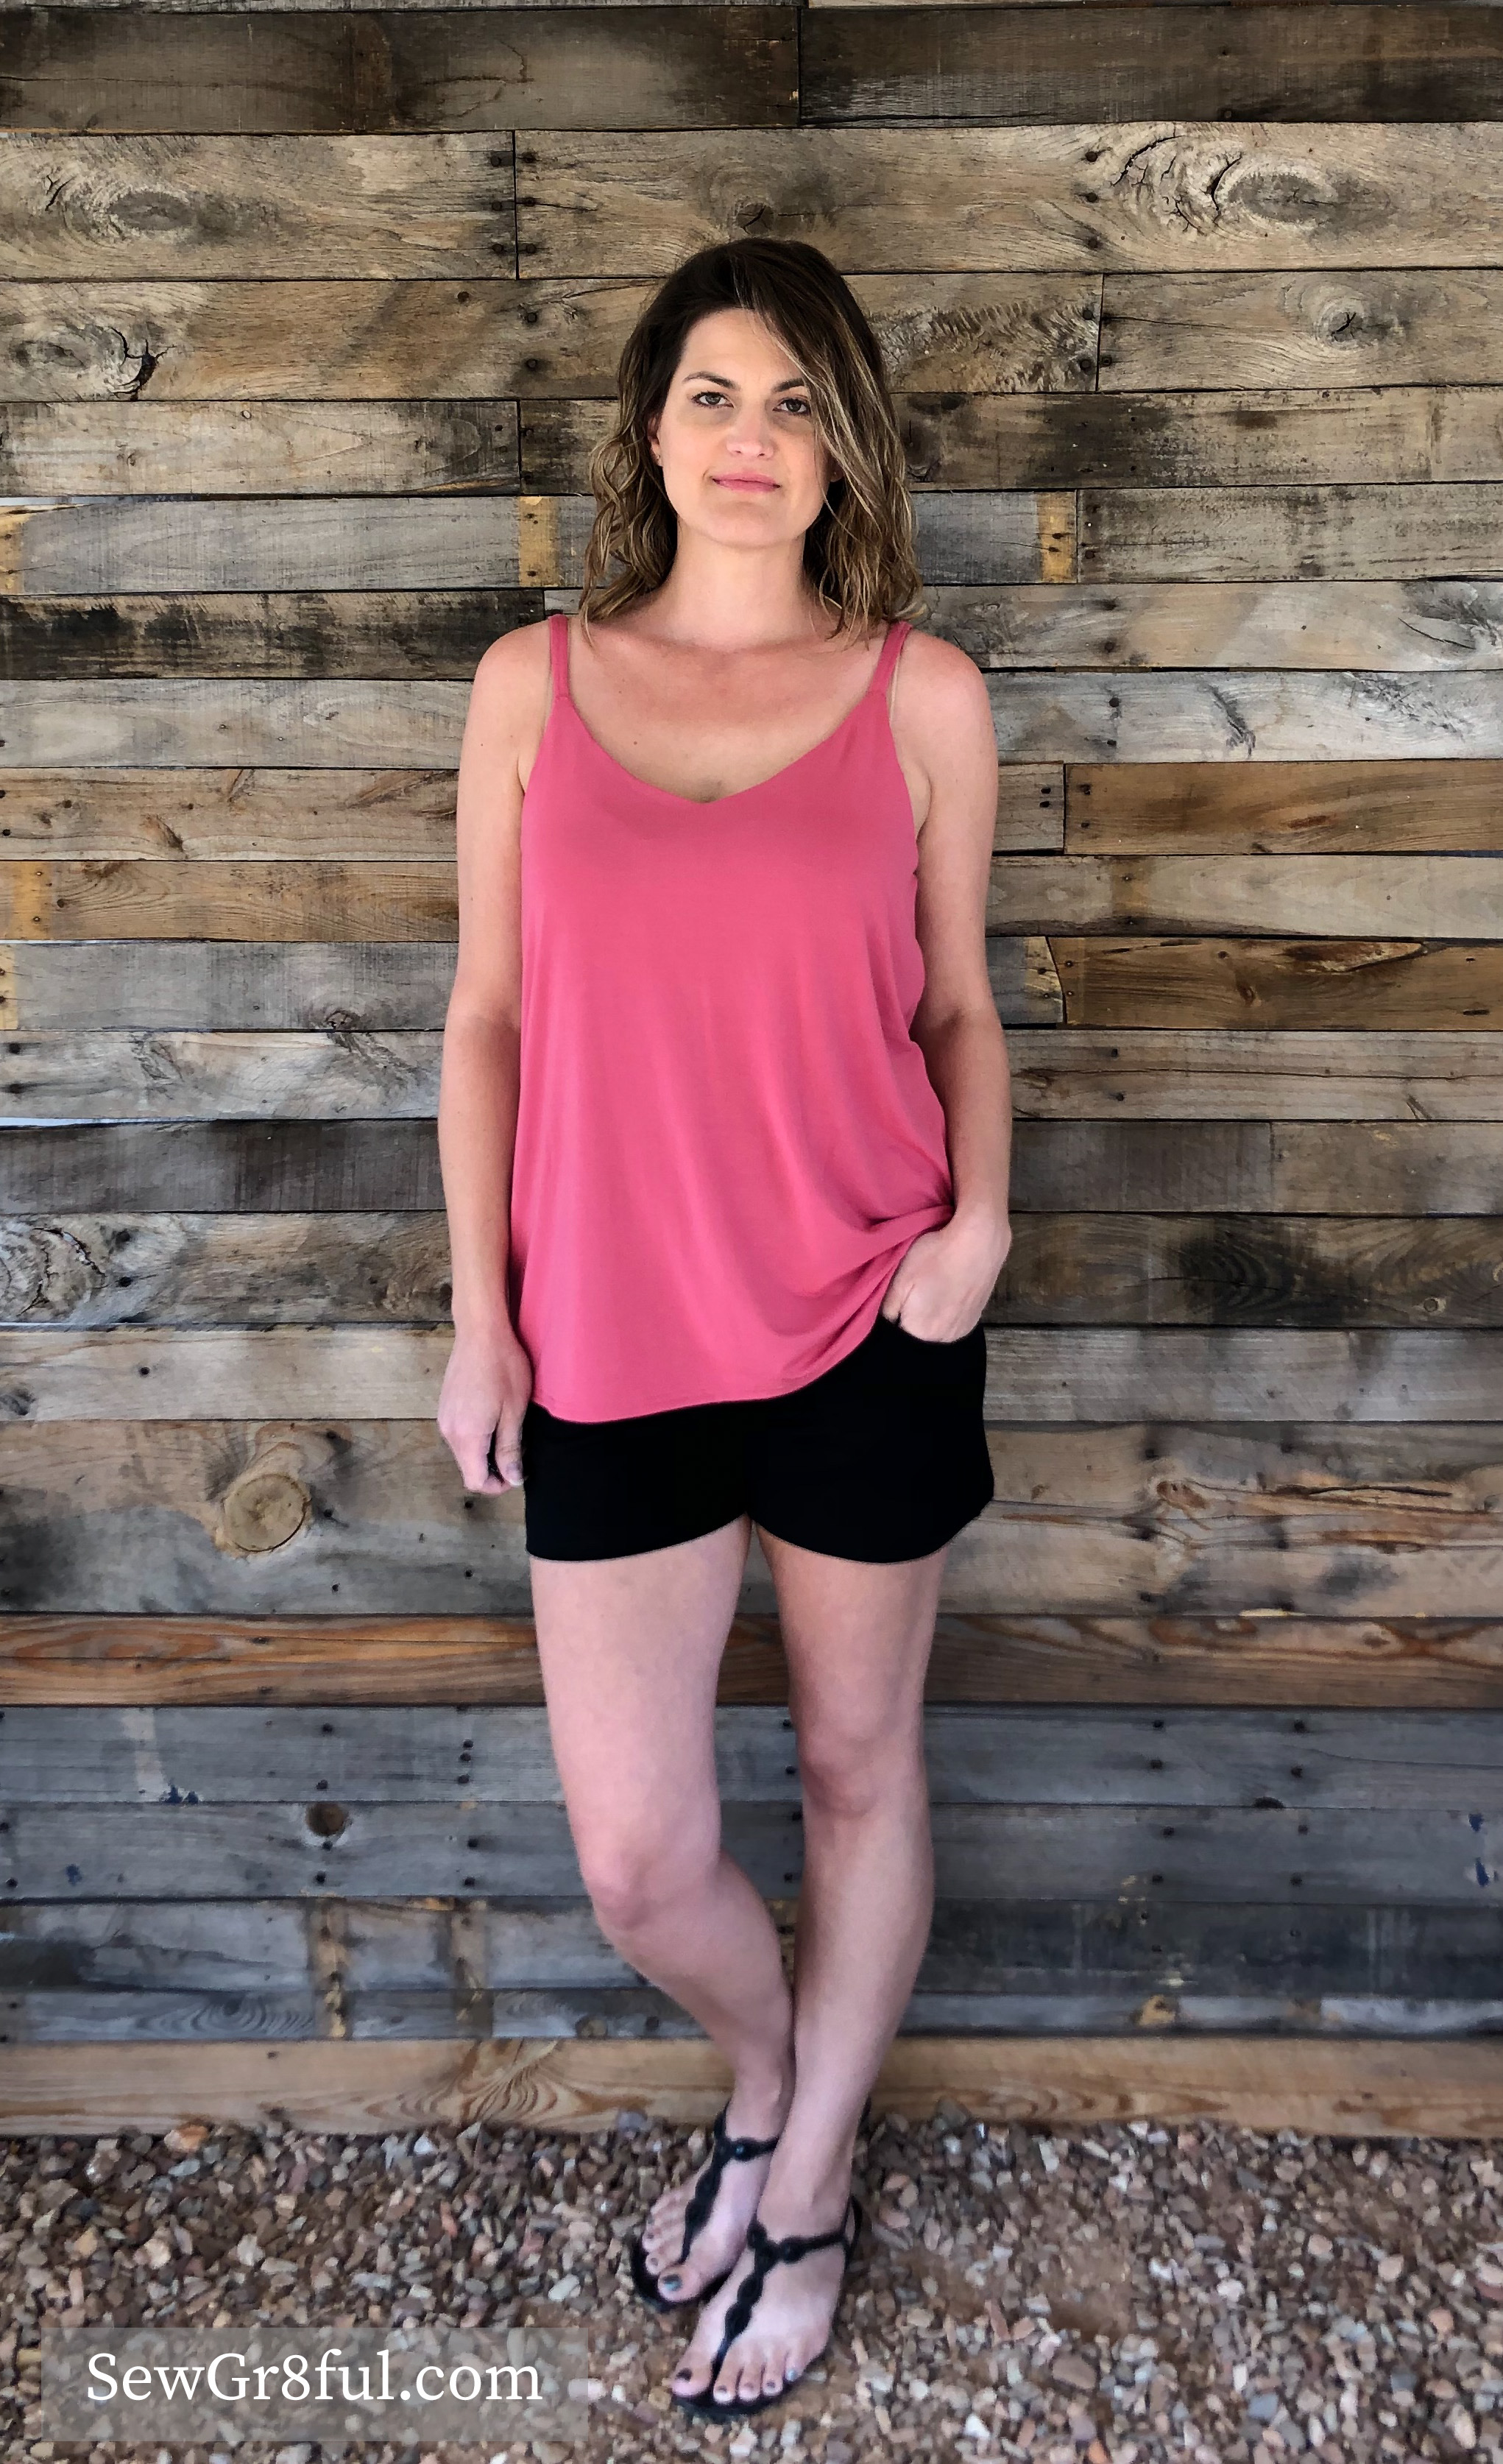
My second Ogden was done exactly per the pattern instructions. I used a rayon challis from Surge Fabrics. I love how smooth and cool rayon challis feels. It has such great drape that it works well for dresses and tops, especially those you want movement with.

This shirt looks great half tucked in or fully loose and I feel very springy.

954ADA0F-FD7E-4E95-8099-9E86919E79E4

I fell in love with a shirt on Pinterest, that had a very similar look to the Ogden, just with tie straps being fed through grommets. I decided to use another rayon challis I had, this one from Sincerely Rylee fabrics. An added bonus to the tie straps, is making the shirt easy to adjust if you needed to, possibly even breastfeeding friendly.

I had to make a few more modifications to the pattern to make this look happen, but they are still relatively simple. Here are the steps I took to get this look.

F807B715-E830-4182-91F1-626AA0A111EB

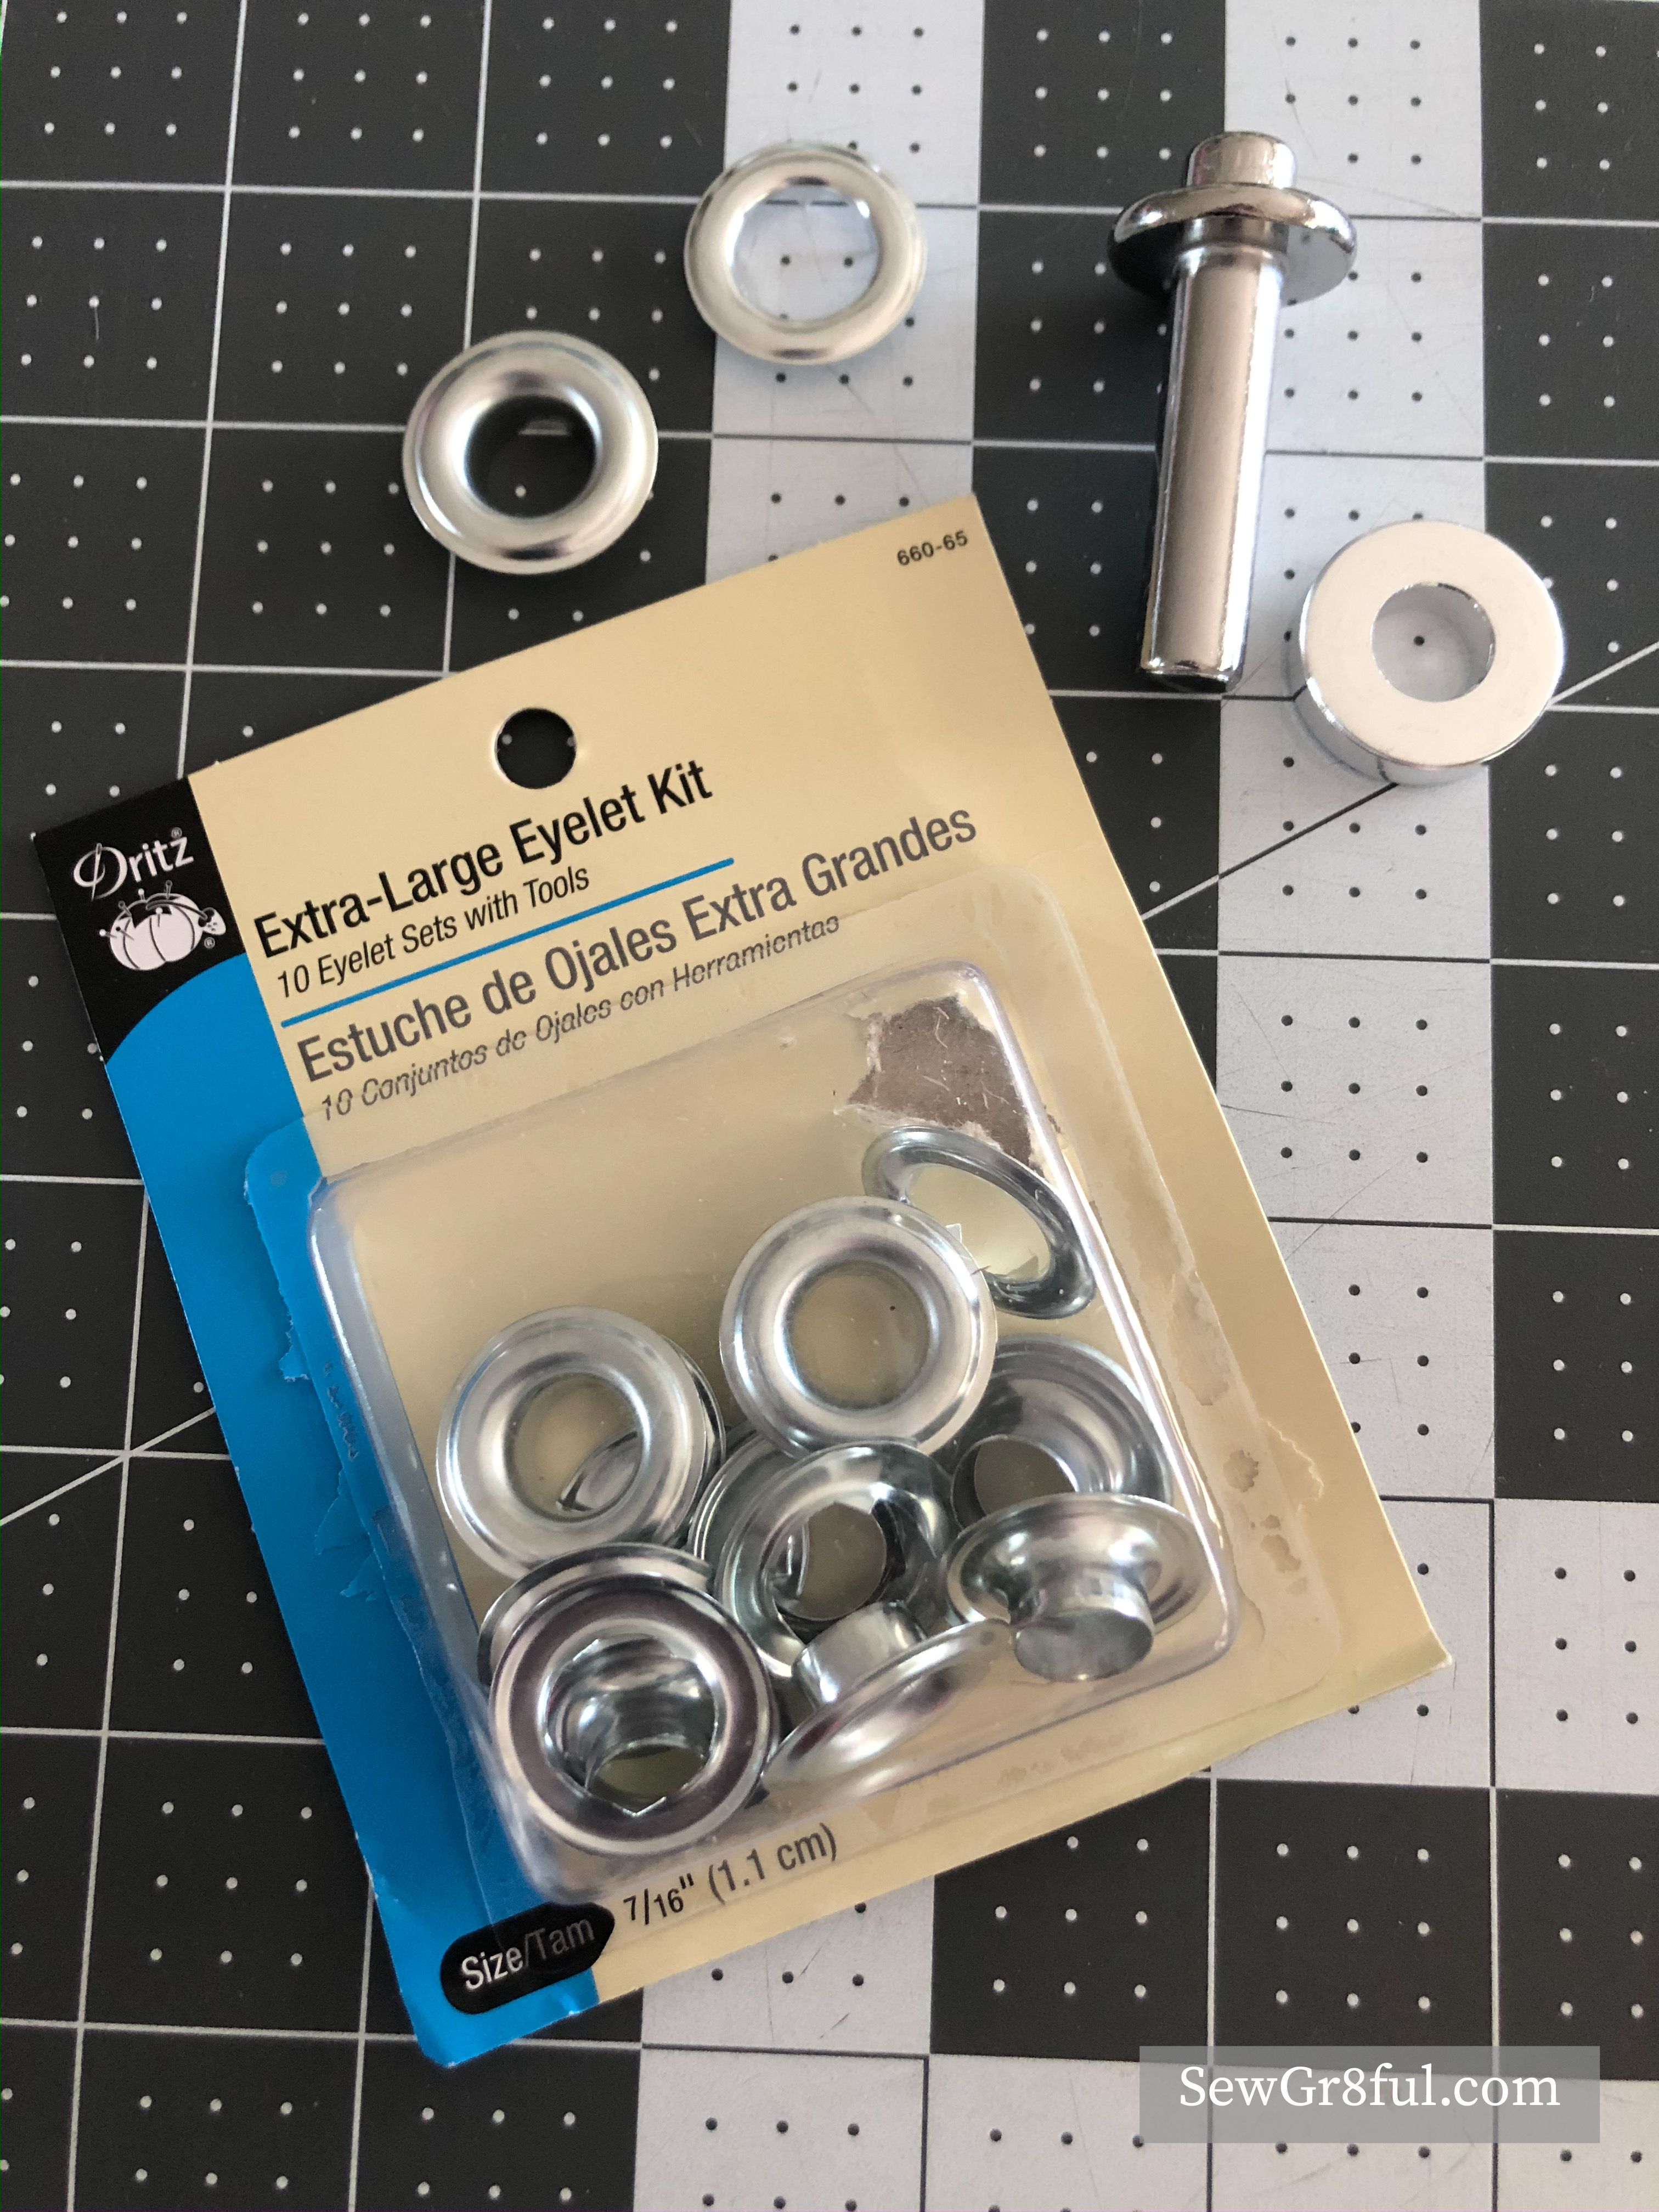
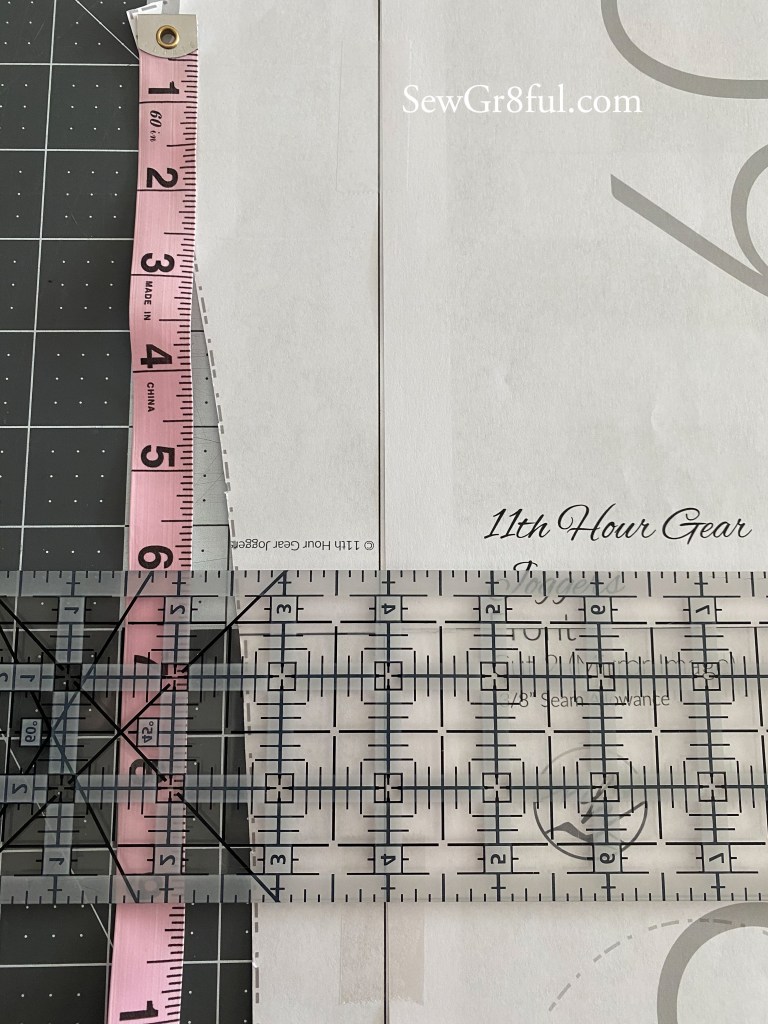
I used Dritz eyelets, size 7/16″. Since the top of the bodice, where the straps attach, isn’t wide enough to accommodate this size grommet, it needed to be widened. I centered my grommet on the back pattern piece and then added an additional 3/8″ to each side.

I carried that extra width down until just past the bottom of the grommet. Then I tapered that into the original neckline and armscye. I smoothed out the lines and made sure to repeat the same steps on the lining pieces as well as the front piece.

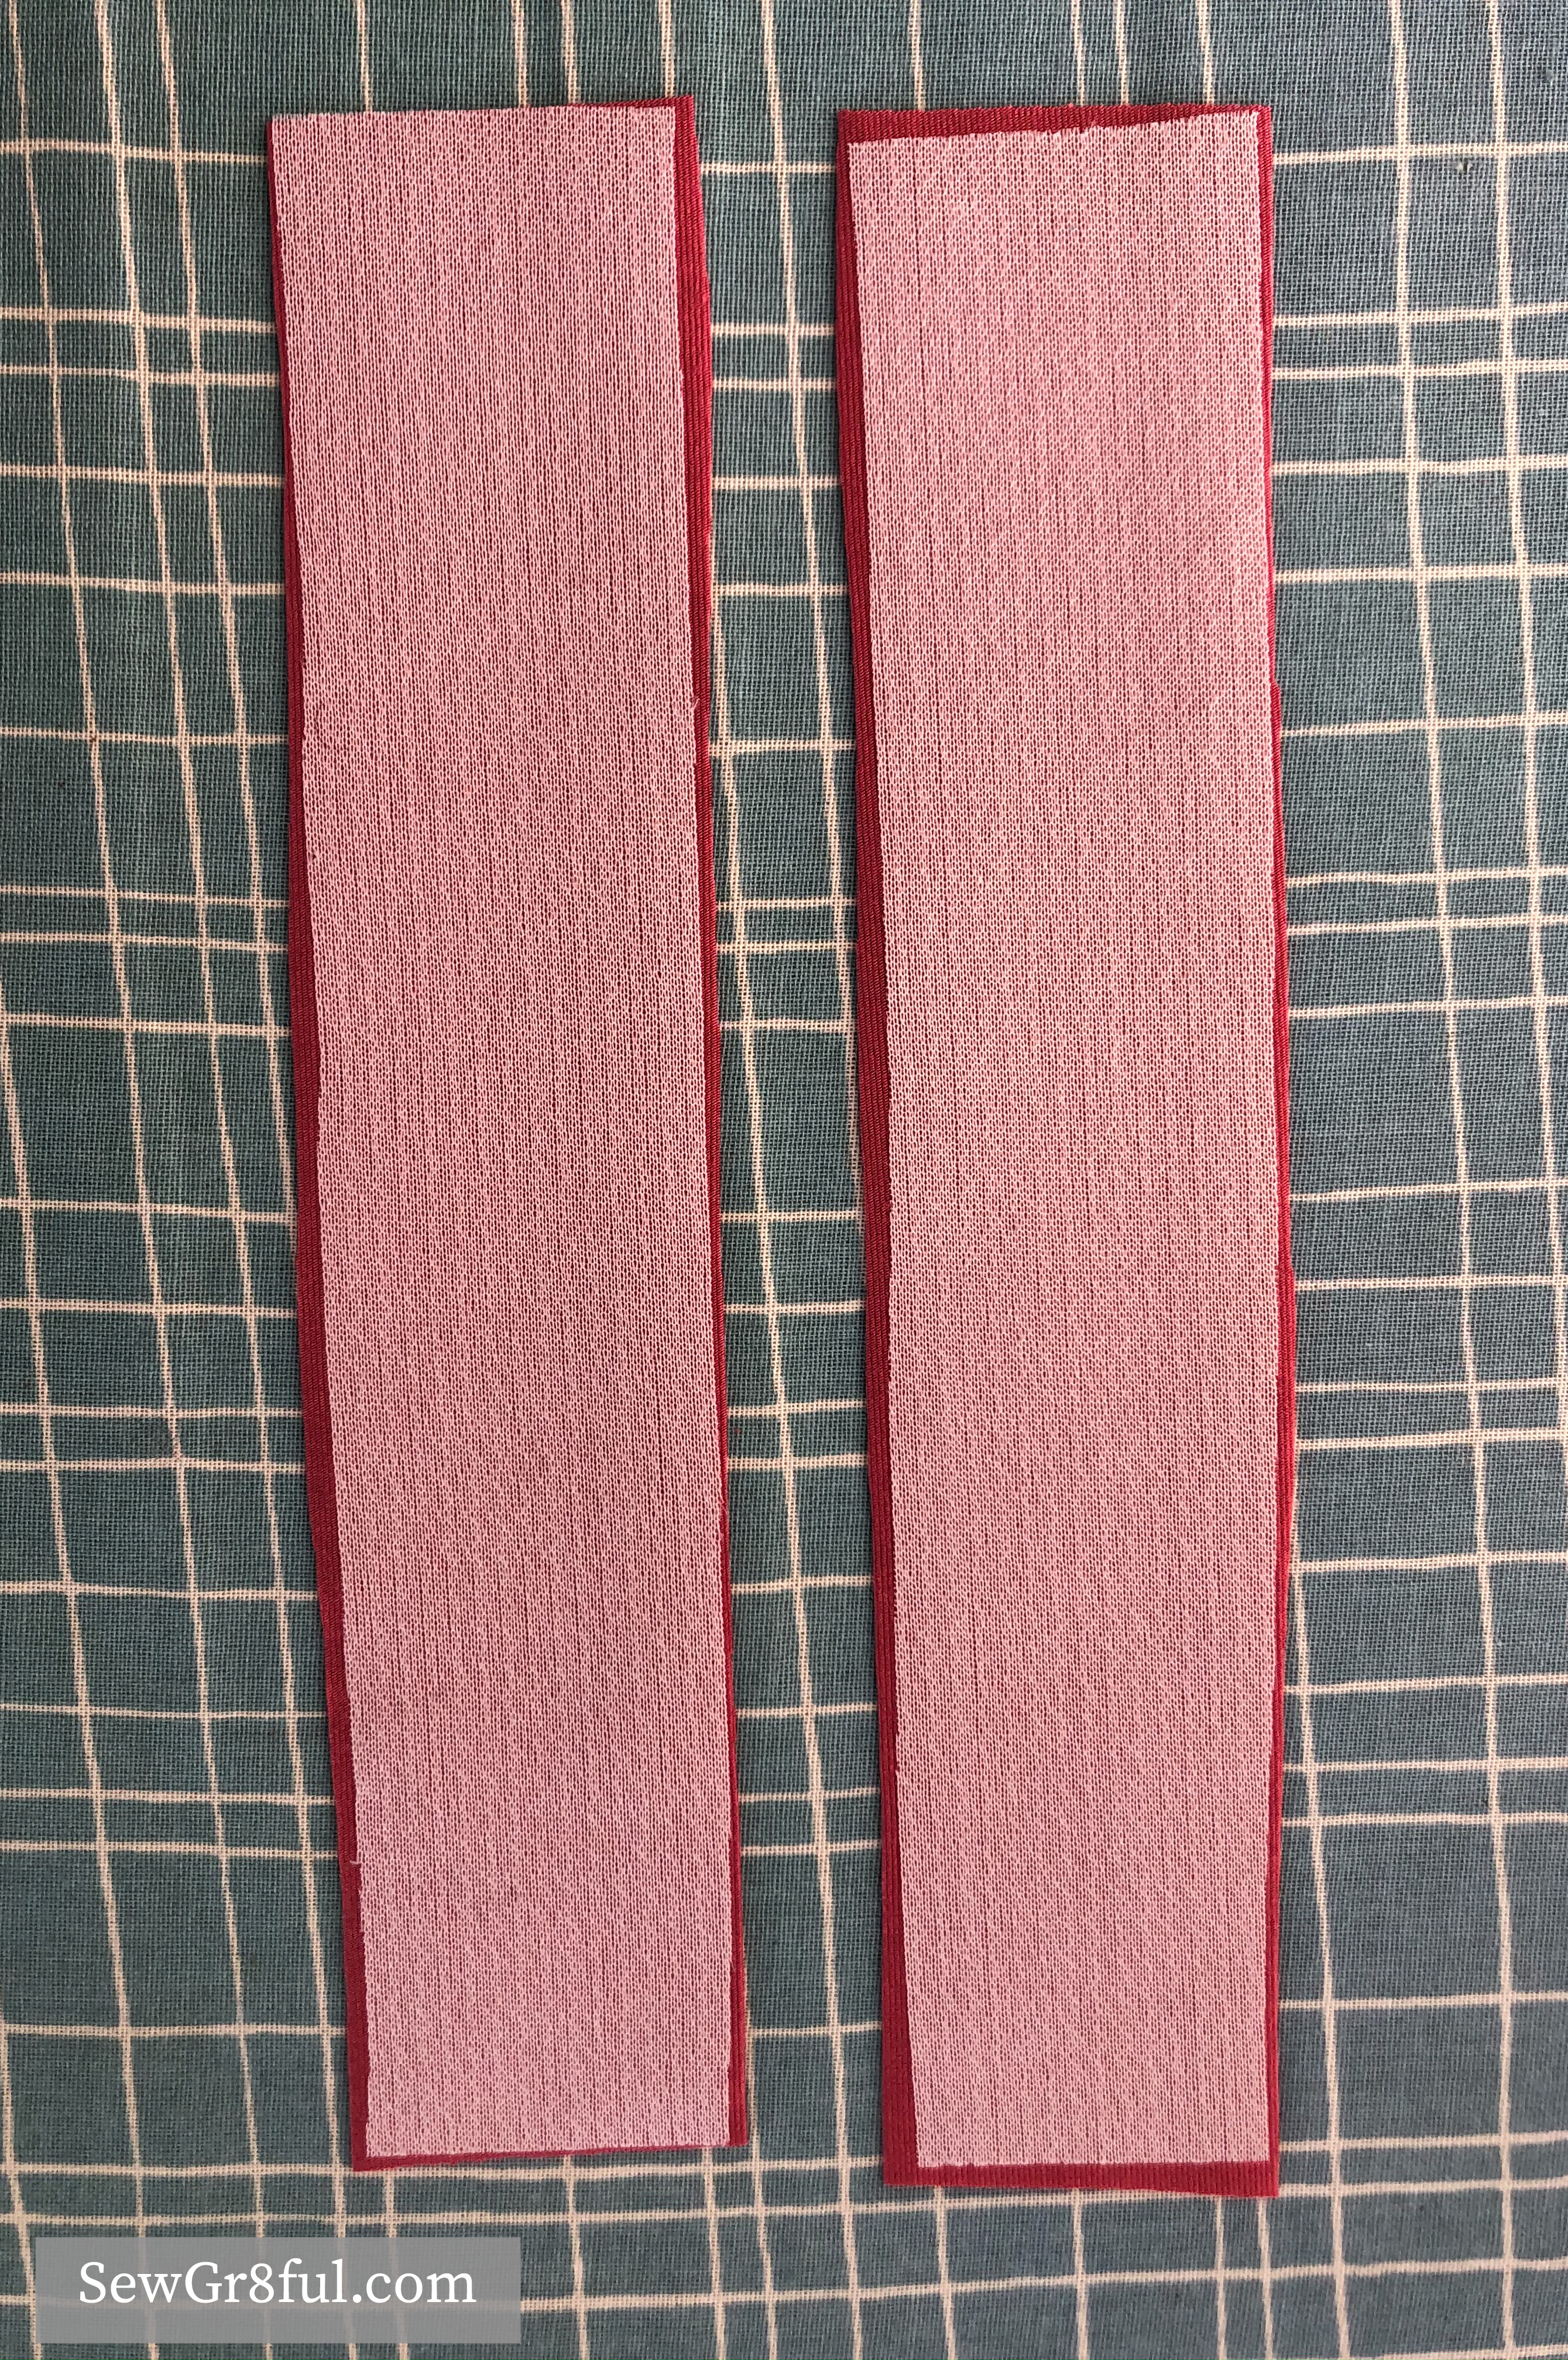
I skipped cutting out the straps until the end, at which point I determined I wanted them to be three times the length of the original strap. Mine ended up being 28.5″ long. To make the straps, I folded them wrong side together lengthwise, and sewed around the three open sides. I left a few inch gap in the middle of the longest side, for turning. Then I clipped the corners and turned right side out. Tucking in the edges and topstitching over the opening to close it.

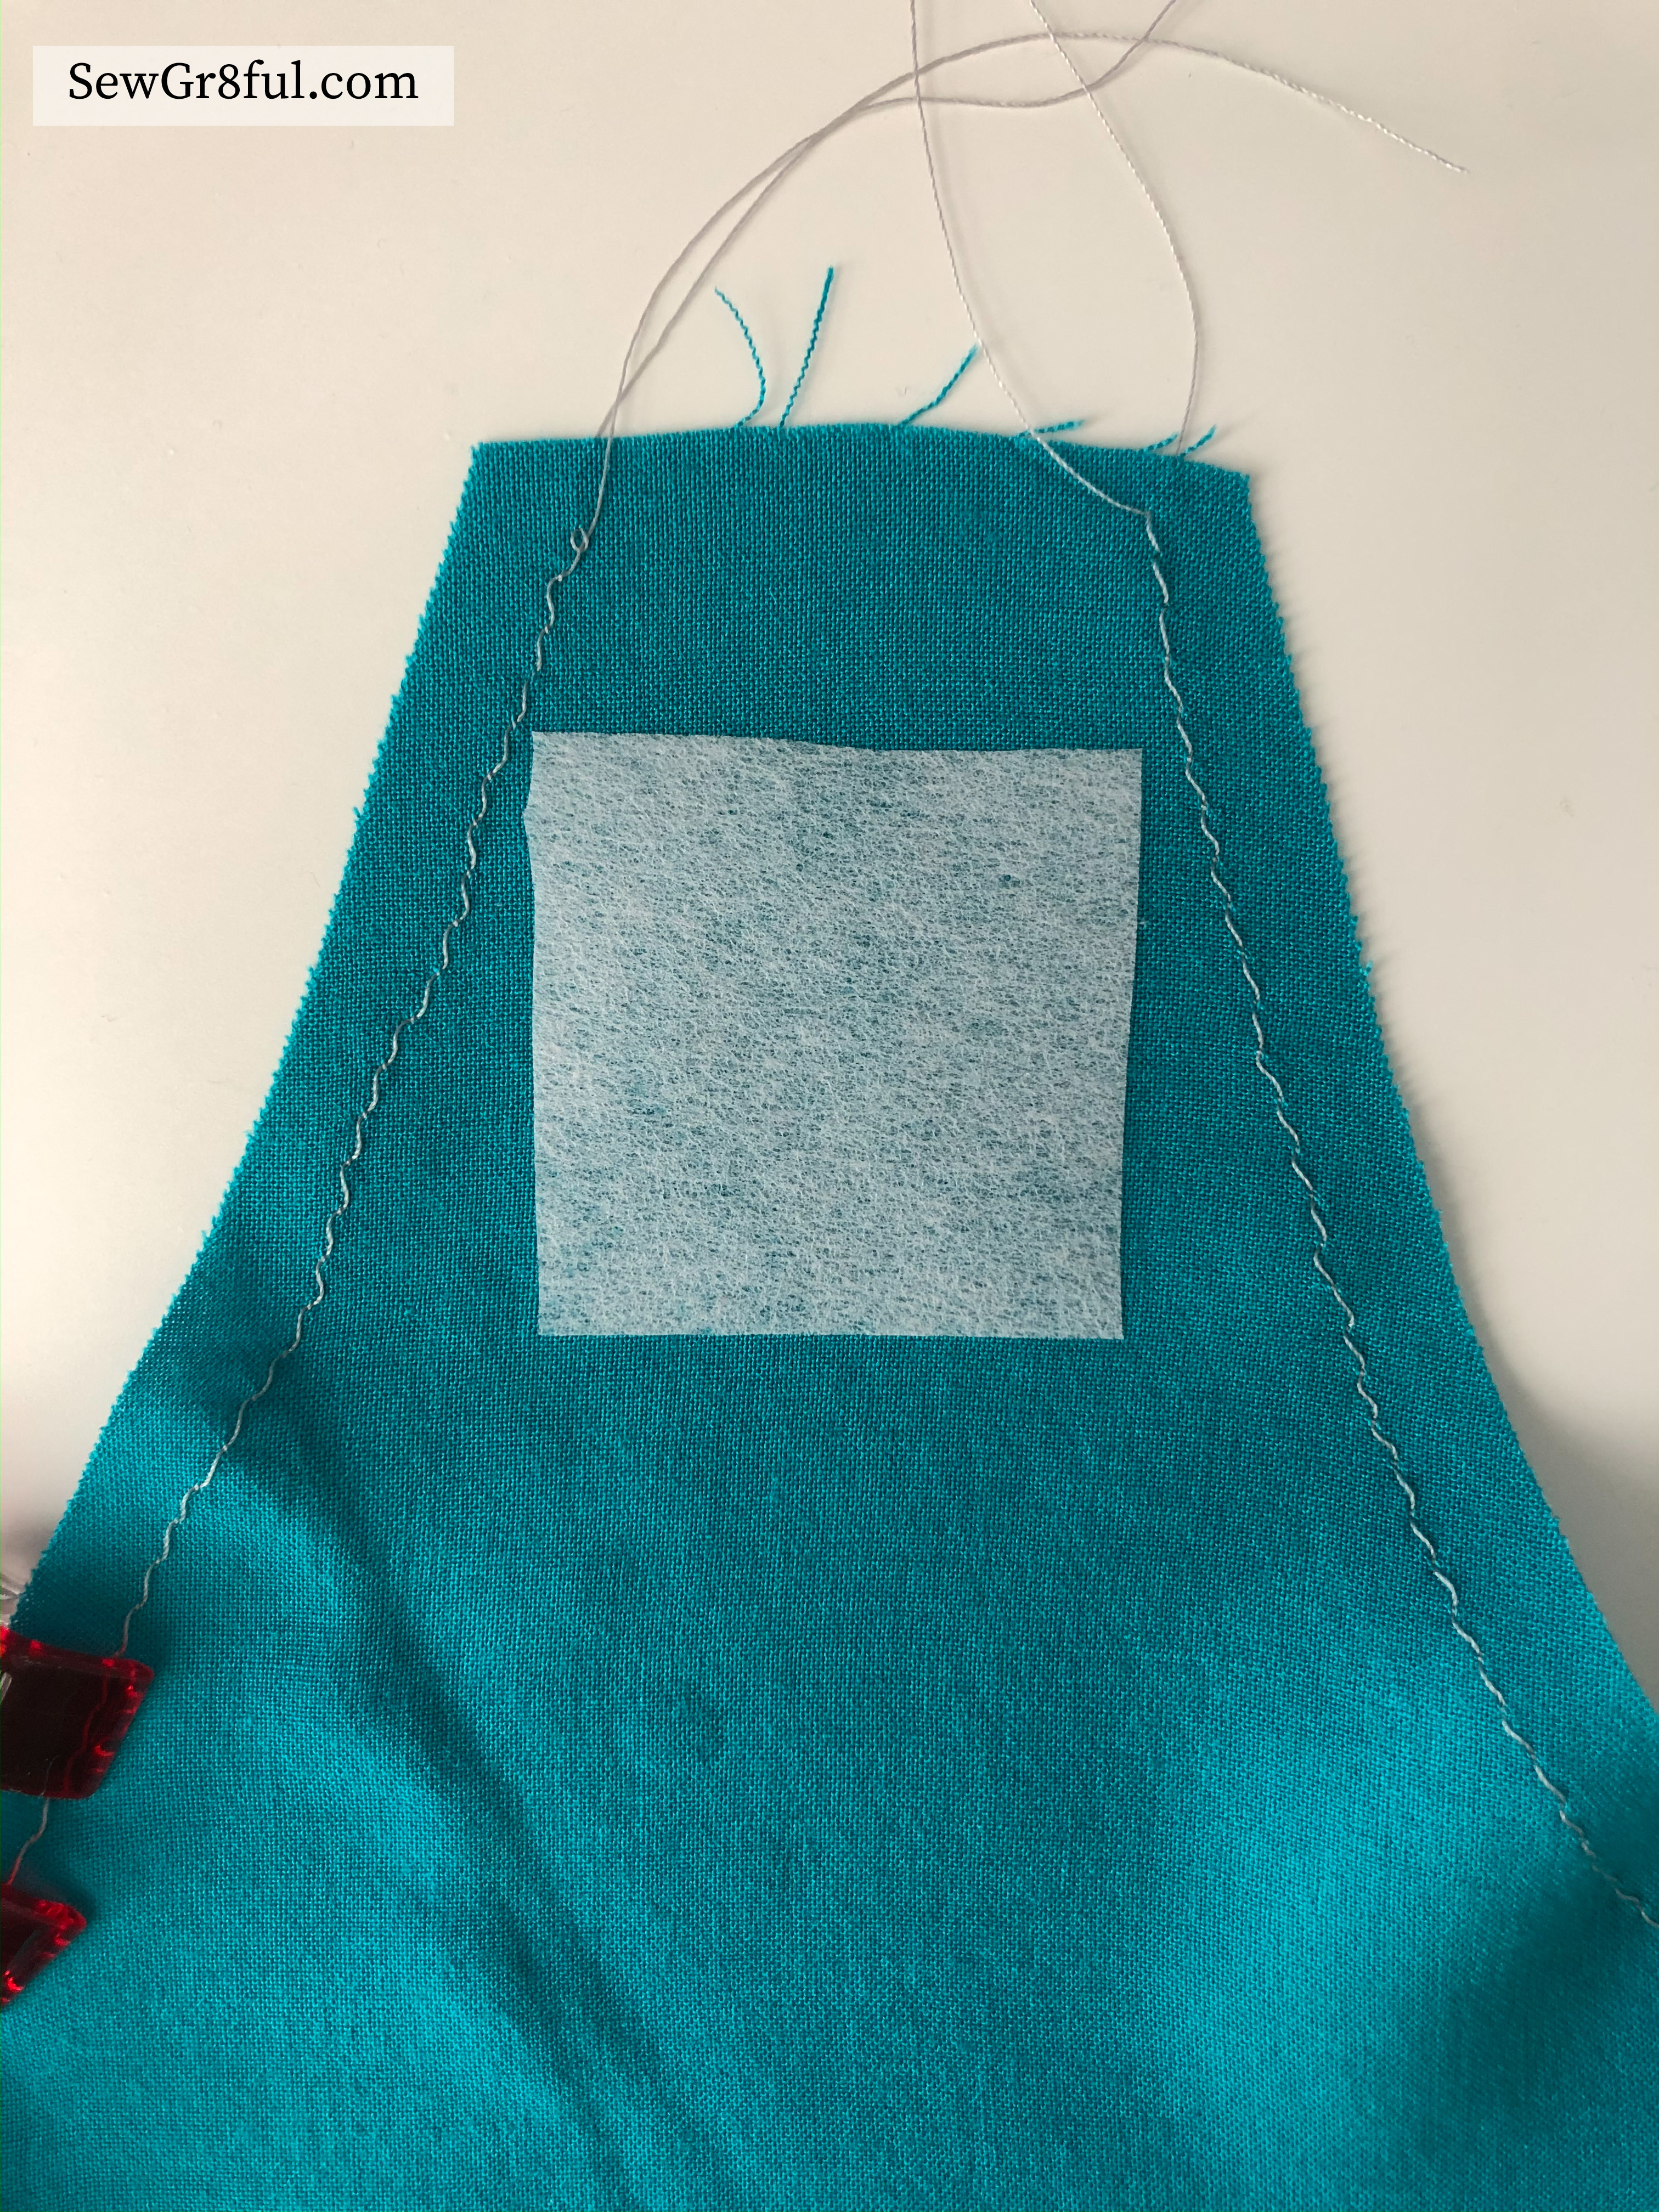
To sew up the shirt, I did step one, and then added a 1.5″ square of interfacing to the wrong side of the front bodice pieces. I wanted to leave a little room in addition to the seam allowance, so I placed it 3/4″ down from the top edge. I used Pellon 911FF.

2D0CBB04-E436-480D-A85C-BB012FB314D6

You will then skip to step 4 and 5. When you get to step 6 & 7 you will sew the full neckline and armholes of the lining to the main fabric, right sides together. This will make your two pieces, one full piece. Snip your V in the front and back and clip all around following step 8.

You will then skip step 9 and 10, and do the edge stitching of step 11. Complete step 12, hem, and press. Then add the grommets. I set the grommet on the shirt, centered on that square interfacing we added earlier. Followed the grommet package instructions to attach, and it was done.

1E588383-48AA-40DC-8247-A6BB72A8D5B0

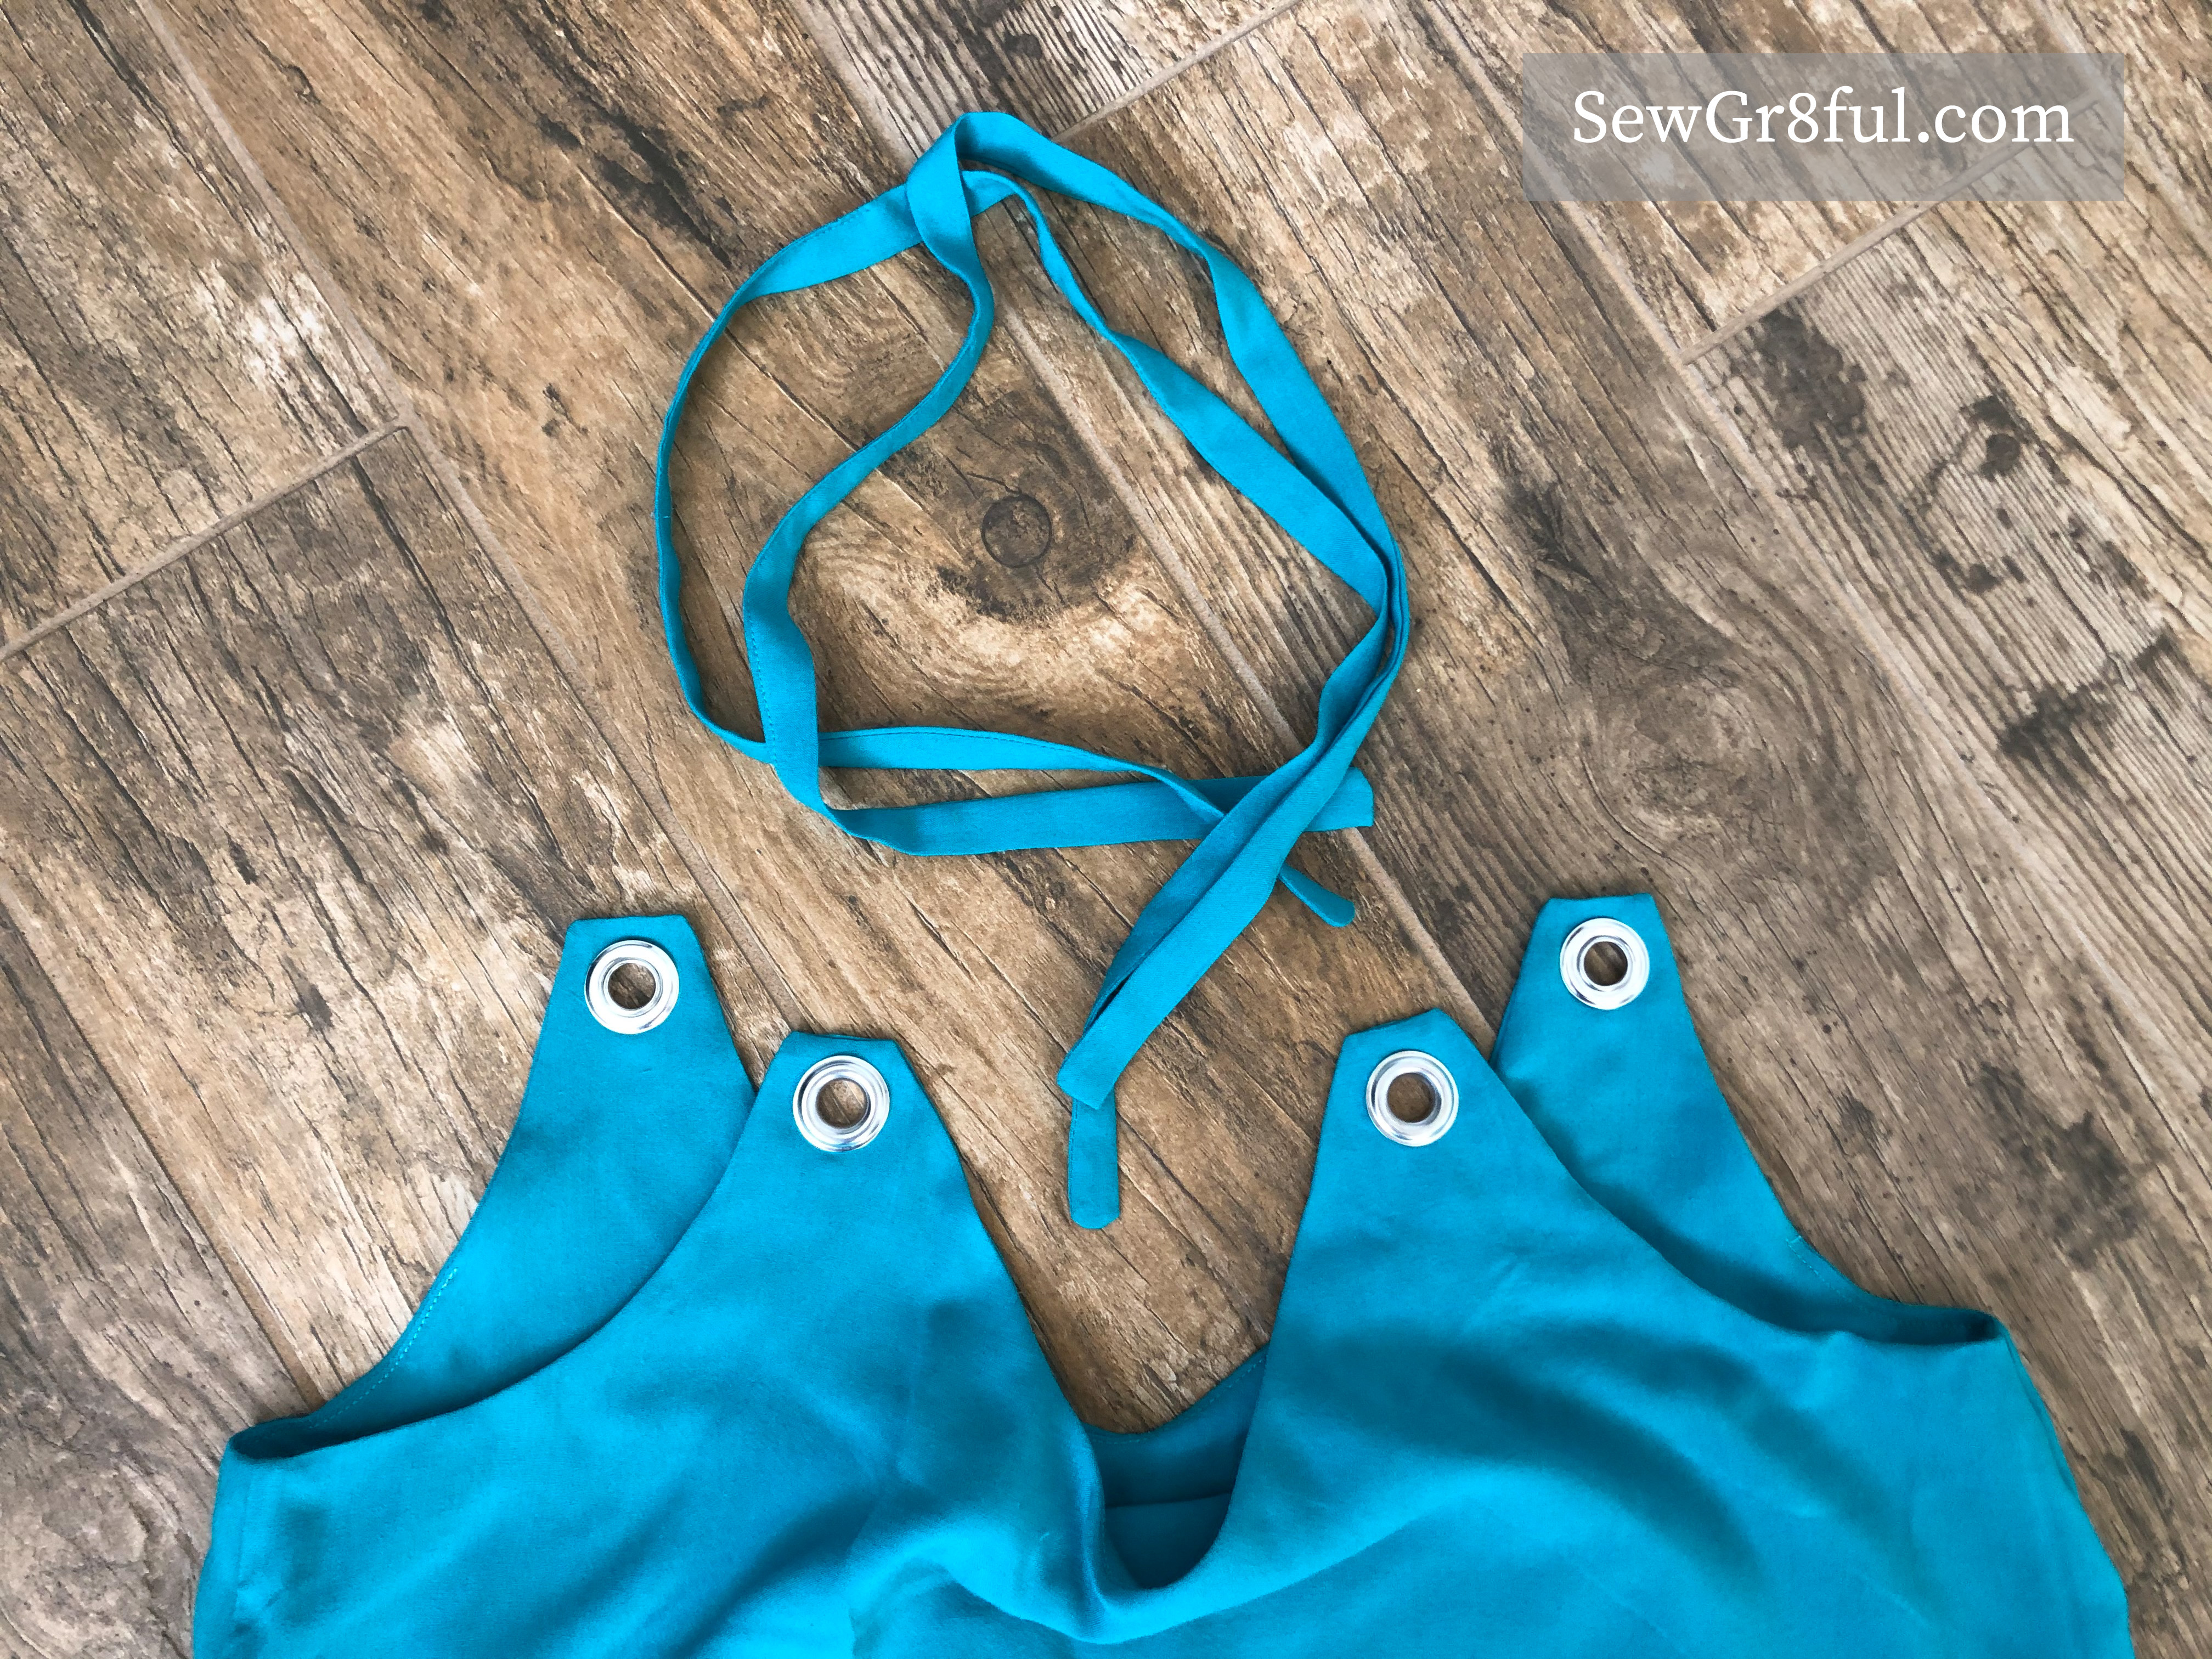
I was surprised at how quick it was to sew this grommet version and I am so glad I attempted it.

A17619AD-034A-461C-B294-E12C77E82629

I hope you enjoyed all my recent Ogden Cami’s and modifications.

True Bias has graciously given a copy of the Ogden Cami as a prize, for one of my readers. To enter just drop me a comment below, letting me know which one was your favorite?

Thank you for joining us on this Spring Fling Blog Hop and don’t forget to visit the other blogs !!!

Happy Sewing šŸ’•

Monday Sew Much Charm & Vlogger Sewing From Scratch

Tuesday –Ā  TPtheModestDoll22 & That’s Sew Venice

Wednesday –Ā  SewGr8fulĀ ( That’s me! ) & Sequoia Lynn Sews

Thursday –Ā  Let’s Go Hobby! & The Sarcastic Sewist

Friday –Ā  The Bear & the Pea AtelierĀ & Wildflowers & Whimsey

And now, her list

If you read my last post, it was about my son’s clothing list he “needed”. My daughter’s list was a little more conservative in its length, but now that I have completed it, she seems to need additional things. I kind of feel like she is playing me. Oh, just make a few things Mom. Oh, would you look at that, guess I need this now and ohh what about that?? Hey Mom, what is that fabric for? Oh do you think you could make me something in it too?? Oh Mom, that is so soft, it’s like your hugs… Okay, I made that last one up. You get the point though. She loves my makes and that is such an awesome feeling.

My kids love the fabric options from So Sew English almost as much as I do, so when she was making her list, she asked if she could shop for fabric on their site. She made her list, complete with fabric choices, and this is what she picked.

16A697F9-86FB-404C-BEE8-C5226F1DB85A

First up is this super fun Lilac Unicorn print Double Brushed Poly. Not only does it have unicorns all over, but it also has the foil stars. I tried so hard to get good pictures of the stars, and just couldn’t quite get it. She wanted a shirt to wear with leggings and jeans, but requested something a little different than what we had done before. I showed her the patterns I had already but hadn’t made for her yet, and she picked the Spice Cake Dolman from Pattern for Pirates.

8655B8C6-9C0F-48BA-A855-FA326A2C66D0

The Spice Cake is the girls version of their Pumpkin Spice Dolman for women, which just so happened to be one of the first tops I made myself. The pattern can be made with a short sleeve, 3/4 sleeve, or a long sleeve. You can choose a straight shirt length, curved tunic length, or a banded option with short or tall bands. For her unicorn shirt, she picked the long sleeve, curved hem tunic length.

For fun I did a quick time lapse video, sewing up this Spice Cake Dolman.

After my last time lapse, I had a few questions regarding the clipping I did to my seams when hemming. You can see it at about 1:32 in this current time lapse. Since I took my coverstitch out of time out and have been giving it another chance, I have found that I get less skipped stitches, if I clip into my seam allowance, and split my hems opposite directions. I do not clip all the way through, just up to the left needle thread. This also helps when I am hemming sleeves or pants, as it allows me fold at exactly the right amount. One other note about this time lapse. I usually iron my curved hems while I am folding them. I just did a finger press on this one, since my iron was out of commission. Ironing before stitching is definitely something I don’t like to skip, especially when doing curved hems.

To finish off her “first” list, she asked for two new pairs of leggings. She wanted something really colorful with lots of pattern, that she could wear with solid tops. She picked the Navy “knit print” double brushed poly for this pair.

9918772A-DF09-4278-94A6-275E842293CB

And for the second pair she picked this pretty Lilac scales print double brushed poly. The lilac dbp is only available in a bundle now, but there are some colorways of the French Terry scales, in yardage.

0D8DE8A8-5DDB-4DD6-B38E-75D54F65A7D9

For both pairs of leggings we used the Bonny leggings from Made for Mermaids. This is a pattern we have been using for her for a while, and she just loves how they fit. The pattern is free, has several length options, and also comes with a skirt, which she loves as well.

I should have known her list was going to grow, once I found the piles of clothing they hid when making their need lists. Guess I should start working on those “extras” soon. Although, I do have a few things on my “need” list, so maybe they will be next. šŸ˜‚

This post may contain affiliate links. This means, if you make a purchase through that link, I may get a % back, at no additional cost to you. Let’s be honest, we all know it goes right back to adding to my fabric stash. All opinionsĀ on this blog are my own.


My first sew in 5 weeks – Nicolette

I have been unable to sew for 5 weeks due to our DIY entire kitchen remodel. More on that in a later post. As this remodel was winding down I was able to sneak in a little sewing time this week and make the most amazing dress!

I am so blessed to be part of the team over at Sonia Estep Designs and we just launched the first pattern, Nicolette. Let me tell you about Nicolette. It has two neckline options ( v neck and scoop), three sleeve options ( tank, short sleeve, and cold shoulder short sleeve), and several length options. You can do a shirt, above knee, knee, and maxi length. If that isn’t enough, there is even a color blocked maxi and optional slit. I like how the back is cut mirrored for extra design options, easy sway back adjustments, and most important, squeezing a swingy dress out of less fabric.

The Nicolette covers the 00-22 size range and has an amazing feature I just love. You ready for this?? It comes with both the overlap pattern option and the edge to edge pattern option, plus A0. If I have to print at home, I prefer to use the edge to edge since my printer likes to mess with me and it allows me to just fold up the pattern quickly into a nice pile I can slip into a manilla envelope. But if you like your overlapping patterns, you can totally do that option too.

When this pattern was being created and tested, I made two versions.

CBFB2341-54A6-4572-9957-EE22DD341F8C

This blue above knee length tank, in a bamboo spandex from So Sew English Fabrics. I have worn this dress so many times, it’s not even funny. The pattern changed a little after this one, but to add a little more swing and get this look, you can just flare out your skirt portion a little.

My second one was this maxi.

26220ADF-1996-404E-A82C-62F34EE14147

I have been hoarding this ITY from So Sew English from last year. I knew it needed to be a maxi but was indecisive on which one. Nicolette won the day and adding that slit option really takes it up a notch for me. They don’t have this ITY in stock anymore, but there are so many other gorgeous ITY options that would be stunning as a Nicolette.

Now, for the one I made this week. I seriously had a small window of time to sneak in some sewing. If you saw my IG post, you probably saw me sewing it up at our makeshift kitchen counter/kitchen everything. It was such a fast sew that my husband ran to the hardware store for supplies and I made it in the time he was gone. I know, I’m impressed, I’m usually a super slow seamstress.

I saw a picture on Pinterest and it was my inspiration for using red. I’ve done red here and there and have branched out to include it more, but this was my first red dress. I was nervous. Turns out I like red and so does my family. Both my kids and husband complemented me on it when I was heading outside to take my pictures.


What Pinterest inspiration picture would be complete without trying to recreate the pose?? Ya’ll, I feel like I’m sniffing my armpit šŸ˜‚. Can I hashtag this?? #notamodel

I used a new fabric from So Sew English for this red version. It is Modal Ponte. Modal and Ponte are two of my favorite fabrics so I was really interested in trying this blend. I love it ! It doesn’t have the structure of Ponte, so no leggings, but it definitely has the smooth handling I love about Ponte. It has a little less drape than straight modal, and is a bit more opaque than regular modal as well. AND, it breathes so well! I really think I need to get a few more of the colors to have in my permastash. It sewed up so nicely, no curling edges like rayon spandex either. They have some left in stock if you are interested in checking it out yourself. Enabler Alert – So Sew English is having a mostly site wide sale until 7/6 midnite PST. Use code 4TH25 to get 25% off your order.

Since Nicolette just released, it is on sale as well. 50% off!! Until Sunday, 7/7 midnite EST. You can get it here.

Curious how to style your Nicolette? Look for my next blog post where I share the 7 ways I plan to wear my red above knee Nicolette.

This post may contain affiliate links. This means if you make a purchase through that link, I may get a % back, at no additional cost to you. Let’s be honest, we all know it goes right back to adding to my fabric stash. All opinionsĀ on this blog are my own.

Wrong this whole time but now I’m obsessed

You want to know what I learned during a recent pattern test for Annelaine Patterns?? I learned that I measured my side waist wrong, let’s say, around 2 years ago. I have been operating under the assumption I had an 8ā€ side waist when in reality I have a 9ā€ side waist. How is this possible and how have I not had major fitting issues? As for the fitting issues I usually add length to my shirts at the natural waistline, but for my overall height. Add that to looser fit garments that have less defined waistlines or slouchy fits, and I haven’t had any issues. Kind of like a, two negatives equal a positive, type situation.

In the case of this recent test though, the side waist measurement was extremely important. The top/dress was designed to be a slimmer fit and hit right at the natural waist, thus making my inch difference very noticeable.

Curious about how to measure your side waist? This is how. You know those stretchy selvedge pieces you usually throw away or let your kids tie things up with? Those work great for this, so grab two. Take one and tie off your upperbust. Then sing, ā€œI’m a little teapotā€, and when you get to the tipping part, make a note of where your side crease is and tie it off. You can also tie off where you think your waist is and move around for a bit, allowing the fabric to move to its natural spot, for those of you not into fitting musicals. Now that you have your two spots tied off, you measure from the upperbust one down to your waist one. Here is the important part and what I missed my first time. This measurement should be along the body, tracing your natural curve. Mind blown people. I had an extra inch hanging out in my curve.

Once I knew about my extra inch I was able to add it to the pattern and ended up with a wonderful fit. So wonderful that I have made 4 for myself, plus I hacked a 5th, and made two matching ones for my daughter. I’m totally obsessed !!

The pattern is the Lexington and is available in womens sizing (00-30) and girls (9 mon-20). It has several options so you can decide which look you prefer and allows for year round wear.

BCRC1583

For this one I used thisĀ floral vine rayon spandex from So Sew English. I chose short sleeves, scoop neckline, the waist cutline for the bodice and the skirt is the subtle hi-lo peplum. It was the perfect top to wear with my new pair of hunter green ponte (available at SSE)Ā Peglegs. I have been wanting a green pair for a while so I was really excited I finally could make them and get them in my closet.

CXYE9864

For my second one I went with this gorgeous floral Amber bulgaree ITY. I got it last year from So Sew English and I can’t believe there is still some in stock. I just love how it gathers and drapes. Combine that with the above knee subtle hi-lo skirt and I am in love!! I chose the sleeveless, empire cut bodice, with a scoop neckline.

BJHX9407

This third one I saved for ā€œlastā€.

HHFU8607

I’ve had this ombre blue Venezia ITY in my So Sew English stash, for quite some time. I hadn’t found the right pattern to showcase the gorgeous ombre so it sat in my cabinet. Once I had the first two done I knew this was the right pattern for it. I did the sleeveless, empire bodice with a scoop neckline. I also did the optional side slit for a little extra. I LOVE it!! I’m so glad I saved the fabric for this floor length maxi.

XXCV7849

My daughter saw my Lexingtons and asked for a matching one. Since I didn’t have enough of the fabric I used for my first three, I ordered some double brushed poly fromĀ Amelia Lane Designs and made us a matching pair. This solid navyĀ compliments the Santa Fe print beautifully and she loves her Lexington as much as I do. These are both the sleeveless, empire cutline bodice. Mine is the scoop neckline and hers is a standard. Both are the floor length maxis.

KZCF9900

Not only have I found an amazing pattern that will get lots of use in our house, but I also learned something new about measuring my body to ensure a better fit. I call that a sewing win.

*Enabler alert*

The women and girls Lexington is on sale for 40% off until Wednesday February 13th, 12pm mst.

Amelia Lane Designs is having a 20% off site wide sale until Sunday February 17th. Code PERFECTPAIRĀ  Plus they are running a shipping special that all orders over $40 ship for $10 (international excluded) WOWZERS!

This post may contain affiliate links. This means if you make a purchase through that link, I may get a % back, at no additional cost to you. Let’s be honest, we all know it goes right back to adding to my fabric stash. All opinionsĀ on this blog are my own and I have a lot.

Sewing for my son – Sawyer Shirt

My son loves when I sew for him. He enjoys picking out his pattern and shopping in my fabric stash. His favorite part is picking options though. I just love his reasoning behind what he picks too. This last sew was the newly released Sawyer shirt from Annelaine Patterns. I showed him the pattern and got his resounding approval. ā€œMom, I like that one, and I need a new shirt because I’m 5 now and I’m bigger.ā€ It’s amazing all the things that have changed, now that he is five.

Annelaine patterns has a large size range (6 mon – kids 20) which I particularly love. Kids grow so fast and I like being able to use the same pattern repeatedly, it really makes sewing economical. The sawyer shirt is loaded with some great options too. There is the classic tee version, with sleeveless, short, standard or faux layered long sleeves. You have an optional placket, color blocking, lined or unlined hood, and pockets (inseam or circular kangaroo). You can either hem or cuff your sleeves and hem or band your bottom hem. I have no idea how many combos you can make with all of those options, I’d rather sew than do the math, but it really allows customization and talk about maximizing a patterns use even more.

The options my son picked were the classic tee, faux layered long sleeve, cuffed sleeves, and regular hem. Are you ready for his reasoning?? He likes hoods but since I just made him his Bubby and Bee hoodie, he wanted, ā€œsomething different this timeā€. Then he said he likes two shirts on the sleeve but doesn’t like how, ā€œthe under shirt gets all twisty in my armpits and I can’t do this.ā€ At which point he jumped up and down and waved his arms around. Ha ha ha, guys, this kid cracks me up. As for the cuffed sleeves, that was because they ā€œhold up my sleeves when I’m eating foodā€, and the regular hem, he just liked the line drawing. Makes total sense to me.

A4ED15CF-2399-42F1-A09C-CE9F1E66B670.JPEG

Now on to his fabric choices. I will usually show him a few options when I’m ordering and allow him to pick some things for my stash. Then he has some options to choose from when we decide to make him something. He knows where most of his picks are located in my stash so it makes it quick for choosing. This time he picked the blue corey stripe double brushed poly and a solid black double brushed poly to go with. He really likes how soft double brushed poly is and I love how well it holds up. With the amount of washing his clothes get and the things that end up getting washed with his clothes (rocks, tissues, toy cars, etc), I appreciate things that stay bright and don’t get all pilly.

The best part of sewing for my son is his reaction when I finish and show it to him. He usually runs up and hugs it and asks if he can wear it. He has learned that I like to get pictures before he wears them, so he usually asks if we can do pictures, right now, so he can have it immediately.

Pictures with a 5 year old active kiddo can sometimes be a challenge and this time he asked if he could do a video instead. Who am I to say no if it helps him get his wiggles out? His video turned out so cute I just had to share, and note, no armpit twisting while he jumps around with his arms waving.

Enabler alert – the Sawyer shirt pattern is on release sale until Feb 5th, so be sure to check it out before it ends. All fabric is from So Sew English Fabrics.

977A9E09-A105-46E5-8575-E469D0E76E5A
Love this faux sleeve detail!

This post may contain affiliate links. This means if you make a purchase through that link, I may get a % back, at no additional cost to you. Let’s be honest, we all know it goes right back to adding to my fabric stash. All opinionsĀ on this blog are my own and I have a lot, ha ha ha.