Twining From Afar

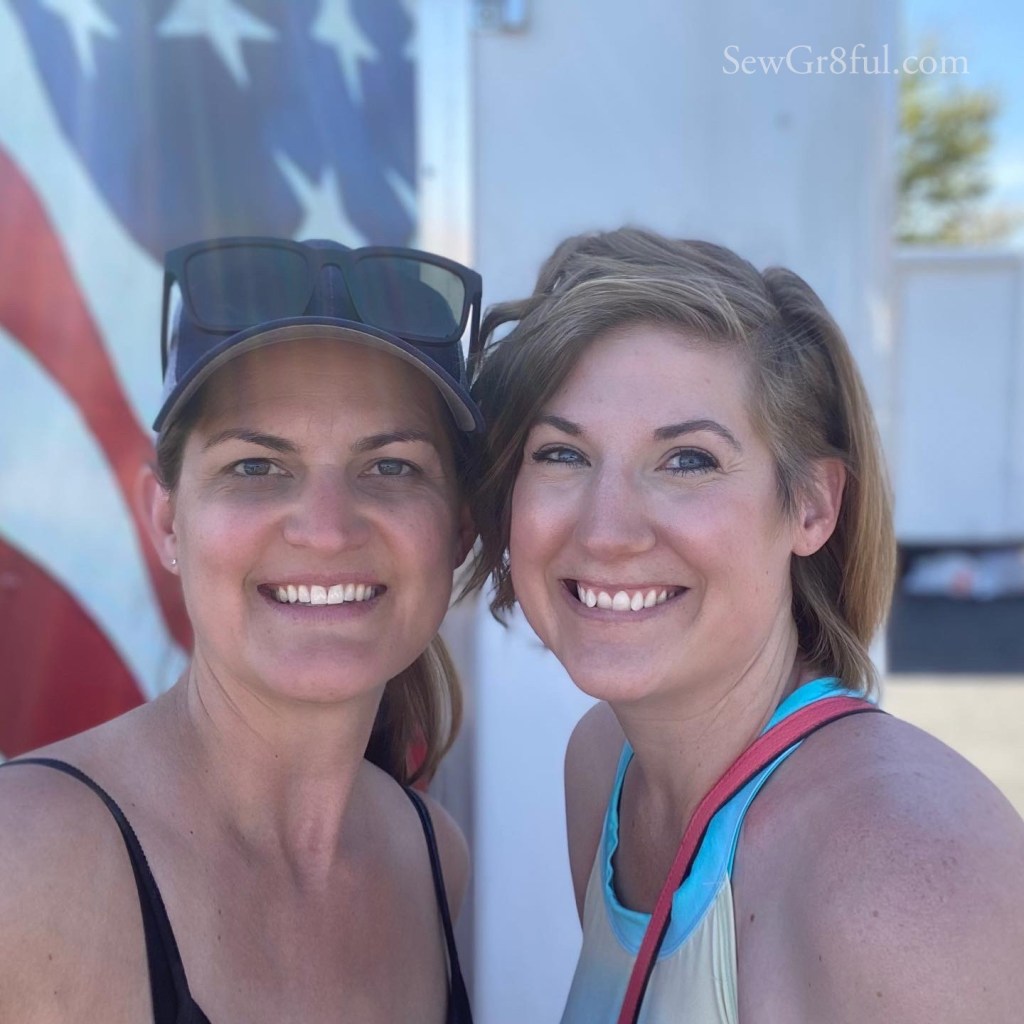
A few months ago I was scrolling and came across shirts that had funny sayings and was sending them to my friend, Afton. One in particular caught our attention and we couldn’t stop laughing about it. Since we both sew, in fact that is how we met, we decided it would be fun to make some for ourselves and twin.

We got to meet in person earlier this year!

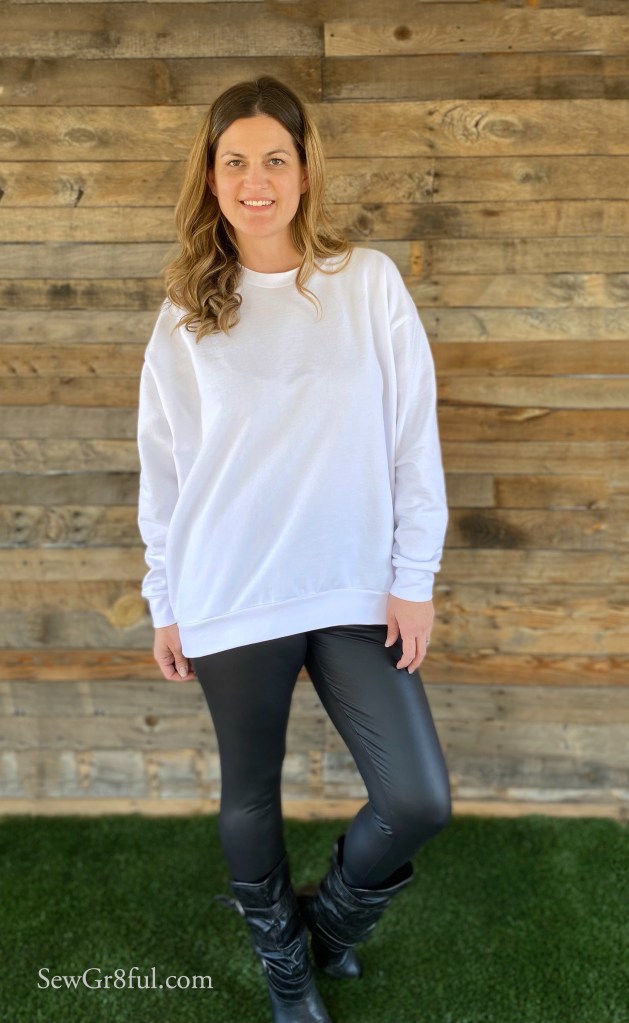
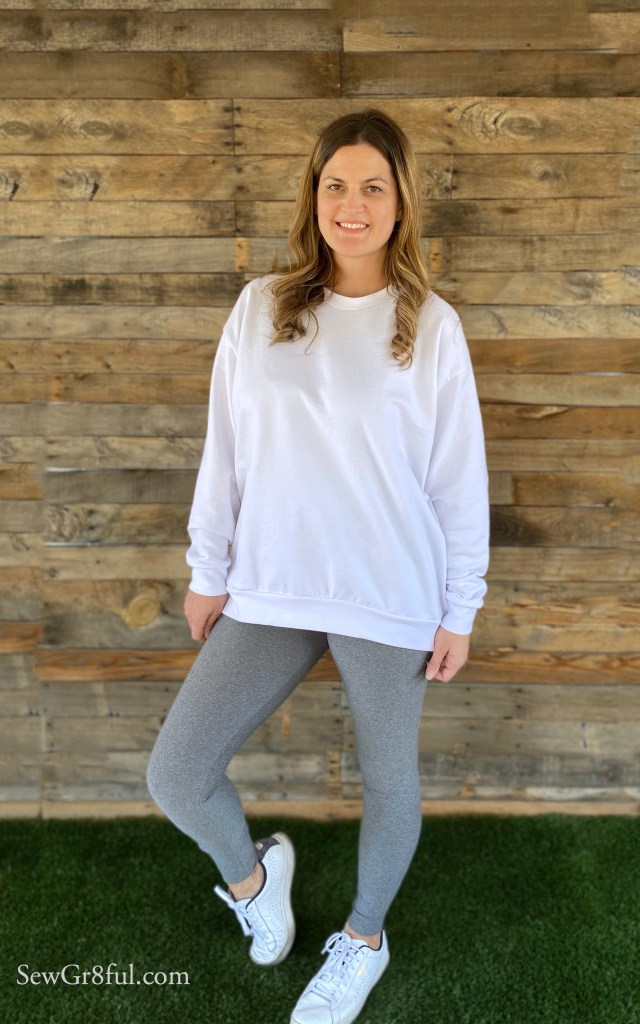
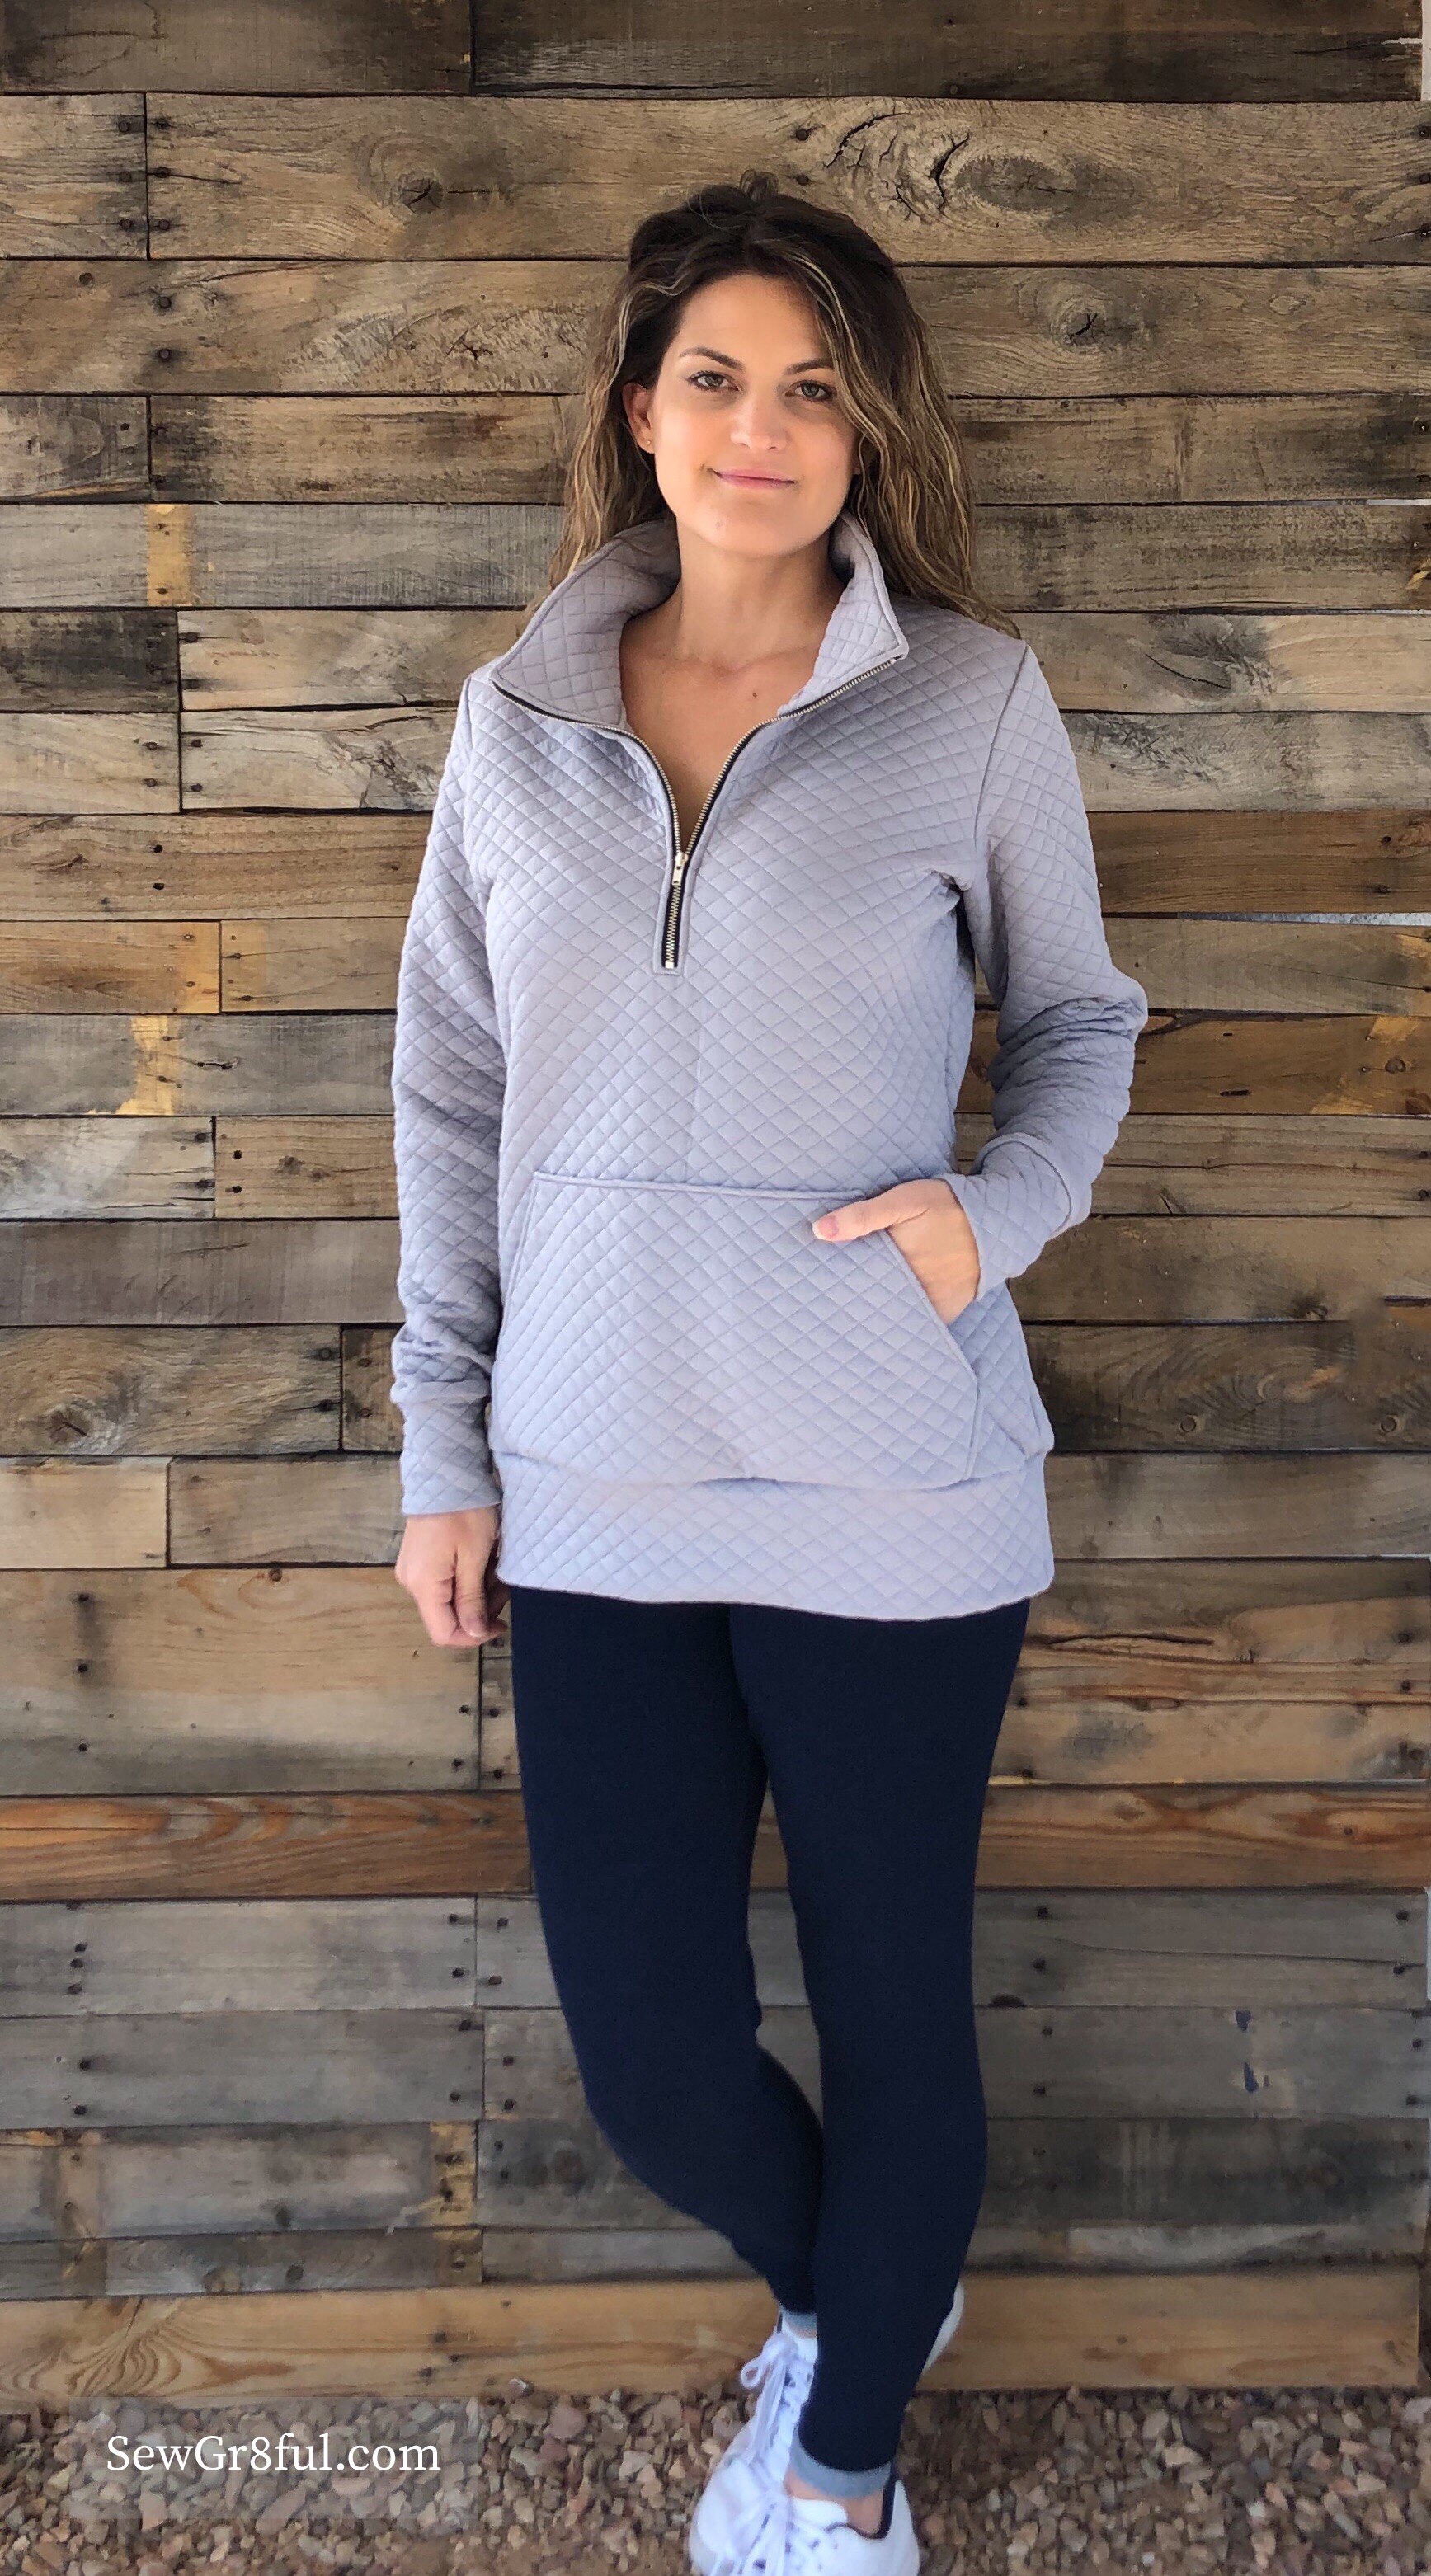
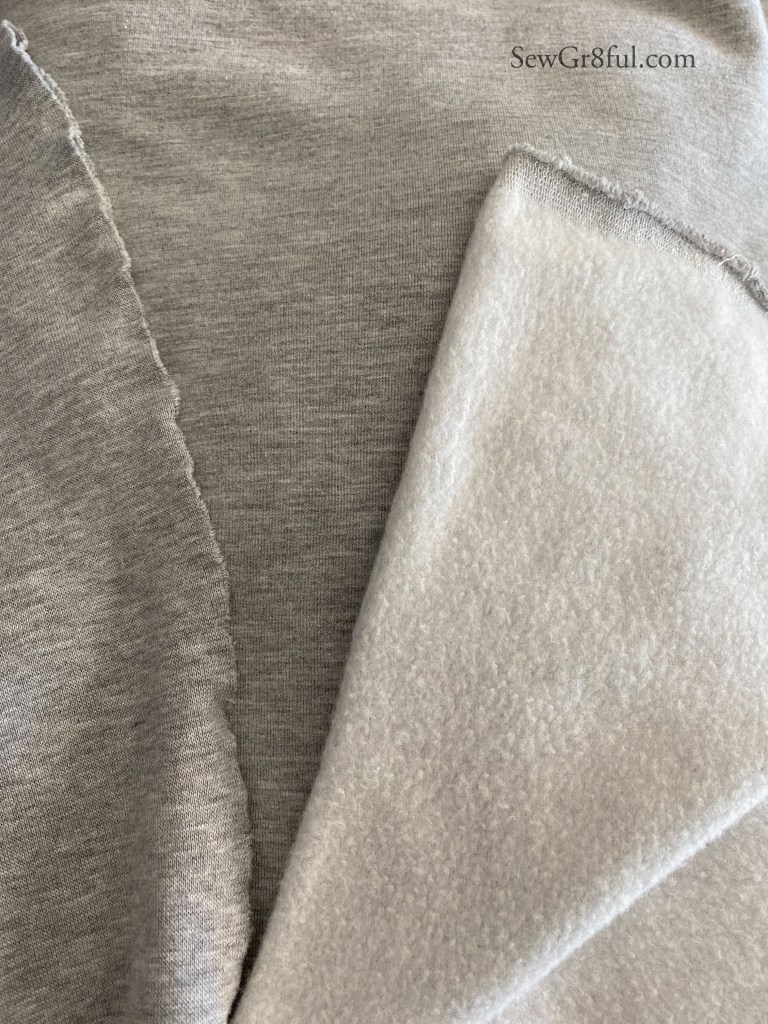
We started discussing fabrics and patterns. Afton had heard great things about the bamboo cotton spandex sweatshirt fleece and coordinating ribbing from Raspberry Creek Fabrics. We looked at it and it seemed like a good option for the top we had in mind, and perfect for the coming cooler weather. We picked the heathered grey color for both the fleece and ribbing.

This was my first order with RCF and I was excited to try out something from them. When the fabric arrived I noticed right away how soft and squishy the sweatshirt fleece was. It has great stretch as well, which is a requirement for so many patterns, and as we hadn’t decided on a pattern yet, I wanted to make sure it would work for multiples. The ribbing wasn’t super stiff like some I have come across in the past, and that was a nice feature for me, because my neck is sensitive after a surgery years ago.

Then came the pattern selection. It is surprising how small of an overlap we actually had in our “sweatshirt” type patterns. We looked and looked and nothing seemed to fit what we wanted. Either it would need to be sized up several, changed from a hood to a neckband, reshaping the bodice, the sleeves were wrong, etc. Then Greenstyle Creations posted a sneak peek video on their Instagram, of a pattern in the works. It looked perfect!!

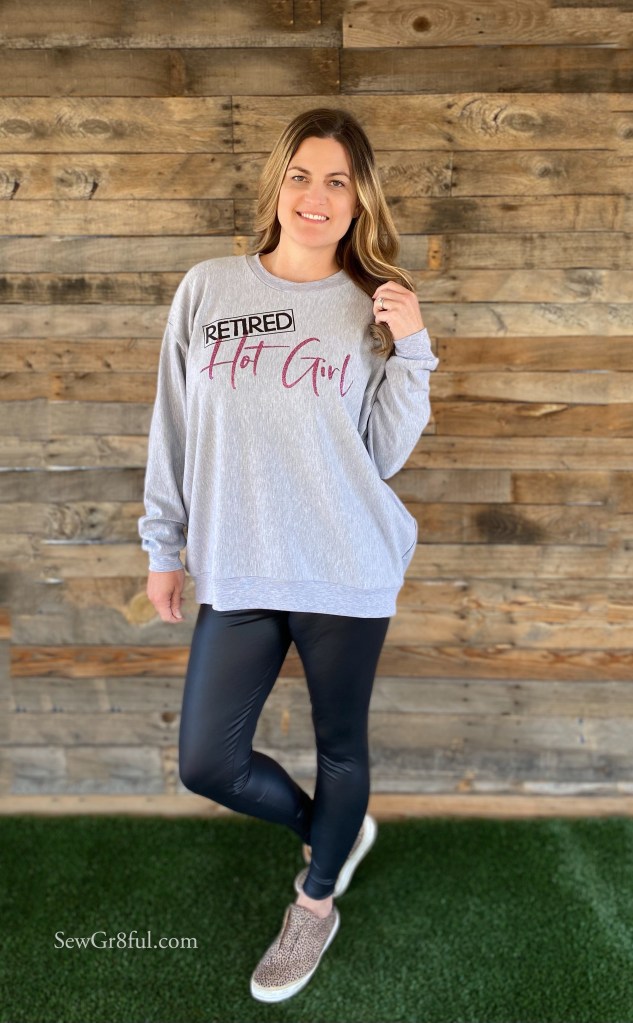
As Afton and I are both in their promotion/tester group, she asked about the testing and release timeline of it. It was meant to be. We were both able to test it, and it was released, just in time for our plans. The pattern is Sav’s Sweatshirt, in the regular length.

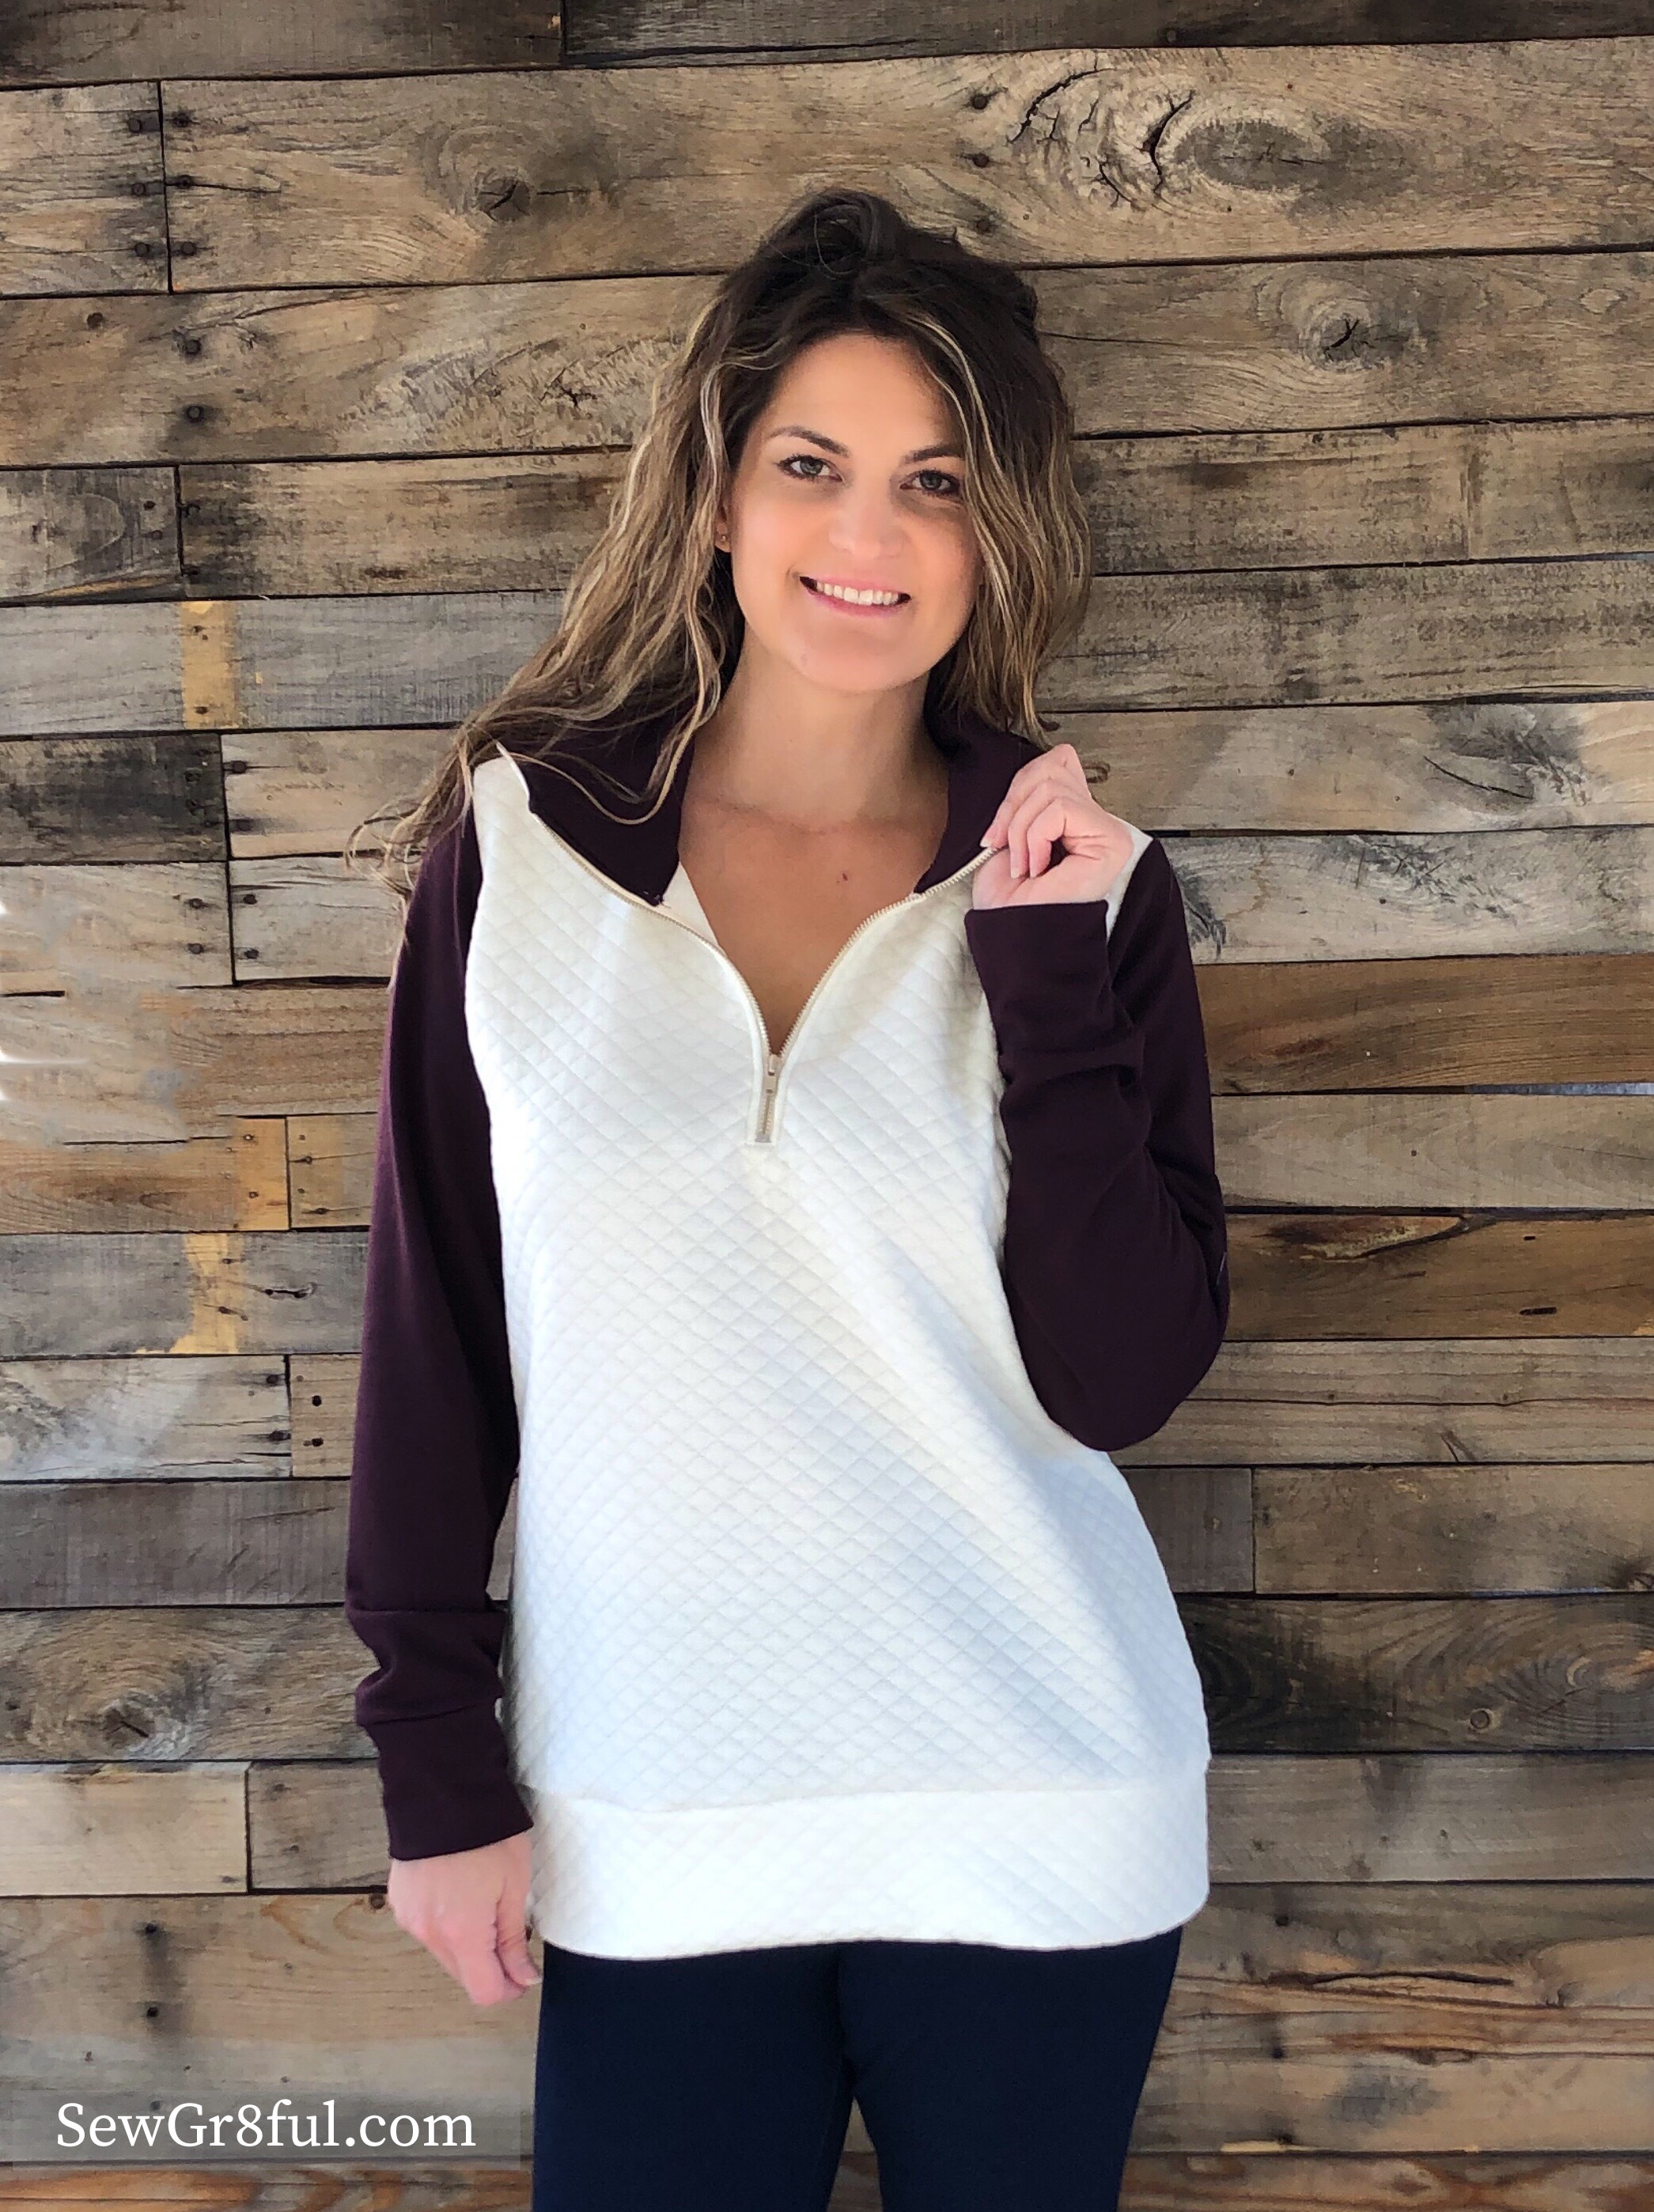
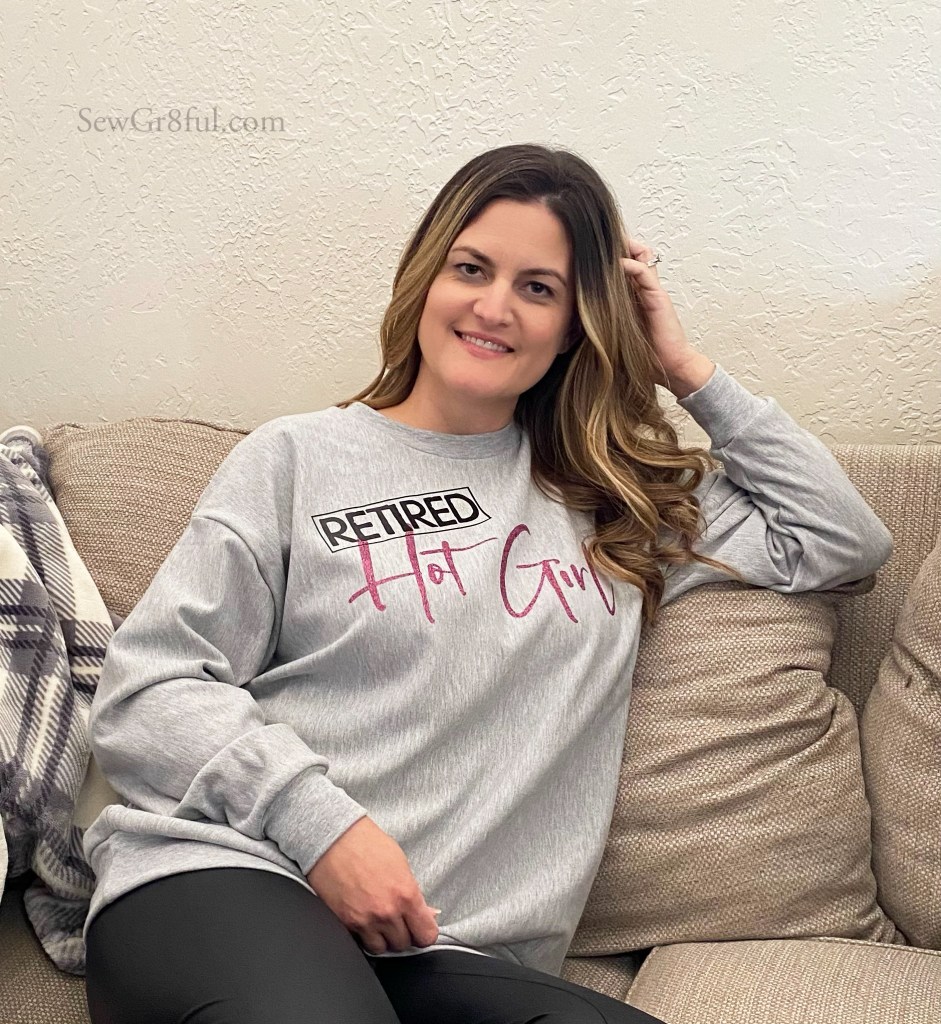
Sav’s Sweatshirt is designed for fabrics with minimal to no stretch, and ribbing for the neckband, hem band, and sleeve cuffs. You can read about my non stretch version here. BUT it also can be done with fabrics that have more stretch and so it worked perfectly with the fabric we picked from RCF. I’m glad the fabric has four way stretch and the pattern requires minimal, because I cut my bodice out with the greatest direction, not realizing that the heathering actually would be vertical. Afton cut hers the opposite way ( You can read about her version over on the RCF blog), and they both turned out beautifully.

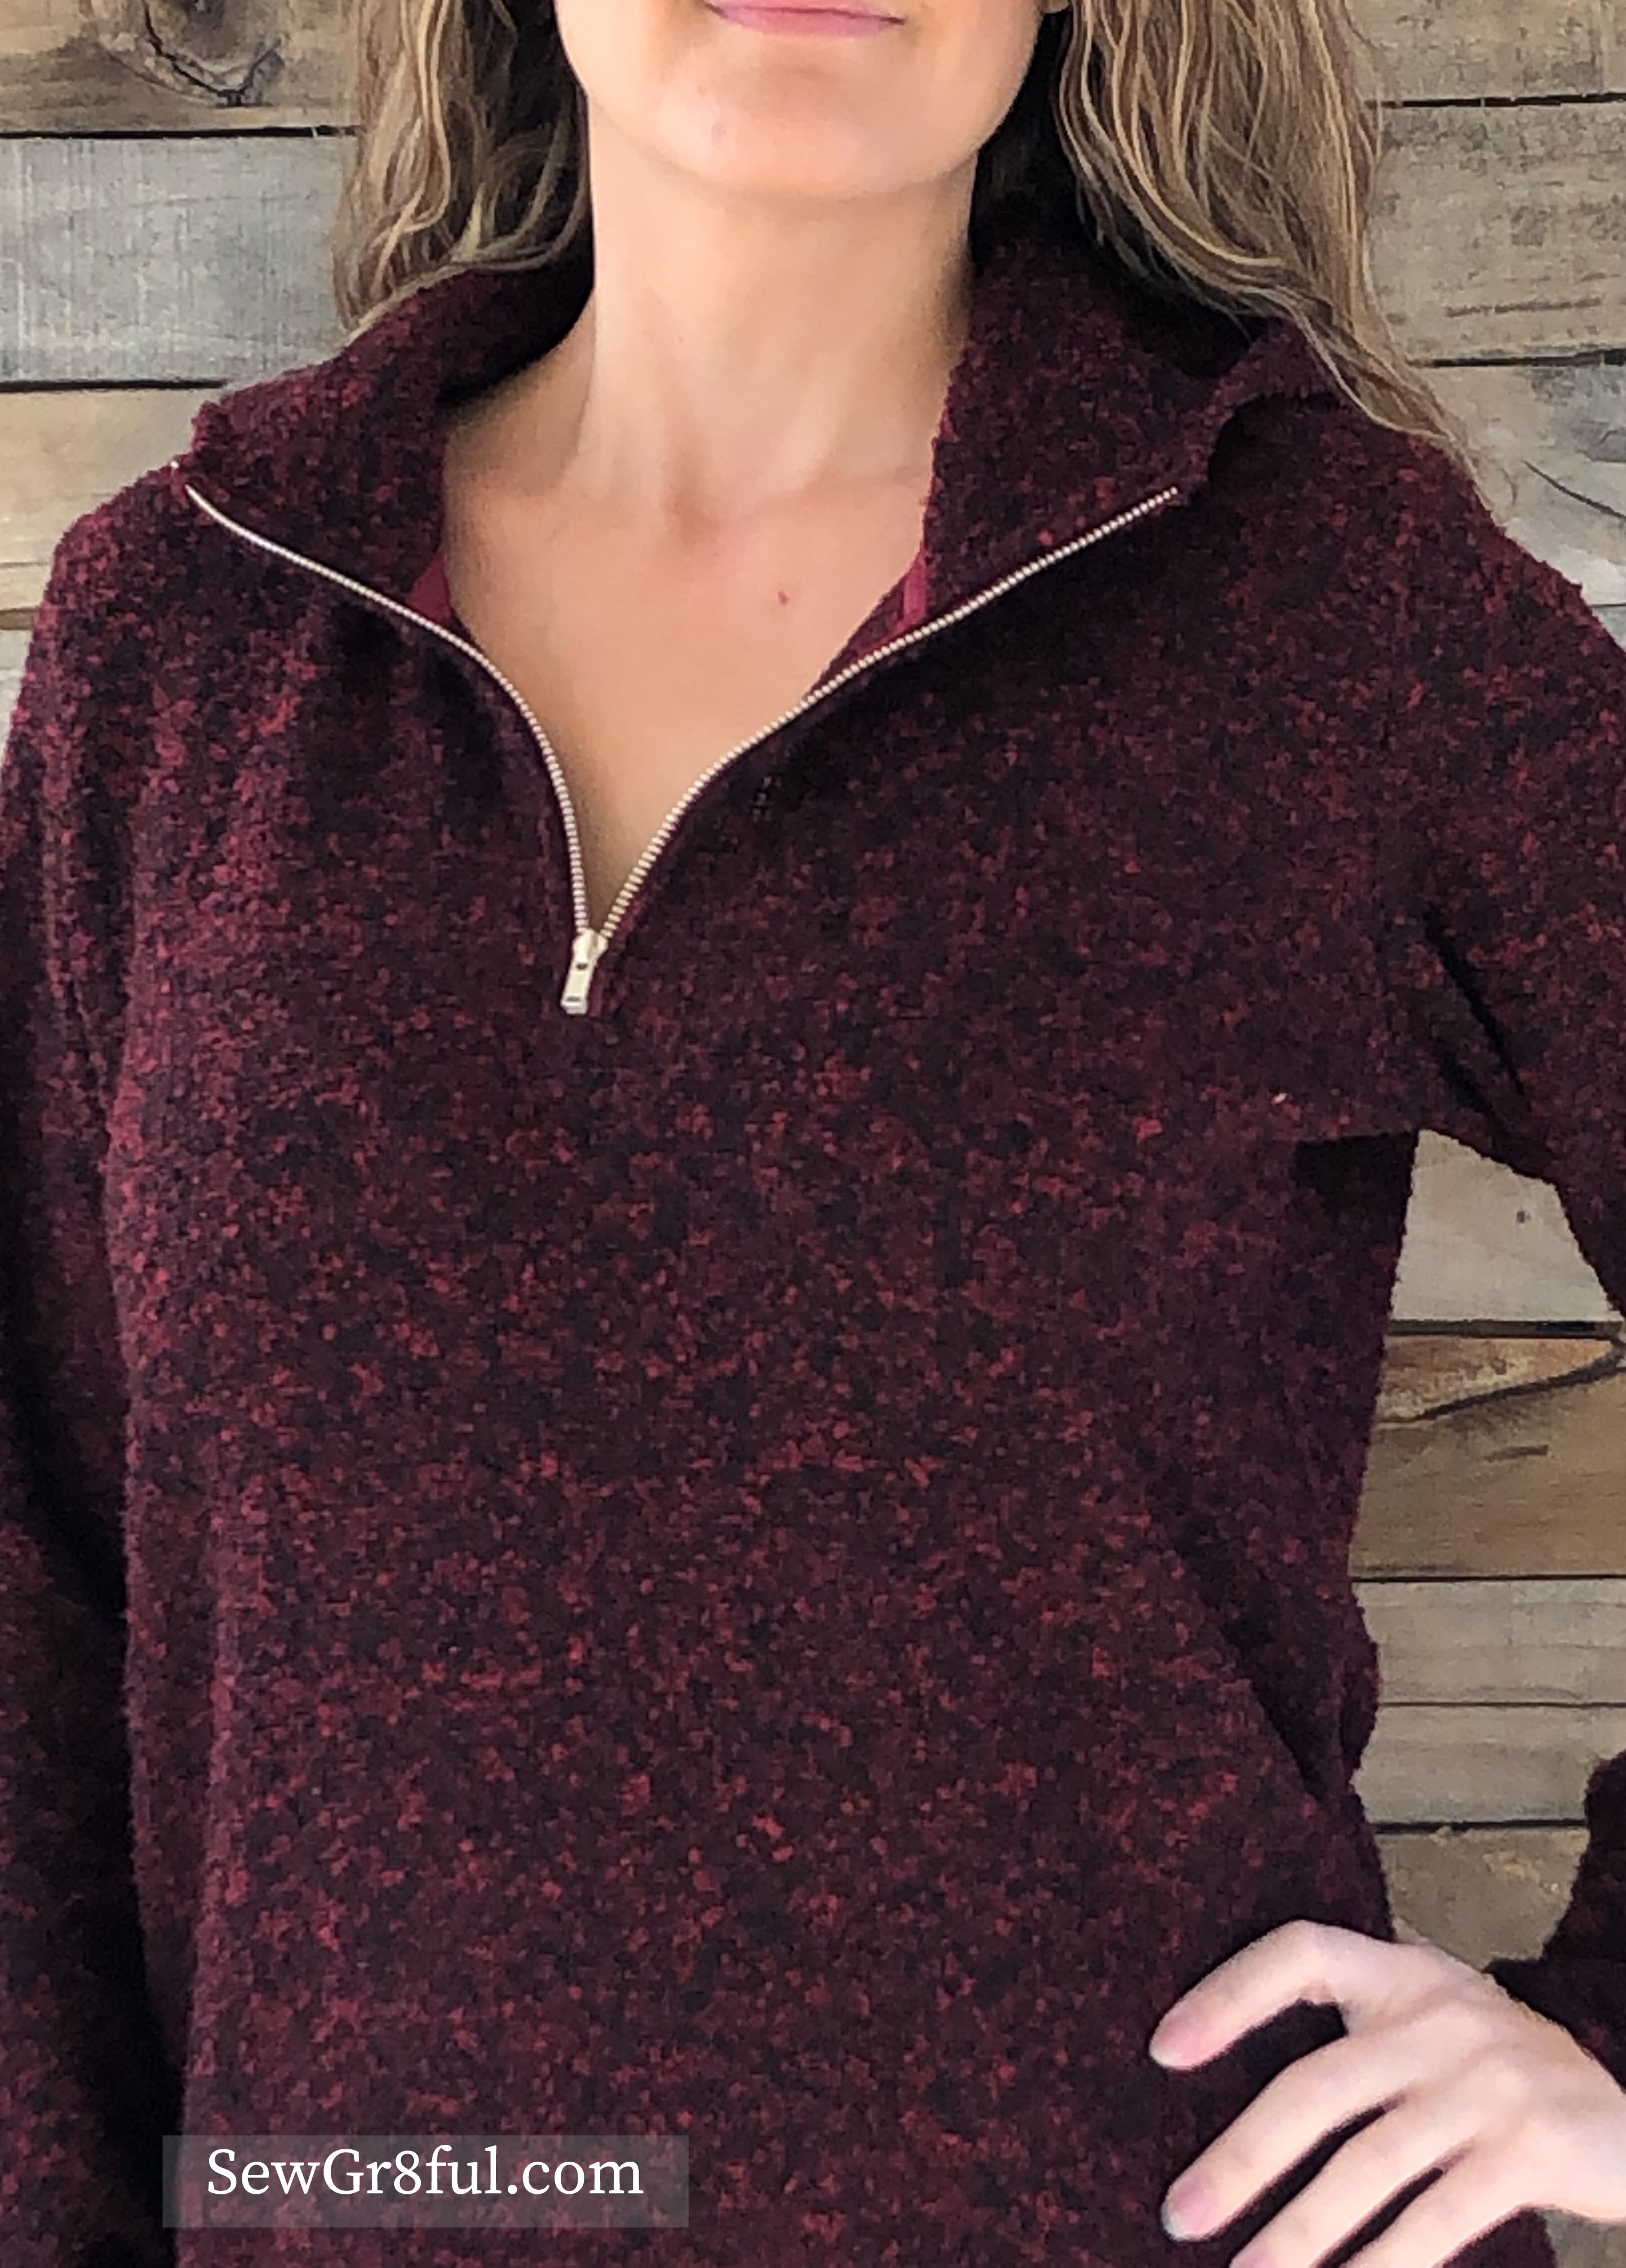
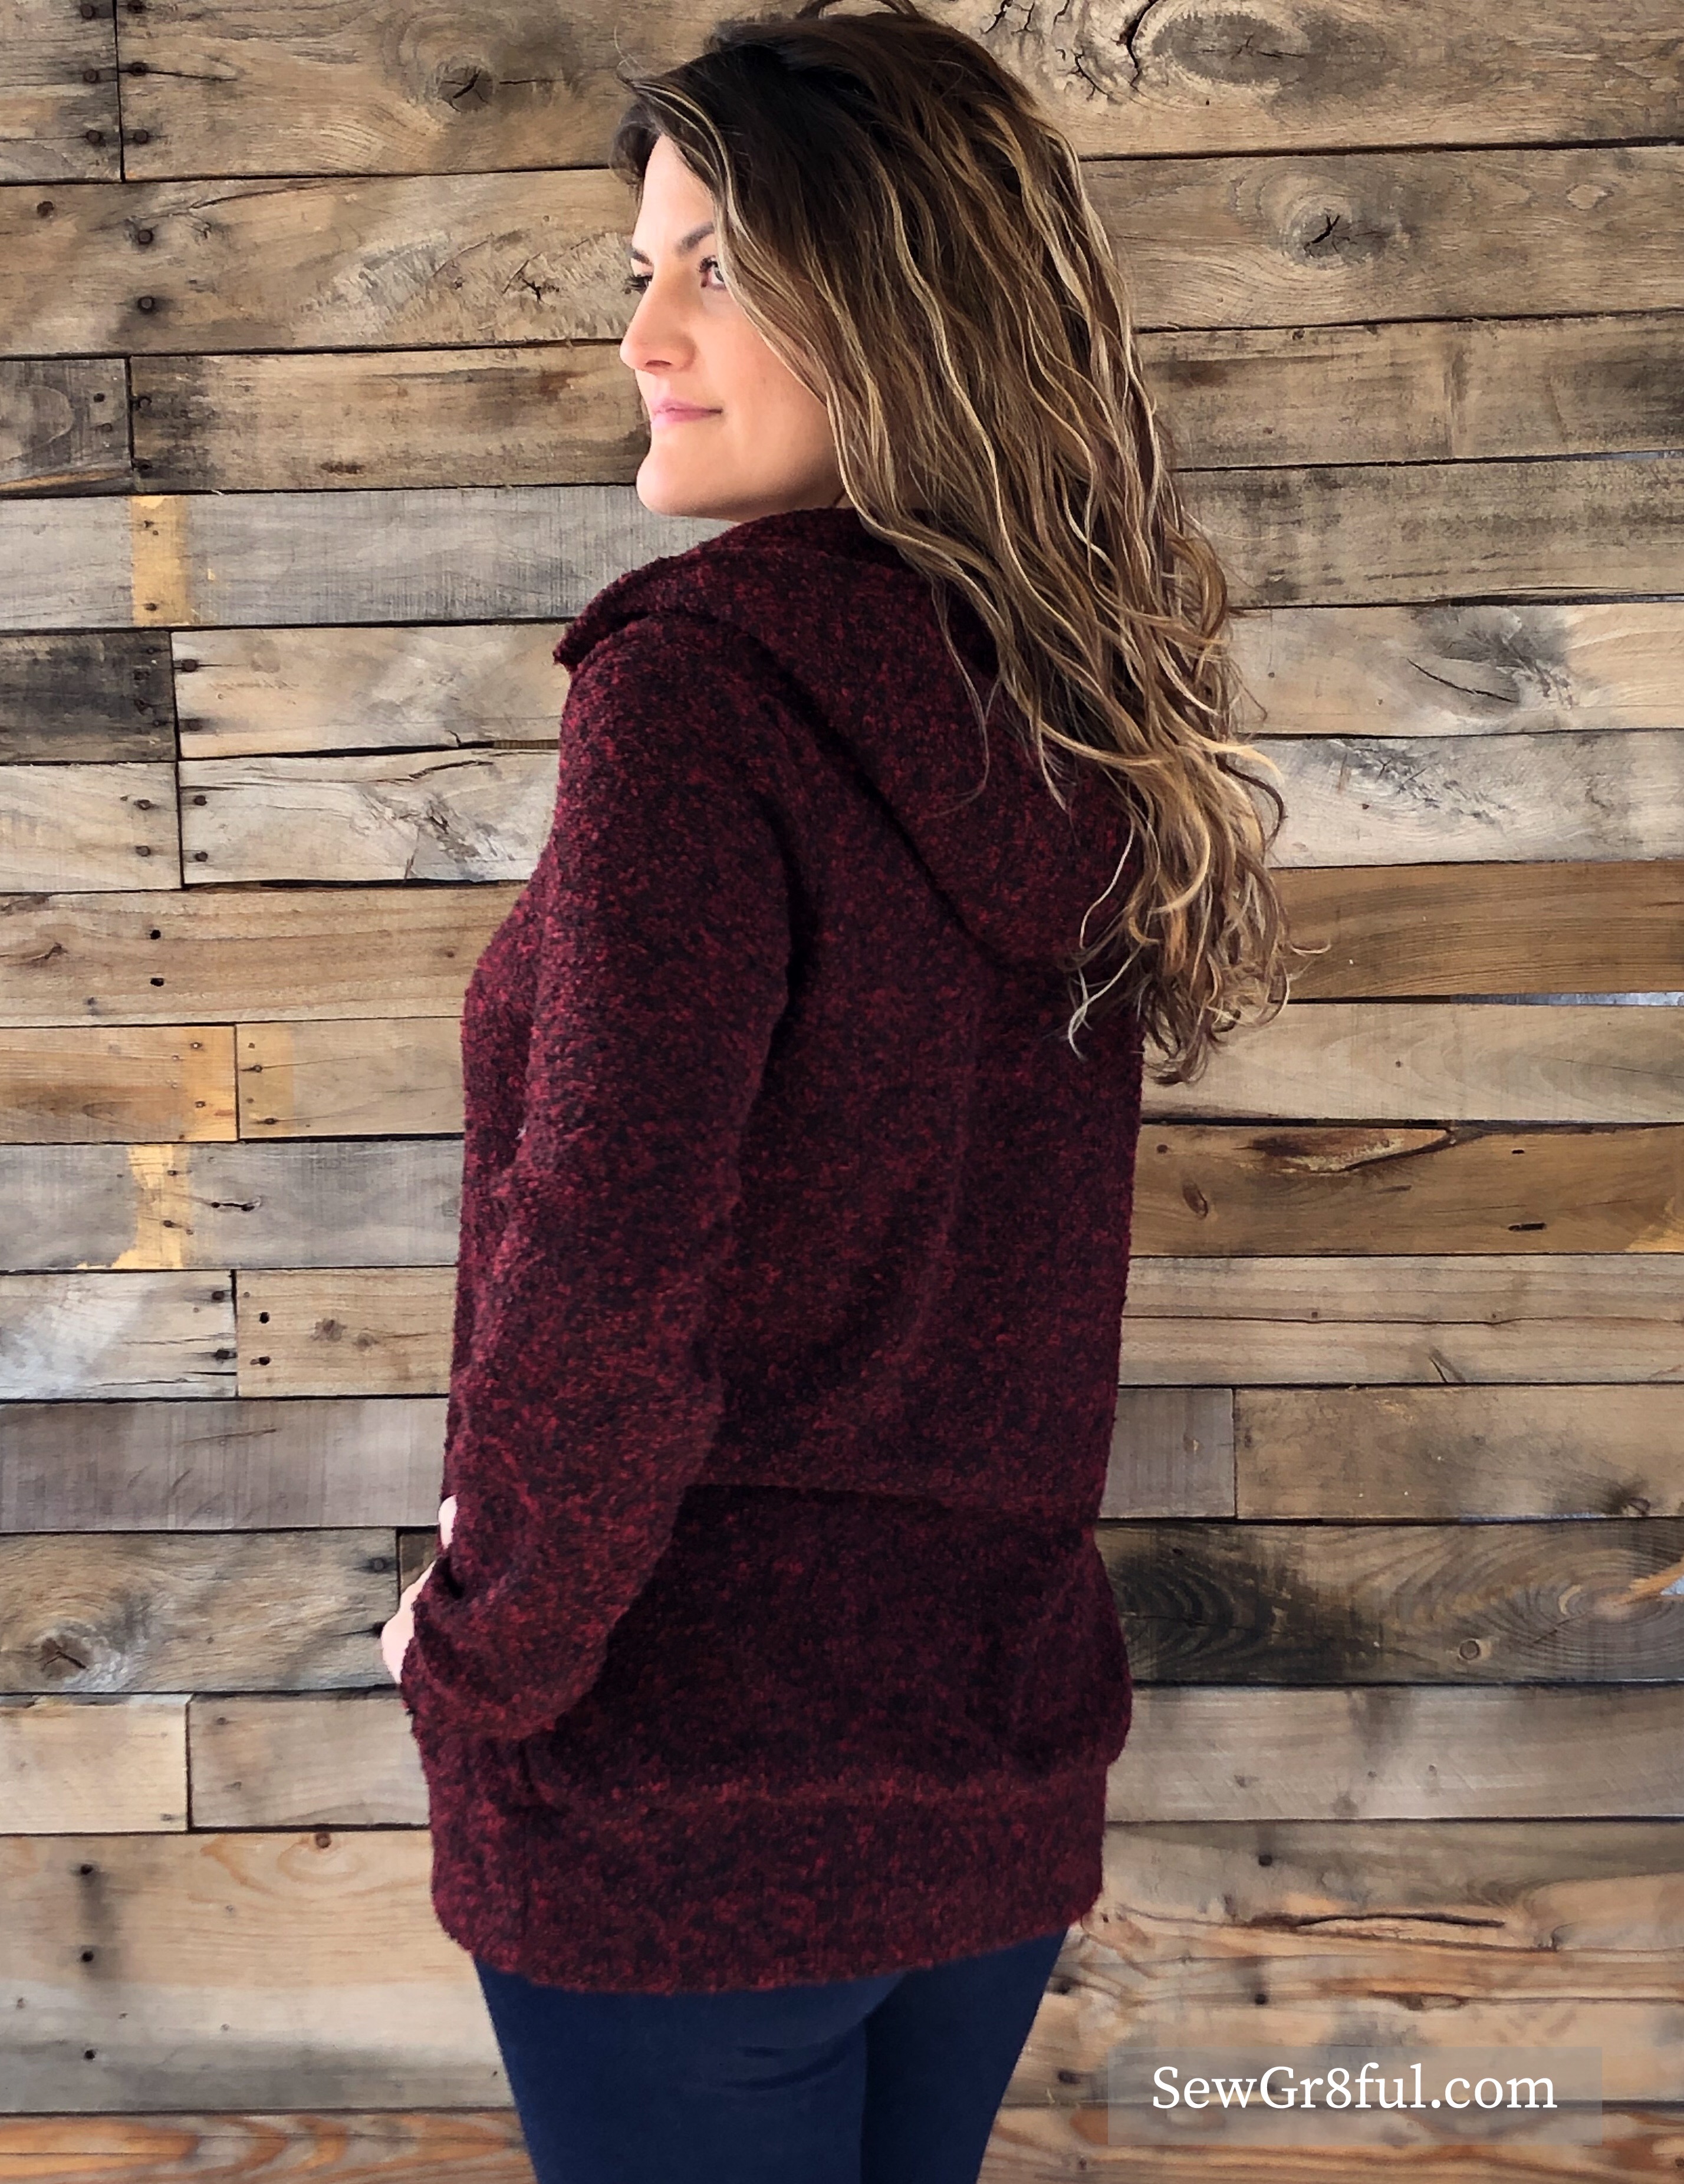
So what was this super funny saying we decided to use?? I present to you, Retired Hot Girl. 🤣

We all try to feel our best, and for some that means showering and doing our hair, wearing makeup, getting dressed, etc. But as a Mom, or with my health issues, there are days where those things just don’t happen, and I feel less than my best. That feeling is “retired” and I just want to put on something comfy and relax.

I had heard people saying “Hot Girl Summer”, so naturally I had to look up what that meant. The short of it is that feeling of living your life, unapologetically being you, and having a good time. I can get onboard with that! But usually after I have days like that, I need to rest and take it easy, especially in the winter.

So while the saying, Retired Hot Girl, can have different meanings to different people, to me it is feeling relaxed, comfy, and chill, with lots of laughter. And twining with Afton, in this sweatshirt, fits that bill to the tee.

Pattern – Greenstyle Creations Sav’s Sweatshirt

Fabric – Raspberry Creek Fabrics Bamboo Cotton Spandex Sweatshirt Fleece and Bamboo Cotton Spandex 1×1 Ribbing

You can see more of Afton’s creations on her Instagram and read all about her version on the Raspberry Creek Fabrics Blog.

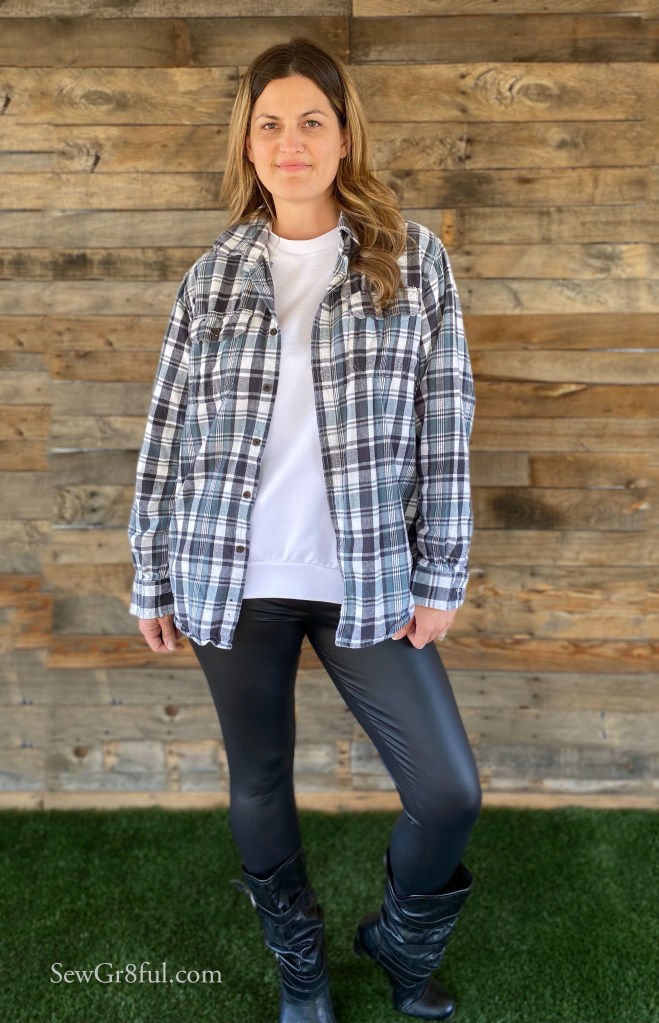
We used Black and Currant Glitter HTV from 143vinyl.com

This post may contain affiliate links. This means if you make a purchase through that link, I may get a % back, at no additional cost to you. Thank you for supporting my sewing šŸ’•

New Sweatshirt – Styling Fun!

I have been looking for the perfect oversized sweatshirt for a while, and I think the newly released Sav’s Sweatshirt from Greenstyle Creations, is pretty dang spot on.

This sweatshirt is made for those warm, minimal to no stretch fabrics, but can also be used for something with a higher stretch. Which means you can use those nice and thick sweatshirt fleece fabrics and soft ribbing for the neck, hem, and cuffs.

I have made a few of these and have fabric on the way for a few more, but I really wanted to try out different looks and styles with this simple white one.

First I tried it on with my regular skinny jeans and white tennis shoes.

I like the simple, almost sporty feel I get with this combo. It’s perfect for errands, grocery shopping, just every day type things.

Then I decided to try out my faux leather leggings. Which I actually really love with it! It changes it to a more glam relaxed look, and I have to say, it was even more comfortable than the jeans.

Perfect length for just a little shaping of the rear too šŸ˜‰

I had to try it with my scrunchie black boots, and I think it would make a nice casual dinner out outfit, with a little jewelry.

Since its shackett season, and I haven’t had time to make one, I just borrowed my husbands flannel shirt and threw it on over it.

Same outfit, but with my black boots. I like the boots with it, but I’m kinda thinking I’d prefer some boxier, maybe lace up ankle boots, a bit more. What do you think??

This one is with my athletic leggings, and I know I’m going to be wearing this for all the dog walks, chilling around the house, and running errands.

I have to say, I was surprised, but my favorite outfit was pairing it with the faux leather leggings and white tennis shoes. It is ridiculously comfy and I feel great in it!

How would you wear it?? Please share, I’d love to have more suggestions for wearing this amazing sweatshirt!

Pattern (On sale along with the rest of the patterns for 35% off. Sitewide ends today 11/30 and then just Sav’s Sweatshirt will be on sale for a few more days) – Sav’s Sweatshirt from Greenstyle Creations

Fabric – Solid White Heavy Cotton French Terry from So Sew English Fabrics

Ribbing is Cotton Rib Knit 1×1 from Joanns

This post may contain affiliate links. This means if you make a purchase through that link, I may get a % back, at no additional cost to you. Thank you for supporting my sewing šŸ’•

Cozy Cardigans for two

A few weeks ago we had a storm blow through and it rapidly dropped our temps for a few days. It was so nice and it totally put me in the mood for Fall sewing.

I was looking at fabric and my daughter “happened” to be looking over my shoulder and saw the Purple/Ivory Leopard Brushed Hacci Sweater Knit I was considering. She thought it was cute and asked what I was going to make. Then proceeded to ask if I could make her one as well.

I was going to make the Calgary Cardigan from Pattern Niche. They only have the adult sized pattern, but since my daughter is starting to fit into some adult patterns, I decided to see if it would work for her as well. She fits perfectly into the smallest size.

She isn’t tall enough so I needed to remove some height. Fortunately with the amount I needed to remove and the shape and multiple length options of the cardigan, I was able to cut the hip length and it was the perfect tunic length for her. No other mods were necessary which made it a really quick adjustment.

Options Line Drawing From The Calgary Pattern

The Calgary has so many options, you can use the same pattern to get a variety of looks.

We chose the standard bands for ours and we love how they turned out! They are so cozy and perfect for cooler weather. Hopefully we get another storm soon so our temps drop again, in the meantime these will be getting worn in the early mornings.

She may be getting into adult patterns, but she still fits under my arm 🤣

Something to note, we usually wear thin long sleeve shirts, tank tops, or short sleeve shirts under most cardigans. This pattern could be a little snug of a fit in the arms, if you were wearing something more substantial under it. You definitely need to pay attention to the required fabric stretch percentage of 35% or more.

Pattern: Calgary from Pattern Niche
Fabric: Purple/Ivory Leopard Brushed Hacci Sweater Knit from So Sew English Fabrics

This post may contain affiliate links. This means if you make a purchase through that link, I may get a % back, at no additional cost to you. Thank you for supporting my sewing šŸ’•

Mix and Match – For my Mom

A long time ago, (Pre covid), my Mom showed me two skirts she had and loved, and asked if I could recreate them for her. My parents were going on a cruise and the skirts would pack light, small, and resist wrinkles. We discussed fabric options, she looked at my stash, and we placed a fabric order for three separate skirts. One skirt would be a single skirt and the other two would be reversible.

The solo skirt would be made from ITY and the two reversible were from rayon crepe (crinkle woven).

The fabric arrived and I got to work on the skirts. I finished the solo one and got the first reversible one done, up to the hemming fit check. Then covid hit, their cruise got cancelled, and the skirt was put on the back burner.

Fast forward to a few months ago. They were prepping for their rescheduled cruise so it was time to get the skirts done. Plus a few new shirts to wear with them. We had a lot of fun ( Well I did 🤣 hopefully she did too) shopping my stash and coordinating fabrics to maximize her outfit possibilities.

Here are the finished outfits, modeled by my mannequin.

Skirt number one – ITY, elastic waist band, rolled hem. Lightweight, wrinkle resistant, and these colors are so pretty!!!

We used the Hey June Handmade Union St Tee, V-neck and short sleeve options, for both this mauve DBP (Double Brushed Poly) and this light blue DBP shirt.

The other two shirts are both scoop neck with a flutter sleeve. This one is in a tan DBP.

This one is Dark Berry ITY from Surge. My Mom fell in love with the color and how it went with so many of her skirts and other outfits she had, but the only issue was I couldn’t part with it. The dangers of letting people shop your stash 🤣. Fortunately I was able to check with Surge, and they had a few yards remaining. Crisis averted, I got to keep my fabric and she was able to have a shirt in the gorgeous fabric.

We picked these shirt colors since they also work with the reversible skirt. All four look great with this side.

I just love all the colors this fabric has. It really allows for multiple ways to style it.

And three of the tops work well with this side of the reversible skirt.

I love that these tops and skirts will also work well with her current wardrobe, so she can mix and match even more. Once she gets back from her cruise I will be finishing up her second reversible skirt.

Fabrics –
DBP was from So Sew English Fabrics
ITY Shirt was from Surge Fabrics
ITY and Rayon Crepe skirts were from So Sew English Fabrics

Pattern – The V neck shirts are the Hey June Handmade Union St Tee

This post may contain affiliate links. This means if you make a purchase through that link, I may get a % back, at no additional cost to you. Thank you for supporting my sewing šŸ’•

Sports Bra- the sequel (plus bonus tank and shorts)

As soon as I finished my first Greenstyle Creations Power Sports Bra ( read about it here ), I knew I wanted to make more. I immediately went through my fabric and started planning my next combo. I didn’t have quite what I wanted, so I went fabric shopping. I saw a combo Heidi posted in April, in the So Sew English Facebook group, and I knew it would be the perfect fabric for the outfit I envisioned. It took a bit to arrive, but once it did I knew it was the right choice.

For this Power Sports Bra, I did almost the exact same options as my very first, adding the optional bra cup opening, and 1/4″ clear elastic in the full neckline and armscye. I opted to add the elastic since this fabric had a bit more stretch than my first, and I didn’t want to chance it gaping once on. I used the Solid Bubble Gum Pink Peached Performance for the straps and remaining pieces, including the lining, is Grey/Ivory Small Stripe Peached Performance. Just like my first power sports bra, I tried on my underbust band elastic, prior to adding it to the bra, and AGAIN, I was glad I did. I used a different elastic than my first one and it stretched a lot easier, allowing me to remove an extra inch, which was still bigger than my suggested size starting point.

I used the same Bubble Gum Pink Peached Performance for my shorts. It is so soft and the perfect fabric for lounging or to run errands. I made my first Run in The Sun Shorts from Striped Swallow Designs for this. It was also my first SSD pattern, and it was fairly simple to assemble. I made my measured size, XL waist to Large hip and Medium thigh, but for my next, I will probably remove some length off the rise and/or go down a size overall in each spot. I love the option to cinch up the side more or less, depending on my outfit and preference.

Since I’m not keen on rocking the sports bra and shorts combo out and about, without coverage, I added a Sundown Tank, also from SSD. I absolutely LOVE the low twist back option, it is so fun and totally creates the perfect showcase for my cute bra and straps. I used the Solid Black Crepe Jersey and it twisted beautifully! My machine seriously did not like the thick bindings though, so my next one, I will skip the binding and just turn and topstitch.

The Sundown tank has three back options, a regular back, and a high or low twist back. I did the low twist, added 1″ in length for my height, and made size Medium graded to Large at the bust and waist. I measured for a Medium graded to Large bust and an XL waist, but when I measured the pattern piece, I felt grading all the way to an XL would be much larger than the look I wanted. I also have smaller hips than I do waist, and while the pattern didn’t provide hip measurements, I know from experience with my body and loose fit shirts, that grading out so far would make my hips look like they are drowning. So with the tank having the shape and ease it does, I opted to grade out to just the Large.

A little sewing tip I like to use: When the pattern size chart doesn’t provide a measurement, you can measure your pattern piece at the approximate spot, minus the seam allowance. Then take your tape measure and hold it around your body part, at the pattern piece measurement and you can get an idea on fit. If the pattern has negative ease, you can do the same with a scrap of fabric (preferably in the same fabric you are using for the final garment).

I can’t wait to sew up my next set, I just got another fabric order that will be PERFECT for this! Plus, I am on the hunt for some swim fabric. I think this would be amazing to wear to splash pads with the kids or just hanging out by the pool.

Fabric all from So Sew English:
Solid Bubble Gum Pink Peached Performance
Grey/Ivory Small Stripe Peached Performance
Solid Black Crepe Jersey

Patterns:
Greenstyle Creations Power Sports Bra (available in Women and Kids)
Striped Swallow Designs Run In The Sun Shorts (available in Women and Kids)
Striped Swallow Designs Sundown Tank (available in Women and Kids)

This post may contain affiliate links. This means if you make a purchase through that link, I may get a % back, at no additional cost to you.Ā Thank you for supporting my sewing šŸ’•

Tanks, I made it! ;)

Back in April I went to Vegas with my husband, for a work trip. While there I was able to meet up with one of my sewing friends for a little bit and actually meet her in person.

We had previously been shopping for fabric from Fabmere at the same time and she had faster fingers than I did, and scored some gorgeous floral ITY. She is so sweet, and ended up splitting the fabric in half and bringing it to me when we met up.

So I’ve had this gorgeous 1 yard cut of ITY and I’ve been trying to decide what it wanted to become. I thought of and rejected so many patterns when I finally decided to try the Athena from Pattern Niche. I wasn’t sure if the style would work well with ITY, since it is a lightweight fabric with good drape. So I scoured their Facebook group to see if other people had used ITY and found none. After asking Tara if she thought it would work well, I decided to go for it.

There are several different kinds of ITY, some are slinky and slippery, some have a brushed feel, some have a textured feel, and I love them all and how cool I stay while wearing them. This particular ITY has a slight texture to it, which is an added bonus for traveling, as it doesn’t wrinkle in luggage.

The Athena tank has a regular racer back, plus three different scoop and cutout back options. You can choose from a crew neck or a scoop neck for the front neckline. For mine I chose the scoop neck and the option 2 back.

I made a straight size 12, and added 1″ in length for my height. I didn’t make any other mods to the pattern.

I was pleasantly surprised with how simple it was to do the fun cutouts! I have been having machine issues lately, and I was really concerned it would eat my fabric, but it behaved and I love it! The cutout is perfect to show off those cute bralettes, or in my case, my green bra, that just so happens to match.

I have some more fabric that just arrived that I will definitely be using to make another one. I think I’m going to try the option 3 back next and make a coordinating set with a new sports bra.

The fabric is ITY from Fabmere Fabrics and you can see all their gorgeous options here.

The Athena pattern is available from Pattern Niche (formerly New Horizons Designs).

This post may contain affiliate links. This means if you make a purchase through that link, I may get a % back, at no additional cost to you. Thank you for supporting my sewing šŸ’•

Trying a new pattern company – SeaChange

Have you sewn any patterns from Pattern Emporium?? I have almost purchased a few in the past, but always forget to go back and miss the sale, and since I try to only purchase when on sale, I have yet to make a PE pattern.

Side note, I love watching Kate’s preview videos. Even if the pattern isn’t my style, I just love to listen to her talk and see all the different ways she styles her own pattern. All the fabrics she uses, and her personal thoughts on why she likes which ones. I just love them and her passion for sewing her own clothing.

The video for the SeaChange was no different, I thoroughly enjoyed it. Except this time, I was determined to catch the release sale and make one for myself.

When I was shopping for fabric at Fabmere, for my Siena ( you can read about it here), I saw a gorgeous red floral, with an almost paisley look to the flowers. It made it into my cart and was earmarked for my SeaChange. I have said it before and I will probably say it a million more times, I LOVE RAYON CHALLIS, especially for our spring and summer.

The SeaChange is a jumpsuit (3/4 or full length) & playsuit ( short or mid length) romper. It has short, regular, or tall cutting lengths, wide or narrow straps that can be fixed, adjustable, or tied. Plus optional side ties, sash, and pockets.

I chose the short length playsuit, with narrow fixed straps, and pockets. For fun I did a narrow rolled hem for the legs.

I know the mantra of making a muslin first, I also knew that I only had a couple yards to make this pattern, and this was my very first time making a PE pattern, all very good reasons for making a muslin first. BUT, I have heard great things about Kate’s drafting, I read her tutorial ( the amount of tips and fit help and steps on how to check fit, were amazing!!) and felt really comfortable with just going for it. With not having much time to sew this past month, it was a good call and I had absolutely no fit issues.

I really appreciated the attention to fit that was provided. I know I usually need to make certain adjustments to patterns for my body, and I can’t even begin to explain how nice it was to know if I actually needed to make those adjustments. For an example, the straps. I almost always have to adjust the straps on cami type tops, and usually longer, which means I need to recut. Kate actually made the straps longer, included a note about it, and I was able to do one fit check and use the original straps, vs multiple fit checks and having to recut new longer straps.

I chose to wear my SeaChange loose with no tie or sash. It really feels very springy, breezy, and super comfy (especially with my current health flare). I love how it almost looks like a dress, but I have no worries of things blowing up and being exposed.

Since our weather is currently fluctuating from the 70’s in the morning and evening, and the 90’s during the day, I decided to try it on with some white tennis shoes and my jean jacket.

I love how this looks!!

I am definitely making more of this pattern, and I’m determined to not miss another PE sale šŸ˜‚

Fabmere Fabrics has this Rayon Challis still in stock, plus a few other solids and prints.

Hannah Hem Hack-Skip The $68 Price Tag

This really isn’t a hack, more of a simple mod, but I couldn’t resist the title of Hannah Hem Hack. It was just too much fun.

I’ve made a Hannah in quilted, a quilted and brushed French Terry combo, and a poly skimo hacci. You can see them here. Ā So when I decided to recreate this pin ($68 price tag, no thank you), I pulled out my left over plaid super plush from last year.

6FB00030-4E1C-49C0-9016-170F76FFDE41

I really wanted to have the black contrast collar, so I cut into my hoarded black super plush, for the collar lining and it was just right.

The Hannah pattern is banded at the bottom and the sleeves are cuffed, so to recreate this pin, I needed to alter it just a little for a hem.

To start with I added the amount of the bottom band, to the hem of the bodice, plus a bit more for my 1″ hem. I usually like a 1/2″ hem, but for super plush I prefer a larger hem since it is so squishy. I made my marks off the bottom of the original bodice pieces, and drew a line to indicate my new bottom hem.

112C68BE-B5AE-434D-BED8-32CF08B5FA7C

Then I needed to draw my new side seams. Since it has a slight widening at the hem and I didn’t want to continue that line and make a flare, I brought it in a little and blended into the original side seams.

D5FFBF1F-DE2B-4565-A99B-C2A074248953

When all was said and done, I ended up taking an inch back off the hem after I tried it on, which gave me a total addition of 3.5″. I did this to both the front and back bodice pieces.

I followed the same steps for the sleeves and added 4.25″ to them. The only difference to the sleeves was that they taper in at the hem. Since I didn’t want them too tight, I wrapped a scrap piece of fabric around my wrist to determine how snug of a fit I wanted. Then I added a little to the fabric length to account for seam allowance, and that was what I made the width of the sleeve at the hem. Then I blended the lines in to the original sleeve seams for my new pieces.

ADD9FD96-E06B-4A25-87A1-7E932D6A1155

I made no other changes to the pattern and with those two simple mods, I now have a hem option Hannah.

5CE78A87-B091-4490-AFB5-7D29EFE134D2

The Hannah is on new release sale for $5 until Sunday 11/3, midnight EST. The fabric is super plush from So Sew English. With a total price tag of $30, it is a bit more up my alley, and it’s custom fit to top it off.B632F6C1-E61D-47F3-9C7B-DDC56AAAD428

This post may contain affiliate links. This means if you make a purchase through that link, I may get a % back, at no additional cost to you. Let’s be honest, we all know it goes right back to adding to my fabric stash. All opinionsĀ on this blog are my own.

Three years waiting and just in time

Several years ago I found a pullover I fell in love with. After seeing it, I found a few pictures of similar ones on Pinterest and saved them to my inspiration board so I wouldn’t forget details about them. I spent time shopping for fabric and trying to find the pattern. After finally giving up the pattern search last year, I found a mens pattern that I figured I could hack to make my pullover.

The cold season quickly changes here and I never got a chance to attempt my hacking. So when Sonia decided to make the Hannah pattern, I literally jumped up and down with joy. Now, I get to start making all the Hannah’s, with all the fabric, I have been accumulating for the past three years. And not a moment too soon, with the weather just starting to change, I will have plenty of time to wear them all.

Hannah has cuffed sleeves, a banded hem, a quarter zip, and the options of a hood or collar. Both the hood and collar are lined and you even have the option to finish them with bias binding around the neckline. There is also an optional kangaroo pocket.

My first Hannah is in a grey quilted fabric from So Sew English. I had planned to use a contrasting bias in a dark blue color, to match my zipper tape. Unfortunately, when I went to the store, I grabbed the wrong one. I ended up finishing the collar with the other pattern option and I still love how it turned out.

24AE6339-73DB-46B3-845F-2FBCB9C29EA2

I did the collar and kangaroo pocket options for this grey quilted, and used an 11″ zipper. Ā I am ridiculously proud of this kangaroo pocket. Can we take a moment to enjoy how it lines up??

6FE61C09-BE4D-418E-99AA-546E2A5BC850

My next Hannah is also made from quilted, but this time it is the ivory, and I only used it on the bodice, hem band, and the outer hood. For the rest of the hoodie, I used a super soft brushed French Terry. Both fabrics are from So Sew English Fabrics.

CC0A92B2-D19C-449F-A43D-C1EE34007F05

On this one, I skipped the kangaroo pocket, and did the hood option.

85675BF5-2C1A-4486-88C0-28900D6A3801

When I did the zipper on this one, I really wanted to try a 10″ length, but I only had 9″ and 11″ zippers. So I used an 11″ zipper, and did the assembly as though it was a 10″ zipper. When I got to the step of trimming the hood stand, I just cut off my extra zipper length. My stop got cut off, but it didn’t affect my zipper at all, as it was sewn into the hood corner.

This third one is so comfy! I got this poly skimo hacci last year from Sincerely Rylee fabrics. It is a slightly open weave, yet warm, and I just love this wine color with the little black flecks.

51583BCC-C684-4F49-B3BF-9044D8AFE40F

For this one, I also did the hood option with no kangaroo pocket, but I used the bias binding option, to finish off the hood neckline. It looks so pretty!

A150473C-A586-4C25-B5D2-B838CB25A808

I love the length on the Hannah. I added my usual length for my height, and it hits just right. I can easily wear it with leggings or a pair of jeans, if I want.

68422E6F-764B-4609-87AA-1C3E0463699E

I have a few more Hannah’s planned, including a simple mod to make it without cuffs and a band. That mod will be up on here shortly, so be sure to come back and check it out.

Enabler alert: The Hannah from Sonia Estep Designs, is on sale for 50% off during it’s release sale, ending Sunday 11/3, at midnight.

This post may contain affiliate links. This means, if you make a purchase through that link, I may get a % back, at no additional cost to you. Let’s be honest, we all know it goes right back to adding to my fabric stash. All opinionsĀ on this blog are my own.

I went Pinterest “shopping”, again

Pinterest scrolling led me to this fun outfit and I just knew I needed to recreate it.

IMG_9268 2

I already had a similar looking fabric in my stash for the top, but nothing for the leggings, so I went fabric shopping. My shopping led me to The Fabric Fairy and their supplex category. I know people commonly use supplex for workout clothing, but I have found it can also be great for other things. Some supplex I have used in the past, has a kind of slick feel to it, but this was a little different. It had a smooth side and a slightly brushed feeling on the other side. This one is called Beyond Cream Supplex Lycra Jersey, and the description on their website says it is high wicking with a microsuede back. It sounded intriguing so I decided to give it a try. The fabric shipped pretty quickly ( I even got a fun pen! ), it washed up well, and sewing began.

I used the Patterns for Pirates Peglegs for these leggings. I like how quick they are and they had the right look for this outfit. Bonus, they are free. I like using the low rise on the pants, with the contour high rise waistband, from their add-on pack (also free). They keep things secure, I get no rolling, and they aren’t so tight that I get uncomfortable when I have health flares. I made a time lapse video, sewing up this pair, that you can see on my youtube.

Something to note, the Pegleg pattern, has negative ease like most legging patterns. I wasn’t sure how see through these would be, with that negative ease, but I figured with the longer sweater, it would be okay. I will definitely not be wearing these with anything other than nude underwear, ha ha ha, but even with the stretch, things stay G rated.

8585A986-682A-47AE-979B-DA43E17BB132

To make the top to wear with them, I used the Nora from the DIBY Club. I was fortunate to have tested this pattern when it first came out a while ago and I still wear the two versions I made then. I knew one of the options it had was the split hem I wanted for this look, and with a little tweak to make it more of a high low split hem, it was perfect. I measure in a few different sizes, but since this has a bit of ease and I was under the finished measurements for the SZ 8, I just made a straight 8 for this look. I picked the 8 based on my upperbust measurement. I did my usual 1″ addition, for my 9″ sidewaist, and then added an additional 4″ to the back hem.

91109053-4BAF-432F-8DCC-E71F4194AFEA

I used some Burgundy Honeycomb Sweater Knit from So Sew English Fabrics, that I got last year. It is super soft and has that almost heathered look to it, that was like my pinspiration picture.

E65AE960-86B2-499D-A4FD-DC6377BA6FA2

Another pinspiration, made mine, and now I need to find some calf high, grey boots, and maybe a few more colors of that supplex šŸ˜‰.

This post may contain affiliate links. This means if you make a purchase through that link, I may get a % back, at no additional cost to you. Let’s be honest, we all know it goes right back to adding to my fabric stash. All opinionsĀ on this blog are my own.