And now, her list

If you read my last post, it was about my son’s clothing list he “needed”. My daughter’s list was a little more conservative in its length, but now that I have completed it, she seems to need additional things. I kind of feel like she is playing me. Oh, just make a few things Mom. Oh, would you look at that, guess I need this now and ohh what about that?? Hey Mom, what is that fabric for? Oh do you think you could make me something in it too?? Oh Mom, that is so soft, it’s like your hugs… Okay, I made that last one up. You get the point though. She loves my makes and that is such an awesome feeling.

My kids love the fabric options from So Sew English almost as much as I do, so when she was making her list, she asked if she could shop for fabric on their site. She made her list, complete with fabric choices, and this is what she picked.

16A697F9-86FB-404C-BEE8-C5226F1DB85A

First up is this super fun Lilac Unicorn print Double Brushed Poly. Not only does it have unicorns all over, but it also has the foil stars. I tried so hard to get good pictures of the stars, and just couldn’t quite get it. She wanted a shirt to wear with leggings and jeans, but requested something a little different than what we had done before. I showed her the patterns I had already but hadn’t made for her yet, and she picked the Spice Cake Dolman from Pattern for Pirates.

8655B8C6-9C0F-48BA-A855-FA326A2C66D0

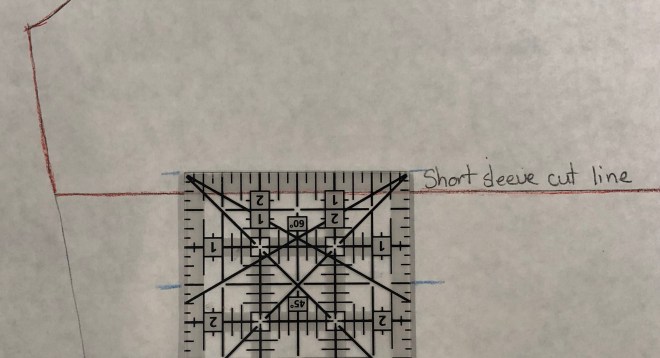
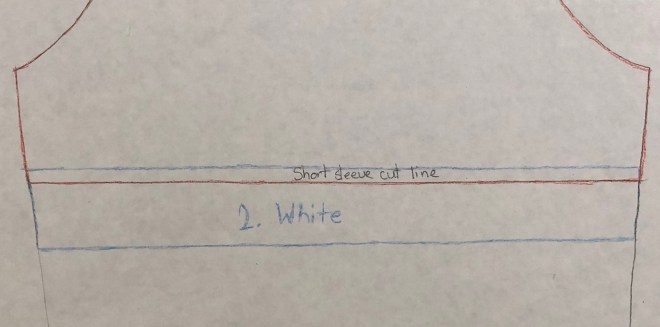
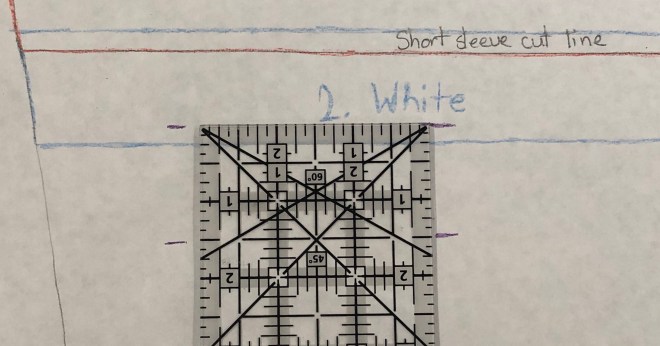
The Spice Cake is the girls version of their Pumpkin Spice Dolman for women, which just so happened to be one of the first tops I made myself. The pattern can be made with a short sleeve, 3/4 sleeve, or a long sleeve. You can choose a straight shirt length, curved tunic length, or a banded option with short or tall bands. For her unicorn shirt, she picked the long sleeve, curved hem tunic length.

For fun I did a quick time lapse video, sewing up this Spice Cake Dolman.

After my last time lapse, I had a few questions regarding the clipping I did to my seams when hemming. You can see it at about 1:32 in this current time lapse. Since I took my coverstitch out of time out and have been giving it another chance, I have found that I get less skipped stitches, if I clip into my seam allowance, and split my hems opposite directions. I do not clip all the way through, just up to the left needle thread. This also helps when I am hemming sleeves or pants, as it allows me fold at exactly the right amount. One other note about this time lapse. I usually iron my curved hems while I am folding them. I just did a finger press on this one, since my iron was out of commission. Ironing before stitching is definitely something I don’t like to skip, especially when doing curved hems.

To finish off her “first” list, she asked for two new pairs of leggings. She wanted something really colorful with lots of pattern, that she could wear with solid tops. She picked the Navy “knit print” double brushed poly for this pair.

9918772A-DF09-4278-94A6-275E842293CB

And for the second pair she picked this pretty Lilac scales print double brushed poly. The lilac dbp is only available in a bundle now, but there are some colorways of the French Terry scales, in yardage.

0D8DE8A8-5DDB-4DD6-B38E-75D54F65A7D9

For both pairs of leggings we used the Bonny leggings from Made for Mermaids. This is a pattern we have been using for her for a while, and she just loves how they fit. The pattern is free, has several length options, and also comes with a skirt, which she loves as well.

I should have known her list was going to grow, once I found the piles of clothing they hid when making their need lists. Guess I should start working on those “extras” soon. Although, I do have a few things on my “need” list, so maybe they will be next. 😂

This post may contain affiliate links. This means, if you make a purchase through that link, I may get a % back, at no additional cost to you. Let’s be honest, we all know it goes right back to adding to my fabric stash. All opinions on this blog are my own.


Wardrobe Staples – Tank tops

Wardrobe staples are just that, staples. They are such great building blocks that can take a simple outfit up a notch or allow you to quickly expand your current wardrobe. Since I live in a pretty warm climate, year round, the wardrobe staple I use the most, are tank tops. When I got the opportunity to test the new Greenstyle Creations Staple Tank, I was excited. I enjoy testing and helping out pattern designers, but it can be a lot of work, fabric, and time. So when the item I’m testing, happens to be something I will get a lot of wear from, it’s a huge plus.

This particular tank is great to wear solo, layering over a sports bra, layering under a jacket or even a loose fit slouchy top.  It fits the bust nicely and allows for a little breathing room throughout the rest of the bodice. The staple tank is available in the size range of XXS – 3XL. It has a pretty scoop back, perfect for showing off those fun bra straps if you wanted to.

3845068C-24EF-4843-9009-EE426A9165E9

Another thing I love about this tank, is the option to finish your neck and arms with either a band or binding.  I’ve become fond of binding on my clothes. I really like the low profile look it gives and I don’t find it more or less difficult to do than a traditional band.

C55C908B-9E27-45F4-BB33-0AA2ED91A48A

I used the binding method in the pattern for both my tanks. Yup, you read that right, I have already made two, and have a few more planned. Did I mention these are fast sews and don’t take up much fabric??  Both of my tanks were made from leftover fabric from my camo leggings and ombre maxi. I did my exact size per the chart and added my usual length for my height. Boom, done.

For the camo tank, I used double brushed poly, from So Sew English. I really love camo and I’m enjoying the addition to my wardrobe. I was so pleased with the versatility of this tank that I couldn’t stop trying different ways of wearing it. I kind of wonder what my neighbors were thinking as I paraded in and out of my house with all these outfit changes, ha ha ha.

For this outfit, I paired the tank with a new pair of Greenstyle Stride tights, in Supplex, and my black tennis shoes. This was super comfortable when I rode on my recumbent bike and for running around with the kiddos. This supplex was my first and I got it from So Sew English (SSE). It has a GSM of 440 and has totally been squat proof, plus it was a dream to sew up.

I changed my shoes into my white tennis shoes and threw on my cuffed sleeve jean jacket. Perfect for those cool mornings and evenings, or whenever I want to pretend that I don’t live in tanks and leggings most days. There is just something about the jean jacket and camo combo I can’t get enough of.

Change the shoes. Switch to some stretchy jeans and add a long necklace. Tucked in or left out. With a cardigan (This one is the Coffee & Tea from Annelaine, in a ribbed sweater knit from SSE) or without. Another three looks! SERIOUSLY!!  5 looks so far and I didn’t even get to take pictures of this tank with my slouchy tops, darn laundry.

B5D40813-2C55-45FA-B03F-2CF2357EFBB7

ITY is one of my favorite fabrics to wear for summer here. It has a cool touch to it and it feels so flowy that I wanted to try it as this tank. This particular ITY is the blue ombre Venezia from So Sew English. It’s only been available in bundles recently, but they do have other Venezia ITY options. I hung on to my three yard cut for a while and finally used it for my recent maxi. I was left with around two yards of not quite half the width of fabric. Turns out it was the perfect amount to make this tank. I really like how it looks with the white shorts. I’m thinking I need to add pair of loose leg white pants to my wardrobe soon. Wouldn’t that be cute??

1A685726-7A6F-498E-9CE7-0404B3C1C5B9

The Staple Tank is available from Greenstyle Creations and is on release sale right now, ending Wednesday, March 27th.  How would you wear your staple tanks??


This post may contain affiliate links. This means if you make a purchase through that link, I may get a % back, at no additional cost to you. Let’s be honest, we all know it goes right back to adding to my fabric stash. All opinions on this blog are my own.

Denim Obsession and My First Pinspiration Hack

65C2AD24-D3DA-4D37-85A4-97C6DD5110F1

I have been obsessed with searching for just the right denim fabric to make myself, and my kids, some pants. This fabric couldn’t be just any denim though. I had fabric requirements and so did my kids.

My kids requirements first My requirements first, lets be real, I need pants more than they do. This fabric needed to have stretch and lots of it. It also needed great recovery, I really HATE sagging pants after wearing for a short time. It needed to actually look like denim if it wasn’t true denim. I also needed it to be squat test approved, you know the test where you squat down and force your children or husband to tell you if it is see through? Unless of course you can contort yourself well enough to see your rear in a mirror or you get brave and decide to take a squatting booty selfie, that you promptly delete. PROMPTLY DELETE. It also needed to work for one of my favorite patterns, the Peglegs from Patterns for Pirates (free with the code from their facebook group ), plus a few other patterns I have on my radar this year. I had about given up finding the right fabric when So Sew English Fabrics (SSE) got in this crazy Stretch Denim.

img_0421

I say crazy because it is Cotton Spandex Heavy French Terry, say what??? I’d never heard of it. Amanda, the owner of SSE shared a video of it in their facebook group and wow, this stuff looked amazing! It has the denim look on the inside and outside, no faux here. Plus the stretch (80% x 50%) and recovery to make my Peglegs. All I needed for it to pass my list of requirements was passing the squat test. So, like any logical seamstress, I ordered 2 yards to try it out.

The fabric arrived and I immediately loved it. I knew as soon as people started getting their orders and sewing it up, it was going to disappear quickly. I moved my pair of peglegs up on my “to be sewed” list, just in case I needed to get more. Then, Heidi, from SSE, posted her pair of peglegs, in this fabric. It was exactly what I was looking for. I got so excited! Then I realized that I wasn’t the only one who thought they were amazing. Shoot, that fabric was going to be gone fast. Naturally, I got online and ordered a “few” more yards. I told you, I’m logical. I needed more for shorts, pants for my kids, and if it passed the squat test, I was going to need a few pairs of my own.

I washed up my yardage and sewed up my peglegs. I sewed them up live by the way, in the Sew Inspiring facebook group. You can see that here if you are so inclined ha ha ha. It was my first time sewing live and while it was very nerve wracking, I had a ton of fun chatting with the ladies that joined me. Back to my leggings. I tried them on and yup, I took one for the team, they absolutely pass the squat test. *cheers*

A few details about sizing in case you were lucky enough to snag some of this denim. I made my usual size peglegs that I do with ponte. This means,  I size up the legs one from the chart and make my waistband my true size. I usually do that, because while I like snug fit leggings, I have health issues that cause me to get uncomfortable if it is past a certain snugness. I make my usual waistband size since ponte can relax a little after wearing and I don’t want to risk slippage. This denim has the right stretch and amazing recovery. The recovery is so good that it has a little more of a snug feel. While I really like my first pair, I will probably size up my waistband as well as my leg pieces for my next pair.

When I was looking for something to wear with my new pants, I pulled out one of my first sews, from 2016. It got me thinking. This shirt was my very first pinspiration make and pattern hack. I had seen it floating around pinterest and just knew I wanted to have one of my own. I had no idea what I was doing and it took me FOREVER to figure it out. I laugh now because it seems so simple when in reality I was doing all kinds of math and had lines all over my pattern piece. It worked though and totally gave me the confidence to try more hacks and pinspiration makes.

img_0430

For anyone wanting to make one of these sleeve stripe raglans for themselves here are the few steps I took using the Slimfit Raglan from Patterns for Pirates. I made a few pattern pieces to cut out my fabric but for the sake of this tutorial I will be drawing and marking on the same piece so you can see the effect.

Step 1. I cut out the floral using the short sleeve line. Shown below in red.

img_0385

Step 2. I measured out and marked a 1.5″ strip, overlapping the short sleeve line from step 1, by 1/4″, for the white fabric. Shown below in blue.

img_0386img_0388

Step 3. I measured out and marked a 1.5″ strip, overlapping the bottom line of step 2, by 1/4″, for the floral fabric. Shown below in purple.

img_0389img_0391

Step 4. I used the remaining bottom portion of the sleeve, adding 1/4″ to the top and overlapping the bottom line from step 3, for the white fabric. Shown below in green.

img_0393

I used 1/4″ as the overlap amount for each piece since that was the amount of seam allowance I chose. You can see below how all the pieces will go together.

img_0394

Cut out your four pieces and sew them together. You will do this twice, once for each sleeve.

  • Take the piece from step 1 and place it right sides together (RST) with the top of the piece from step 2. Sew together to create the beginning of your new sleeve.
  • Take the 1/2 piece and place it RST with the top of the piece from step 3. Sew together.
  • Take that 1/2/3 piece and place it RST with the top of the remaining piece from step 4. Sew together.

You should now have your new sleeve 1/2/3/4 all ready to assemble the rest of the pattern per the included instructions.

img_0419

There are a few other ways you can achieve a similar stripe look but I chose to go this route since it gave me the complete sleeve and clean look I was going for. This shirt was pre serger time for me and was completely sewn using my starter sewing machine. It is so neat to look back at where I started and see how much I have learned and improved.

I love the fact that my first pinspiration pattern hack from three years ago, not only looks so great with my new stretch denim leggings, but that it has held up and still looks almost brand new. Longevity sewing makes my heart and wallet happy <3.

abaaab4f-bdba-4b5b-9de3-3618608bdebf

I think it’s also safe to say that my denim search obsession has come to a close. Now I get to work on the list of denim makes I have planned with my “few” yards.

This post may contain affiliate links. This means if you make a purchase through that link, I may get a % back, at no additional cost to you. Let’s be honest, we all know it goes right back to adding to my fabric stash. All opinions on this blog are my own and I have a lot, ha ha ha.