Pinspiration – You win some and you lose some

Where do you find your sewing inspiration?

I have my own ideas (usually when I’m trying to sleep), get inspired by other seamstress makes, and “shop” on Pinterest.  I really love “shopping” on Pinterest because I can save the things I like and can come back to it when I need something to sew or I find the perfect fabric. Another thing I love using pinterest for is finding examples of those late night ideas I get. I can search for things that are similar and make my notes to save them for later. Usually, when I find something I want to make, I have to search for a pattern or figure out how to hack one I already have, like I did for my first pinspiration (blogged here). In the case of these two recent pinspirations, I had both patterns already and no hacking needed, yay for saving time and money !! It also helped that I have made both patterns several times before so I knew they would be a good fit.

img_9986
Pinterest pin #1

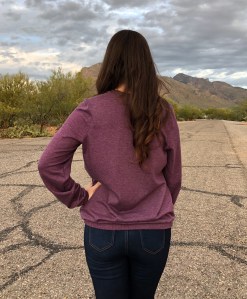
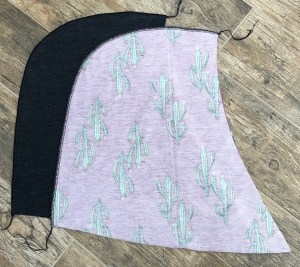
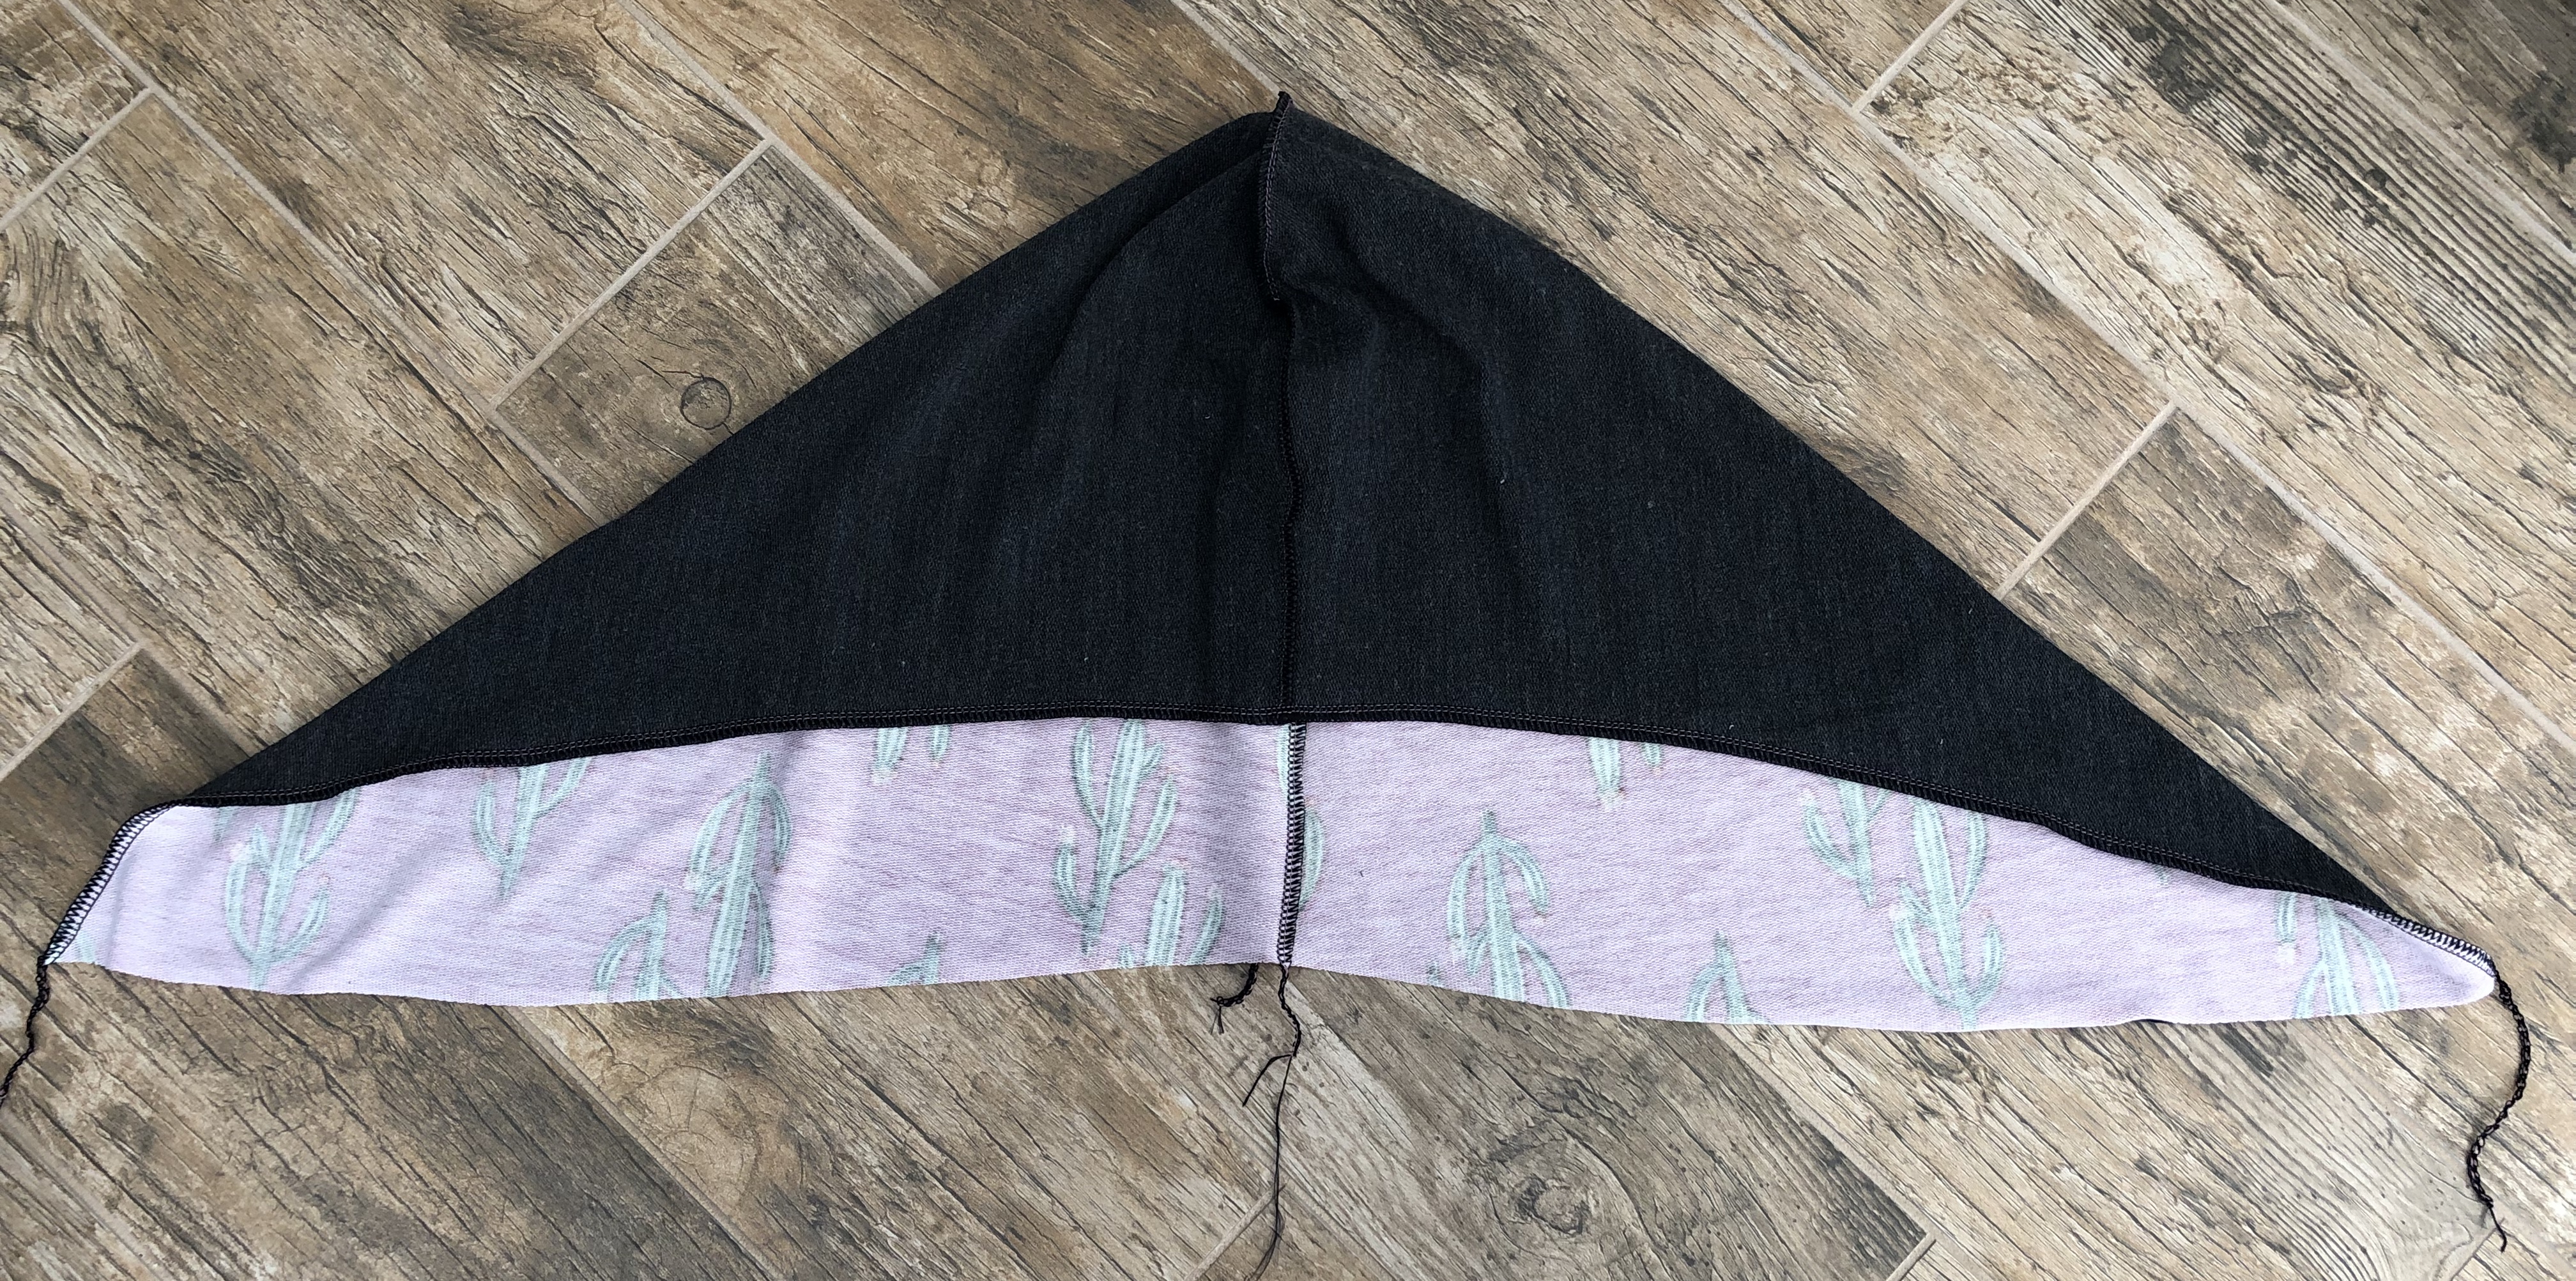
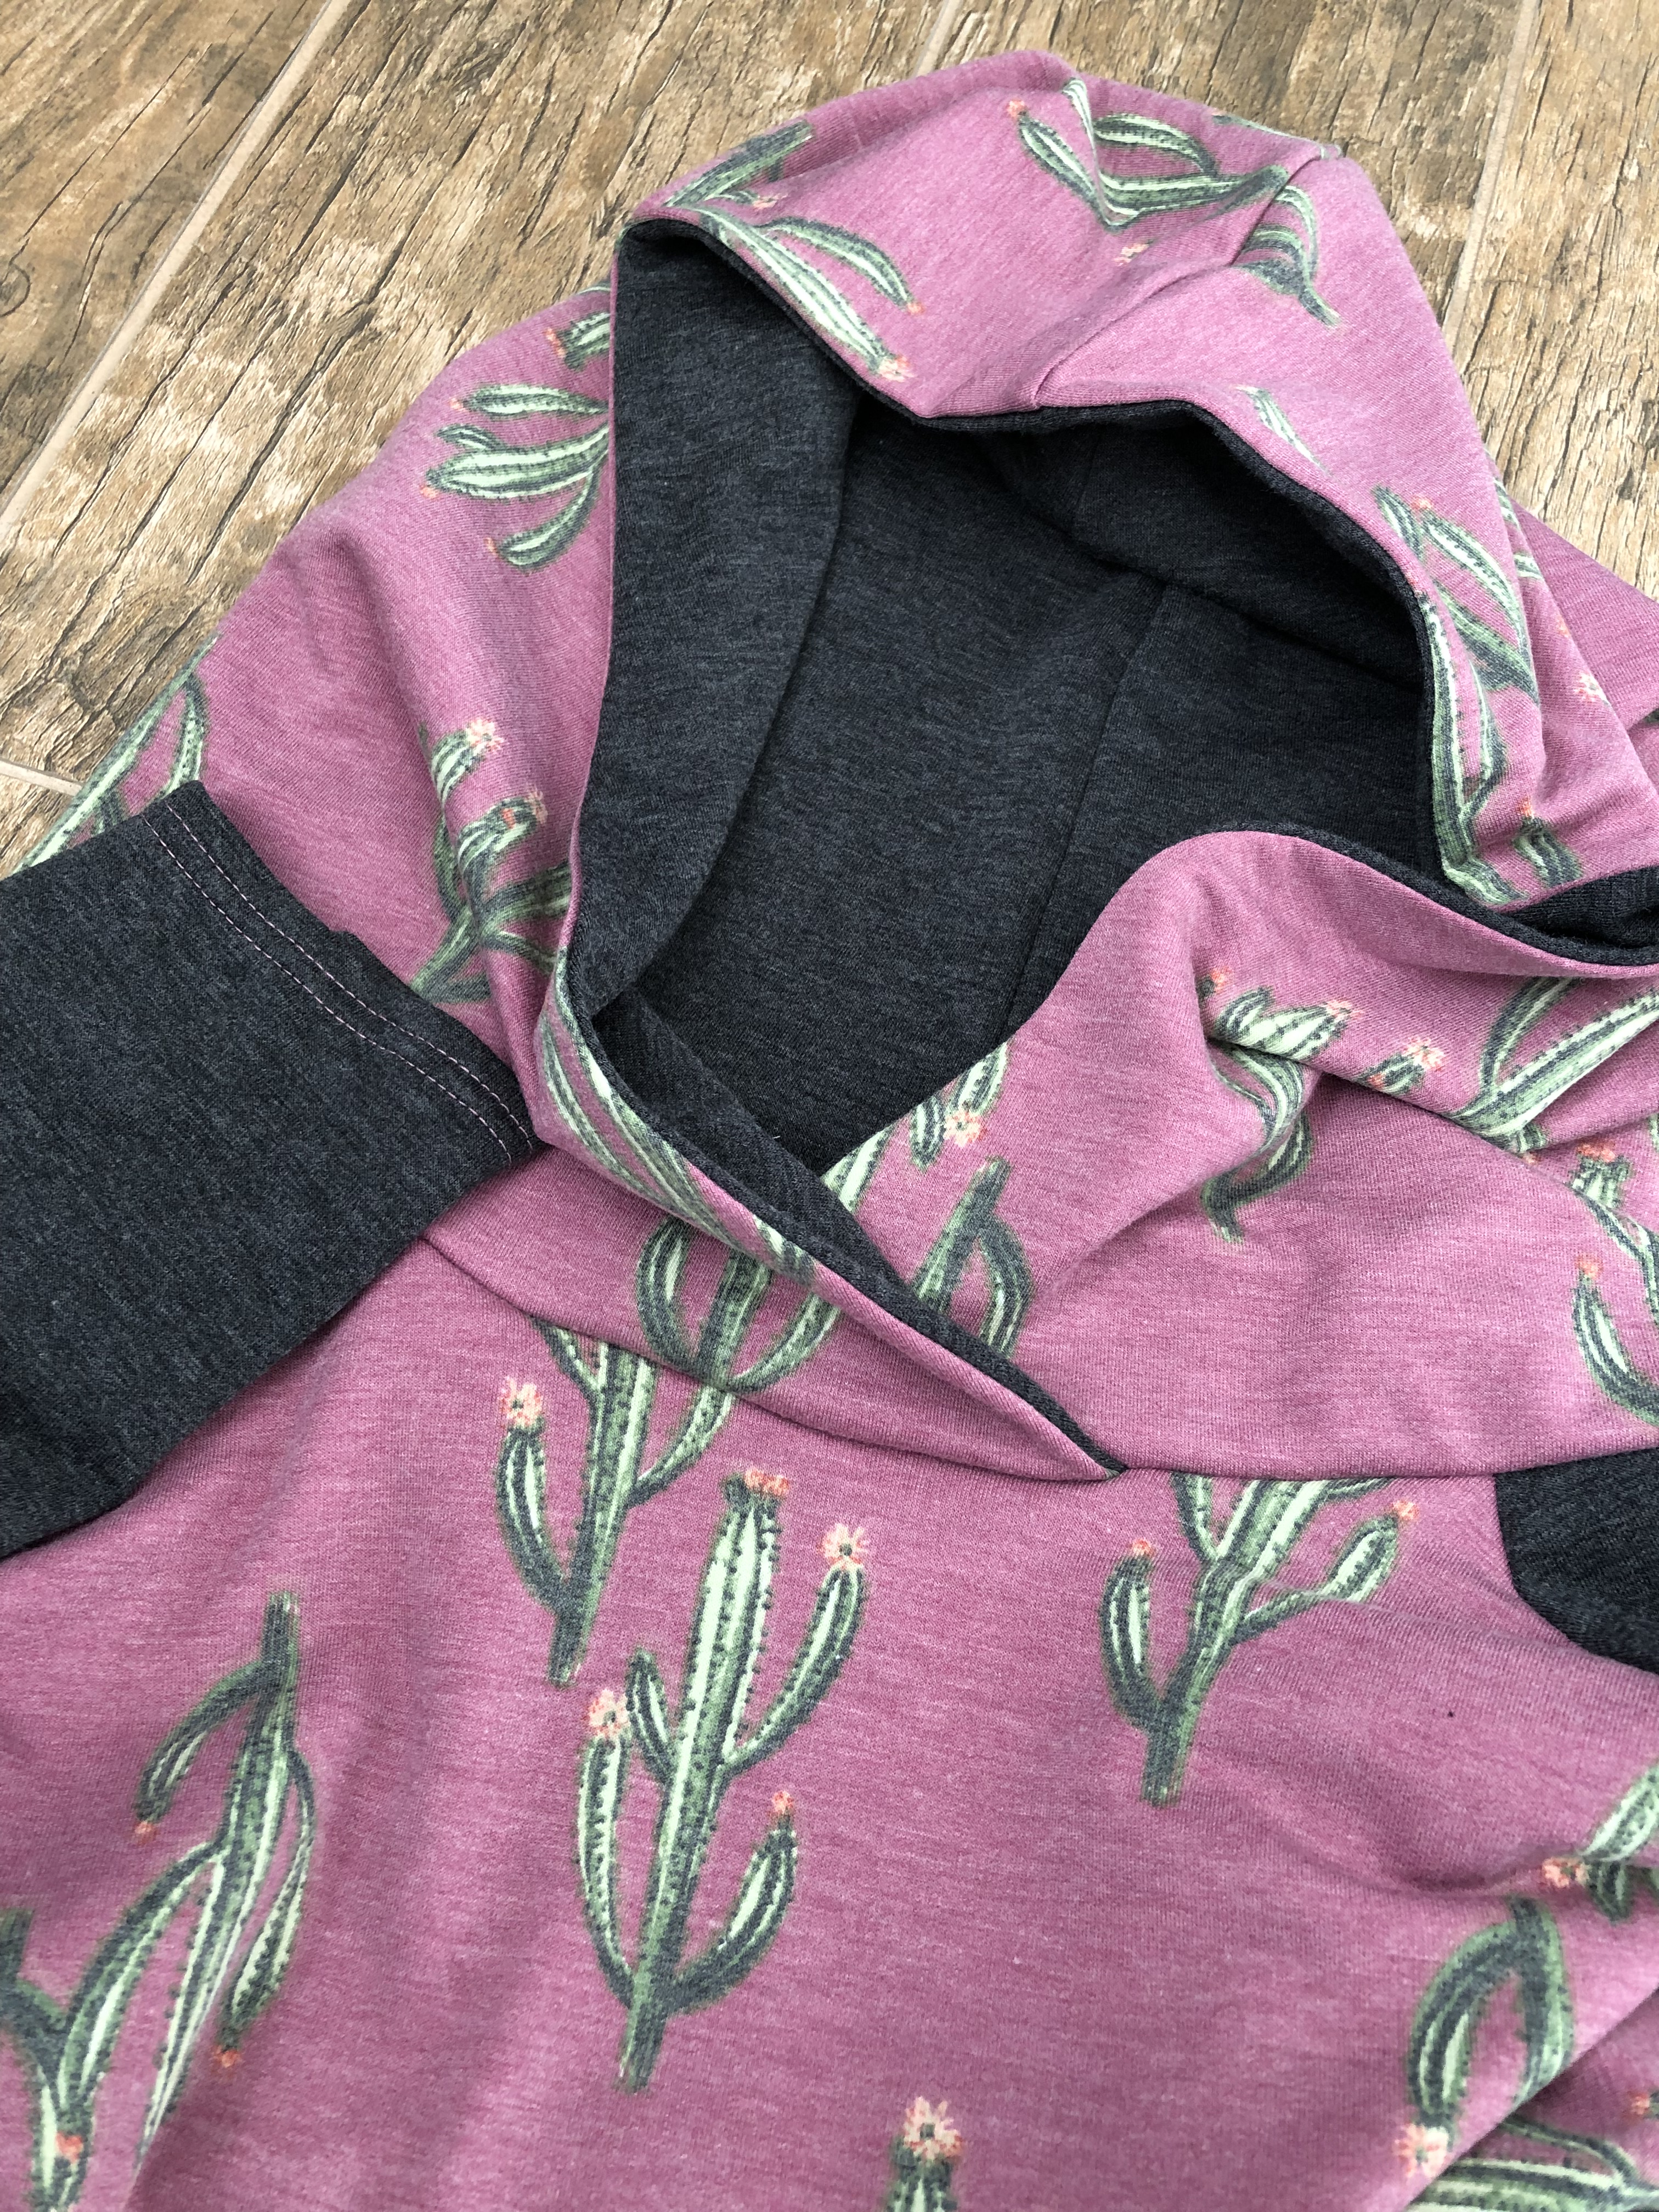
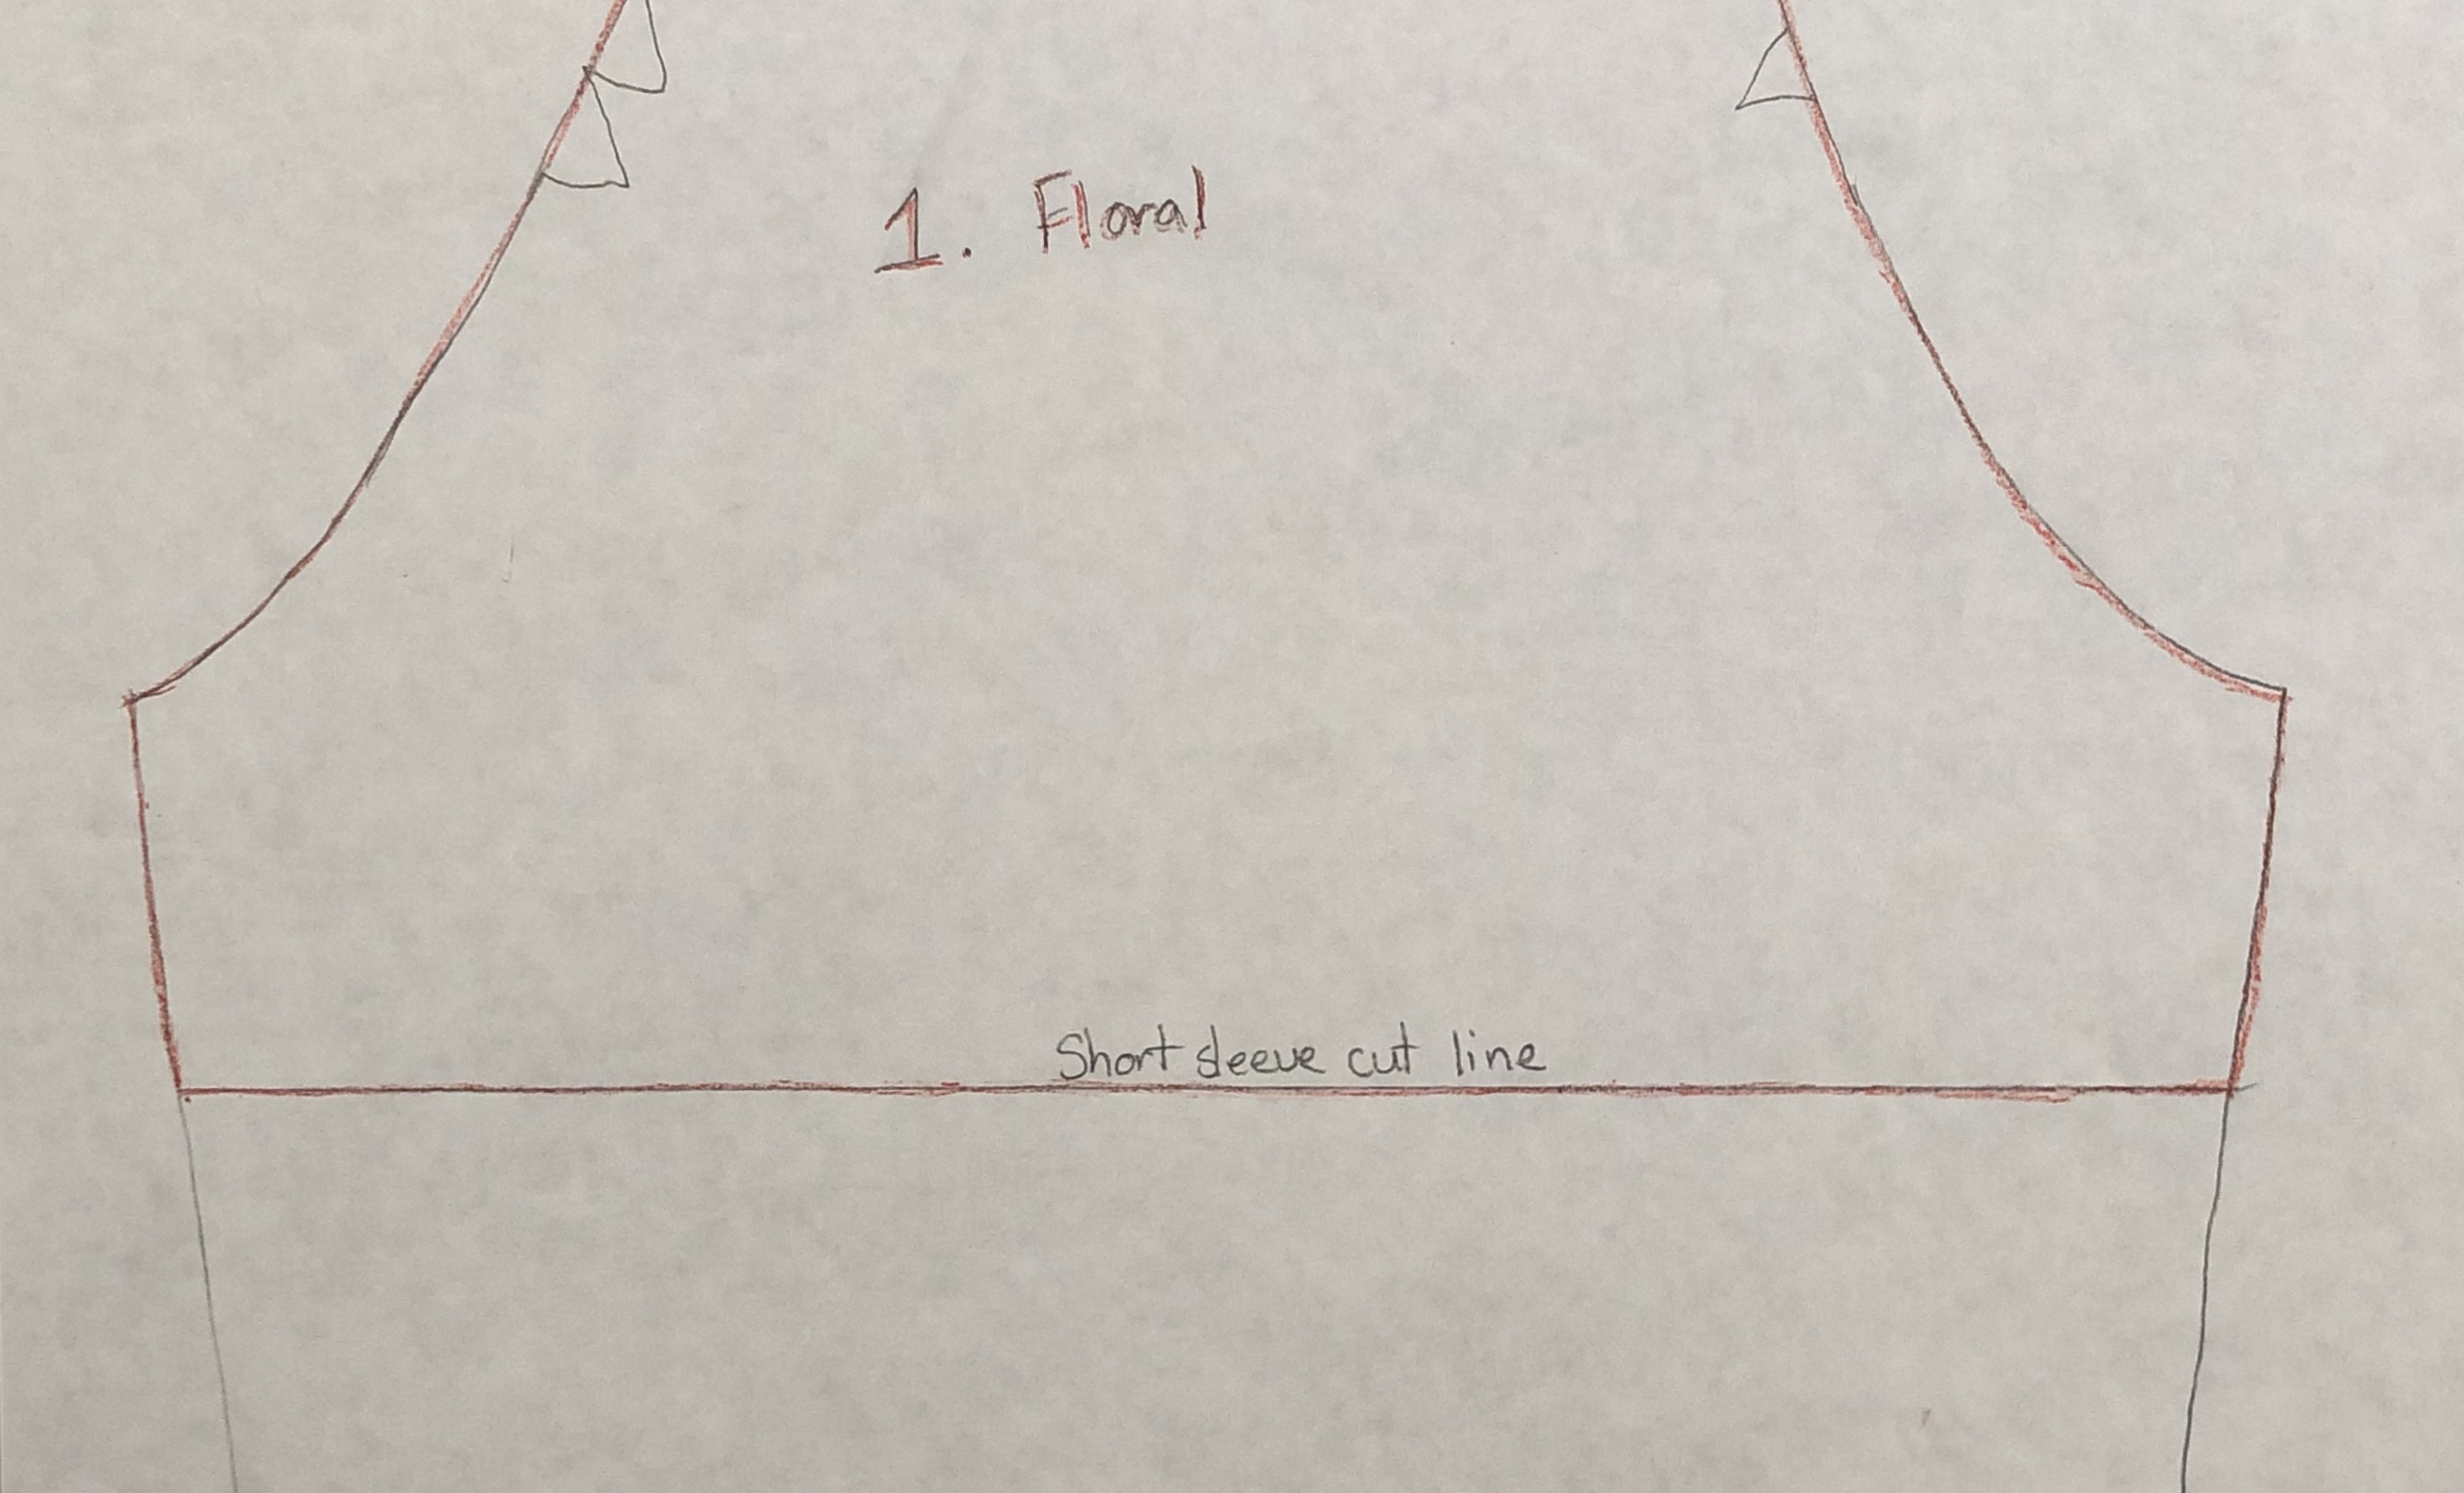
I’ve had really great luck with my pinspiration creations and usually love the way they turn out. Unfortunately, that wasn’t the case with this purple cardigan. Let me start by saying, I love the pattern I used (Coffee and Tea from Annelaine ). It has several different options which allow for you to make a bunch of different cardigans from the same pattern. Another yay for saving money!! I have used it several times, several = 5, and each time it comes out beautifully. This time, my 6th, was no different.

I liked the fabric too. It was a Purple Hair I snagged in a bundle from So Sew English Fabrics. It washed well, sewed up well, even with the extra “hair”, and it had a unique look to it.

The problem came when I tried it on. I really did not like the way this specific combo looked on me. I tried it with several different looks and just couldn’t say I loved it. I was so bummed too. I had really wanted this to turn out. I mean, a purple fluffy sweater, who doesn’t need a purple fluffy sweater??

40ccec71-1ebd-42c2-91e4-441951883964

To get this look I used the Coffee version, length between the long and short cut lines, hemmed loose sleeves, and the slim bands. Plus pockets, because, POCKETS.

img_9987
Pinterest Pin #2

My other recent pinspiration was a solid landing in the win column. I love this pattern too (Union St. Tee from Hey June Handmade)!! I have made several, several  = 4 in this case. I like all the options the Union St Tee has, but I really found the v-neck instructions easy to follow. All three of the  v-necks I have done, have turned out great.

Then there was the fabric. It is a brushed hacci from So Sew English, and is so so SO dang soft. Soft and cuddly, and soft. It is soft ya’ll ! I tried it on and it was instant love! The hardest part was trying to photograph it to make it look like the pinspiration picture.

img_1331

I gave up, I’m not a good selfie taker, and I’m okay with that. Making my bed and cleaning the mirror is totally not worth it. I’m kidding, but seriously, selfies are hard. I applaud all of you with selfie skills!

img_0091

The options I used for this top were long sleeves and v-neck.

Pinspiration. You win some and you lose some.

Anyone looking for a fluffy purple cardigan?? I happen to have one just hanging around.

This post may contain affiliate links. This means if you make a purchase through that link, I may get a % back, at no additional cost to you. Let’s be honest, we all know it goes right back to adding to my fabric stash. All opinions on this blog are my own and I have a lot, ha ha ha.

Lining the hood of my Lane Raglan

Hoodies.  Ahh yes,  I love hoodies. There are so many different changes and hacks you can do to hoodies and it completely changes the look. One of my favorite changes is adding a lining to the hood.  Unlined hoods are great when you need to use less fabric but unlined also means you can see my stitches *gasp*.  Unlined means the wrong side of the fabric is showing and is against my head and neck. I don’t know about you, but I usually prefer the feel of the outside of most fabrics. I particularly like to line my hoods with an accent fabric, which was the case with this recent Lane raglan hoodie I made with french terry from my So Sew English Fabrics stash.

img_8457

I have lined hoods before but always with detailed instructions included in the patterns. The Lane raglan hood doesn’t include a lined option, yet looking around the Hey June Handmade facebook group I saw a bunch of lined versions. I read through post, after post, after post, looking for instructions on how they modified the pattern to accommodate a lined hood. I took all that information, added my past lined hood experiences, and I felt comfortable giving it a try. It turned out so cute with that accent lining and ridiculously comfortable to boot.

img_0713

This is how I lined my Lane raglan hood.

 I didn’t need the full 1” hem that the unlined hood has around the front curve. I left in my ¼” seam allowance, for sewing the lining to the main outer fabric, and removed the remaining  ¾”. To remove I took my hood pattern piece and measured ¾” from the front edge. I marked it and continued the same all the way down the pattern piece. (dashed lines below)

img_0703

Then I connected the dashed lines to make a smooth line for cutting. (red line below)

img_0704

Cut off that extra strip and you have your new hood pattern piece.

img_0705

Using your new hood pattern piece, cut two mirrored in your lining fabric (charcoal) and cut two mirrored hood pieces in your main outer fabric (print)

*TIME SAVING TIP* Fold your fabric right sides together (RST), lay your hood pattern on top, and cut both layers at once. Placing your fabric RST here will allow it to be lined up and ready for the next step.

Place your two main outer hood pieces RST. If you used the time saving tip, this is already done. Clip and sew along the outer curve of the two. Repeat with the two lining pieces.

img_0539img_0537

Now you have two hoods, one in the outer fabric and one in the lining fabric.

img_0540

Take the outer hood and place it inside the lining hood, RST. Line up the center seams we just made. Clip and sew along the top front edge. This will make your two hoods into one.

img_0542

img_0543

Take your hood and turn it right sides out with both the lining and outer hood wrong sides together (WST). You will now have your lined hood ready to attach to your shirt. If you choose to, you can also topstitich along the front outer curve.  

img_0545

I prefer not to have a drawstring in my hoodies. If you wanted to add one, this is when you would add a line of topstitching on the front curve to create a channel for the drawstring. If you didn’t make your grommet hole yet, you can also do that now, before adding the topstitching for the channel.

At this point you will follow the rest of the pattern instructions and attach the hood as though it was a single hood.  Look at how pretty that looks !

img_0554

The Lane raglan comes in sizes XS – 2XL and has a variety of options.  Sleeves can be elbow length, 3/4 length, long, or long with bands. The hem can be curved or banded. You can do a hood or regular neckband, thumb hole wristbands and even a chest pocket. Bonus for those of you who need a full bust adjustment (FBA), it includes a separate pattern piece with it built in, how cool is that? The options I used were the curved hem and long sleeves.  Besides the usual grading for height and width, I made no other changes to the pattern. Both these hoodies were made using French Terry from So Sew English Fabrics. ****Enabler alert – they are having a 20% off moving sale until Friday, January 25th at 12 PM PST. The code is in the So Sew English Facebook group.****

As beautiful as this hoodie turned out, you won’t see me wearing it. It was made for a friend and is happily joining her closet. ❤ 

1ee2ce84-13f6-4ad6-bc3e-412576e49193

This post may contain affiliate links. This means if you make a purchase through that link, I may get a % back, at no additional cost to you. Let’s be honest, we all know it goes right back to adding to my fabric stash. All opinions on this blog are my own and I have a lot, ha ha ha.

Denim Obsession and My First Pinspiration Hack

65C2AD24-D3DA-4D37-85A4-97C6DD5110F1

I have been obsessed with searching for just the right denim fabric to make myself, and my kids, some pants. This fabric couldn’t be just any denim though. I had fabric requirements and so did my kids.

My kids requirements first My requirements first, lets be real, I need pants more than they do. This fabric needed to have stretch and lots of it. It also needed great recovery, I really HATE sagging pants after wearing for a short time. It needed to actually look like denim if it wasn’t true denim. I also needed it to be squat test approved, you know the test where you squat down and force your children or husband to tell you if it is see through? Unless of course you can contort yourself well enough to see your rear in a mirror or you get brave and decide to take a squatting booty selfie, that you promptly delete. PROMPTLY DELETE. It also needed to work for one of my favorite patterns, the Peglegs from Patterns for Pirates (free with the code from their facebook group ), plus a few other patterns I have on my radar this year. I had about given up finding the right fabric when So Sew English Fabrics (SSE) got in this crazy Stretch Denim.

img_0421

I say crazy because it is Cotton Spandex Heavy French Terry, say what??? I’d never heard of it. Amanda, the owner of SSE shared a video of it in their facebook group and wow, this stuff looked amazing! It has the denim look on the inside and outside, no faux here. Plus the stretch (80% x 50%) and recovery to make my Peglegs. All I needed for it to pass my list of requirements was passing the squat test. So, like any logical seamstress, I ordered 2 yards to try it out.

The fabric arrived and I immediately loved it. I knew as soon as people started getting their orders and sewing it up, it was going to disappear quickly. I moved my pair of peglegs up on my “to be sewed” list, just in case I needed to get more. Then, Heidi, from SSE, posted her pair of peglegs, in this fabric. It was exactly what I was looking for. I got so excited! Then I realized that I wasn’t the only one who thought they were amazing. Shoot, that fabric was going to be gone fast. Naturally, I got online and ordered a “few” more yards. I told you, I’m logical. I needed more for shorts, pants for my kids, and if it passed the squat test, I was going to need a few pairs of my own.

I washed up my yardage and sewed up my peglegs. I sewed them up live by the way, in the Sew Inspiring facebook group. You can see that here if you are so inclined ha ha ha. It was my first time sewing live and while it was very nerve wracking, I had a ton of fun chatting with the ladies that joined me. Back to my leggings. I tried them on and yup, I took one for the team, they absolutely pass the squat test. *cheers*

A few details about sizing in case you were lucky enough to snag some of this denim. I made my usual size peglegs that I do with ponte. This means,  I size up the legs one from the chart and make my waistband my true size. I usually do that, because while I like snug fit leggings, I have health issues that cause me to get uncomfortable if it is past a certain snugness. I make my usual waistband size since ponte can relax a little after wearing and I don’t want to risk slippage. This denim has the right stretch and amazing recovery. The recovery is so good that it has a little more of a snug feel. While I really like my first pair, I will probably size up my waistband as well as my leg pieces for my next pair.

When I was looking for something to wear with my new pants, I pulled out one of my first sews, from 2016. It got me thinking. This shirt was my very first pinspiration make and pattern hack. I had seen it floating around pinterest and just knew I wanted to have one of my own. I had no idea what I was doing and it took me FOREVER to figure it out. I laugh now because it seems so simple when in reality I was doing all kinds of math and had lines all over my pattern piece. It worked though and totally gave me the confidence to try more hacks and pinspiration makes.

img_0430

For anyone wanting to make one of these sleeve stripe raglans for themselves here are the few steps I took using the Slimfit Raglan from Patterns for Pirates. I made a few pattern pieces to cut out my fabric but for the sake of this tutorial I will be drawing and marking on the same piece so you can see the effect.

Step 1. I cut out the floral using the short sleeve line. Shown below in red.

img_0385

Step 2. I measured out and marked a 1.5″ strip, overlapping the short sleeve line from step 1, by 1/4″, for the white fabric. Shown below in blue.

img_0386img_0388

Step 3. I measured out and marked a 1.5″ strip, overlapping the bottom line of step 2, by 1/4″, for the floral fabric. Shown below in purple.

img_0389img_0391

Step 4. I used the remaining bottom portion of the sleeve, adding 1/4″ to the top and overlapping the bottom line from step 3, for the white fabric. Shown below in green.

img_0393

I used 1/4″ as the overlap amount for each piece since that was the amount of seam allowance I chose. You can see below how all the pieces will go together.

img_0394

Cut out your four pieces and sew them together. You will do this twice, once for each sleeve.

  • Take the piece from step 1 and place it right sides together (RST) with the top of the piece from step 2. Sew together to create the beginning of your new sleeve.
  • Take the 1/2 piece and place it RST with the top of the piece from step 3. Sew together.
  • Take that 1/2/3 piece and place it RST with the top of the remaining piece from step 4. Sew together.

You should now have your new sleeve 1/2/3/4 all ready to assemble the rest of the pattern per the included instructions.

img_0419

There are a few other ways you can achieve a similar stripe look but I chose to go this route since it gave me the complete sleeve and clean look I was going for. This shirt was pre serger time for me and was completely sewn using my starter sewing machine. It is so neat to look back at where I started and see how much I have learned and improved.

I love the fact that my first pinspiration pattern hack from three years ago, not only looks so great with my new stretch denim leggings, but that it has held up and still looks almost brand new. Longevity sewing makes my heart and wallet happy <3.

abaaab4f-bdba-4b5b-9de3-3618608bdebf

I think it’s also safe to say that my denim search obsession has come to a close. Now I get to work on the list of denim makes I have planned with my “few” yards.

This post may contain affiliate links. This means if you make a purchase through that link, I may get a % back, at no additional cost to you. Let’s be honest, we all know it goes right back to adding to my fabric stash. All opinions on this blog are my own and I have a lot, ha ha ha.

The Melissa Sweatshirt – A Happy Accident

Let me start this by saying, the DIBY Club holds a special place in my heart. Jessica, (the boss lady of the DIBY Club) gave me my first real opportunity at being a pattern tester, a little over a year ago. Not only was that insanely exciting and intimidating, but I learned so much!! I used wovens, buttons and buttonholes, zippers, and yes, we even made jeans, that fit! (insert happy dance) Testing for her gave me the confidence to branch out and continually challenge and redefine my comfort zone so I could grow.

If you haven’t seen a DIBY club pattern, I highly recommend checking them out. The patterns are like taking a class. No joke! There are videos and in depth instructions to help you get the right fit for your body. The patterns are chock full of tips and extra little details that really make a difference, especially when going out of your comfort zone. She even put all the extra time and goodies in her recently released men and women’s free patterns! LOVE!

When the opportunity to test the Melissa sweatshirt came along, I knew as soon as I saw the tester call that I wanted to apply. My schedule and health were good. The stars aligned, as they say, and I applied.

I applied to test the banded version and thought it would be the perfect opportunity to use my purple brushed french terry from So Sew English Fabrics.

img_0177The brushed french terry screams sweatshirt to me. It has the soft smooth feel of french terry on the outside. The inside is brushed which gives it this fuzzy soft cozy feel, no loops.

Like I said, perfect for this sweatshirt.

Since the pattern only needs 2-way stretch fabric, it really opens up your fabric choices too. I see you, you gorgeous 2 way fabric just sitting on that shelf. 

I did my usual grading, I cut out my fabric, and I was ready to rock this test!

Then it hit me. I cut out the wrong lines! Ugh, total face palm!

After I debated with myself on cutting off the excess fabric (cringe worthy waste) or taking a total chance and making the elastic bottom (which I was sure would emphasize certain things I didn’t want emphasized), I decided to once again step out of my comfort zone and save the fabric. Somebody give me a cape because the fabric saver is here! Dun dun, dun, dunnn!!! It’s true, my fabric stash agrees, I rescue fabric.

Fabric saving aside. I sewed it up, tried it on, and I absolutely loved it! I was shocked. I really thought I would hate it and end up chopping the elastic off and adding a band. Nope, my happy accident, elastic version Melissa, was perfect.img_8902

It was a quick sew, which for me means less than 3 hours with kiddo interruptions. The pieces lined up properly and things went together smoothly. There is even a video included on how to install the elastic! I particularly like how the elastic is covered for comfort and it looks really clean like a RTW (Ready To Wear) garment.

img_0178
Inside Elastic Wrist

The Melissa has two hem styles in addition to the elastic, single fold and banded. It has two lengths, regular shirt or cropped, and you can use any of the hem styles for either. It has the options of adding a kangaroo pocket and a hood too! The hood is lined and has panels. The panels really give it a nice shape when wearing, nothing pointy about it. The sizing range is 00-36 and it looks so great across the board. The options I did on mine were the regular shirt length, elastic hem and sleeves, with the crew neckline. Which options are your favorite?     

img_8908

Since the Melissa just released it is on sale right now and you can check it out here . Make sure you scroll down on the listing and look through the tester gallery to see more versions. Also, little tip, if you sign up to be a DIBY insider you get additional discounts and special emails when she has new releases and sales. Yay for insider info!!!

I’m thinking of pushing myself out of my comfort zone again and giving that cropped version a try, it is so cute!!! Until then I will stay cozy in my happy accident, that I can’t stop wearing.

img_8914

This post may contain affiliate links. This means if you make a purchase through that link, I may get a % back, at no additional cost to you. Let’s be honest, we all know it goes right back to adding to my fabric stash. All opinions on this blog are my own and I have a lot, ha ha ha.

No Tie Aspen – Simple Hack

I have this thing about taking patterns and tweaking them to create different looks. I can’t help it.  I justify it by saying I am getting more wear from one pattern. It works, right?

Recently, I had the opportunity to test the Aspen by Annelaine Patterns , in women and girls sizes. By the way, if you haven’t checked it out, it has just been re released in extended women’s sizing (00-30) and is currently on sale #enableralert

aspen original
Aspen in Brushed waffle from So Sew English Fabrics

For anyone that follows me on Instagram, you probably saw my gushing post about how everything lined up so perfectly. It was seriously such a pretty pattern and a real joy to sew up.

Of course, after making it I had to tweak it for another look. I made a few simple mods and presto, a no tie Aspen.

788cf4df-1f99-4649-9639-44826b5eb5a9
No Tie Aspen in Brushed Waffle from So Sew English Fabrics

Since the original was so well designed it made these mods so much easier to make.

Here is what I did using my regular size 6 Aspen pattern.

First I took my front bodice piece, curved hem option. I used the side seam curve and continued the curve across to the center cut line. You can see the original pattern piece underneath and the new line (in red) that I made. I just free handed it and that will be your new front bodice piece.img_7885

Next you are going to want to match that curve on your front hem facing pattern piece.  To do that, I just laid my facing piece on top of the new front bodice piece we just made. The side seam matches perfectly. Then trace that exact same curve for the bottom of the facing piece. You can see the new line (in red) below.

Now we need to make the new top curve for our front facing piece. The top of the curve is about 1 ¼ “ from the bottom curve. Using my ruler, I measured 1 ¼ “  from the bottom curve, at the center cut line, and made a little dash. I worked all along the curve, making a bunch of dashes, until it connected with the original. (dashed lines pictured below).img_7886

I like to remeasure a few times at different places along the curve, to make sure I have an accurate line. Once I have that line, I blend it in with the original side seam curve to ensure a smooth pattern piece.

You now have your new front facing piece, in red (below). The dashed red lines indicate where your new interfacing piece will be cut to match your new front facing piece.

img_7893

You will cut two mirrored of your new front bodice piece, front facing piece, and interfacing piece, per the pattern directions.

I made no changes to the back bodice, back hem facing, or sleeve (besides adding length for my arms) pattern pieces. Make sure to cut those out too and assemble exactly like the pattern instructs.

When I attached the buttons and made the button holes, I placed one at the top V, one ½” up from the bottom hem, and evenly spaced the rest between.

That’s it. A few simple mods to add another look to your favorite Aspen

2820841c-4336-4272-8367-240c6fdf2838
No Tie Aspen in Brushed Waffle from So Sew English Fabrics

This post may contain affiliate links. This means if you make a purchase through that link, I may get a % back, at no additional cost to you. Let’s be honest, we all know it goes right back to adding to my fabric stash. All opinions on this blog are my own and I have a lot, ha ha ha.

About Me

Thanks for visiting my blog !!

I figured I should start with a little bit about myself.

I’m a stay at home Mom to two kiddos, a boy and a girl, that I homeschool. When I’m not homeschooling and sewing, my husband and I work on our fixer upper home and DIY projects around here. I have been married to my best friend for 14 years and he fully supports my sewing obsession.

I have been sewing for a few years now and am self taught. How did I start sewing?? Well, I’ve had a few starts and stops to be honest. The first was when we purchased our first home. I decided to sew up our window curtains, by hand, ha ha ha. They worked, they were cute, and that was it.

Fast forward a few years, like 8 years, and I decided to make cloth diapers for our soon to be born son. In my defense, it was one of those great ideas you get while pregnant. This time I asked my Grandma to teach me how to read a pattern and how to use her machine. My husband had a great idea to get me my own machine at this point, enter my Brother XR1355 Costco special. After we made a trip to the fabric store and got all our materials, we got started. My feet were so swollen I couldn’t push the pedal properly, it was either turtle or rabbit speed, no in between. Sitting? Yea, I had to decide between breathing or seeing the needle. Again, ha ha ha, and my Grandma ended up making the cloth diaper covers for me.

A few months after our son was born I now had my own sewing machine and it was just sitting there, so, I decided to make a dog bed. Not only did I make this dog bed, but I also added a zipper, my first, and it actually looked good!!! The dog promptly ate said bed, (moment of silence for stripe matching and full length invisible zipper) but it was glorious while it lasted, and pushed me to start exploring with my sewing.

img_9842 (1)
The zipper is hidden in the matching stripe on the right, so pretty!

I dabbled the following months/years with making random things, learning terms, and trying out paper patterns. I came across a pdf pattern company, Create Kids Couture (CKC)  in 2015, and used my first printed pattern. After that I started looking for more and found Patterns for Pirates (P4P). Which led me to Sincerely Rylee Fabrics ( 2015), Purpleseamstress Fabrics (2016) , and So Sew English Fabrics (SSE) (2016). Beginning the rabbit hole of sewing bliss.  Not to mention collecting gorgeous fabric! By the way, I say my fabric stash is a full wardrobe, some assembly required. Am I right?!?

From sewing dog beds to real pants I have loved every minute of this sewing journey so far and hope you enjoy coming along for the fun as I share my future adventures here.

img_7678 (2)

Dauphine Skinny Jeans – The DIBY Club

This post may contain affiliate links. This means if you make a purchase through that link, I may get a % back, at no additional cost to you. Let’s be honest, we all know it goes right back to adding to my fabric stash. All opinions on this blog are my own and I have a lot, ha ha ha.