Self Drafted Dress For My Daughter

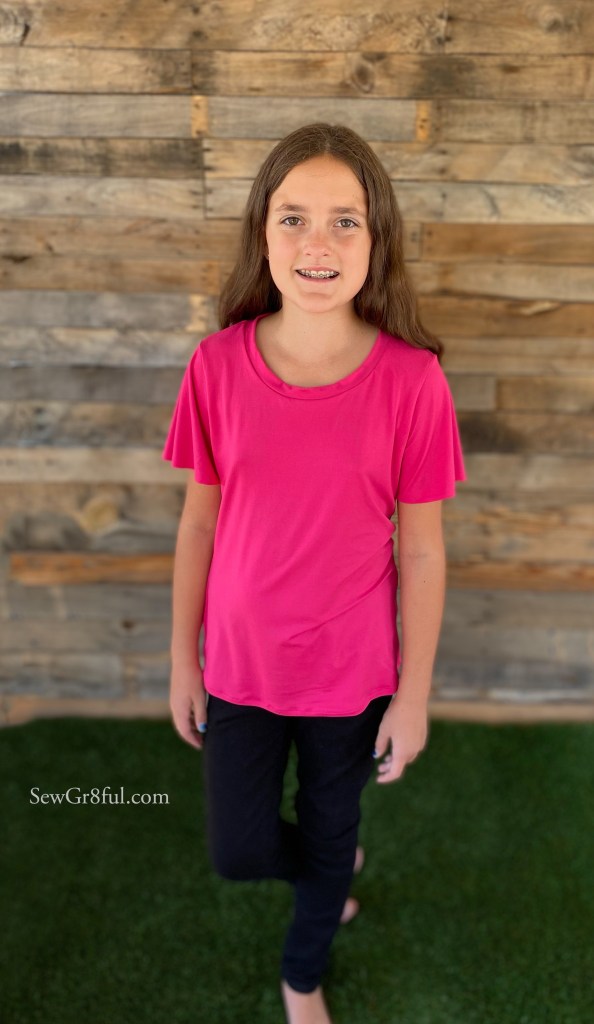
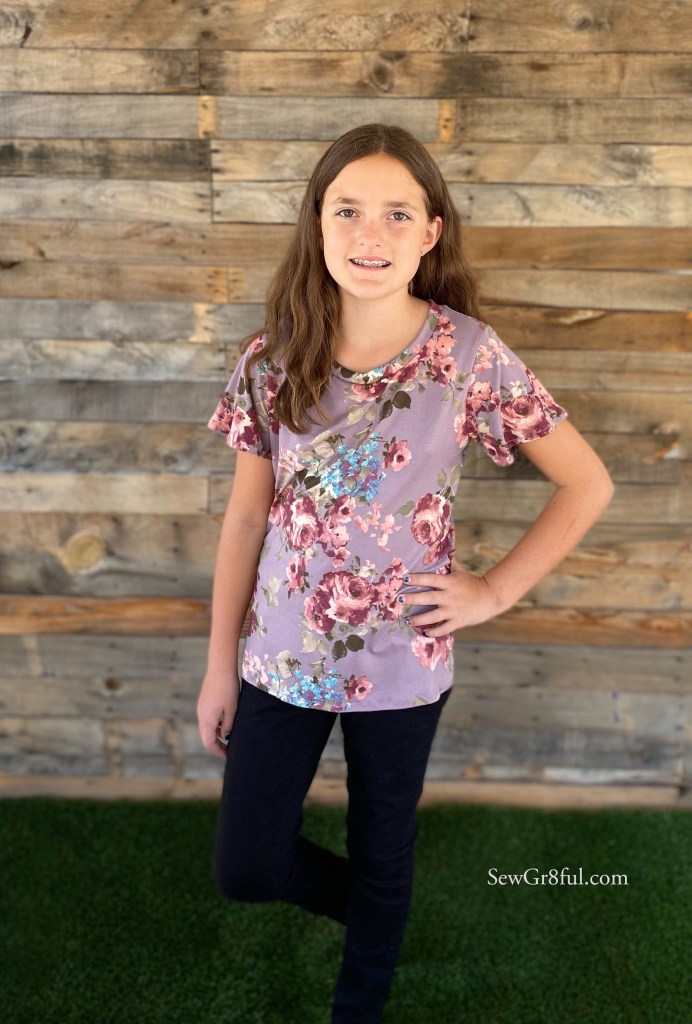
My last post was about my daughter and this one is as well, but so many changes and things have occurred between the two šŸ¤£. She cut off most of her hair and donated it, her first phase of braces came off, she had a bad fall that resulted in a concussion, broken nose, whiplash, and full body aches and pains. She turned 11 and continues to grow out of clothes. She has been going to physical therapy for her body and concussion recovery, she had surgery to repair her nose break, and has slowly been getting back to regular life. She is such an amazing, tenderhearted kiddo, and I am so blessed to be her Mom. I love when she has an idea and I can make it happen. So when this beautiful fabric arrived, that I had plans for, and she saw it and could see a maxi dress, I did what I could to make it a reality.

The steps I took are very simple, and can easily be replicated into a skirt as well. I made this while our family was down with a week long flu bug, so my pictures are less than stellar, apologies for that, and I hope you can still see things clearly.

The first thing I did was measure for the finished length. So I simply ran a tape measure from her upperbust/underarm to her desired length (45″). Then I took several different elastic pieces and held them around her upperbust, to determine which felt the most secure and which fit best for her body. We decided on 1″ elastic (the exact one we used is EL57WH from Wawak). Once I knew the elastic width, I was able to add my casing measurements to the finished dress length.

For this elastic casing, I wanted everything enclosed so it would be more comfortable against the skin. I like to serge the top edge, then fold that 1/4″ over once. Then take that piece and fold it over the additional 1 & 1/4″ to make the casing. Because of this, I added 1.5″ to the finished 45″, plus 1/2″ for a hem, giving me a total length of 47″.

Since we were using elastic to pull it all together, we wanted to make sure we had enough fabric to give a slight gathered effect. To make it simple, we used the entire width of the fabric. So our final piece was 47″x 59″.

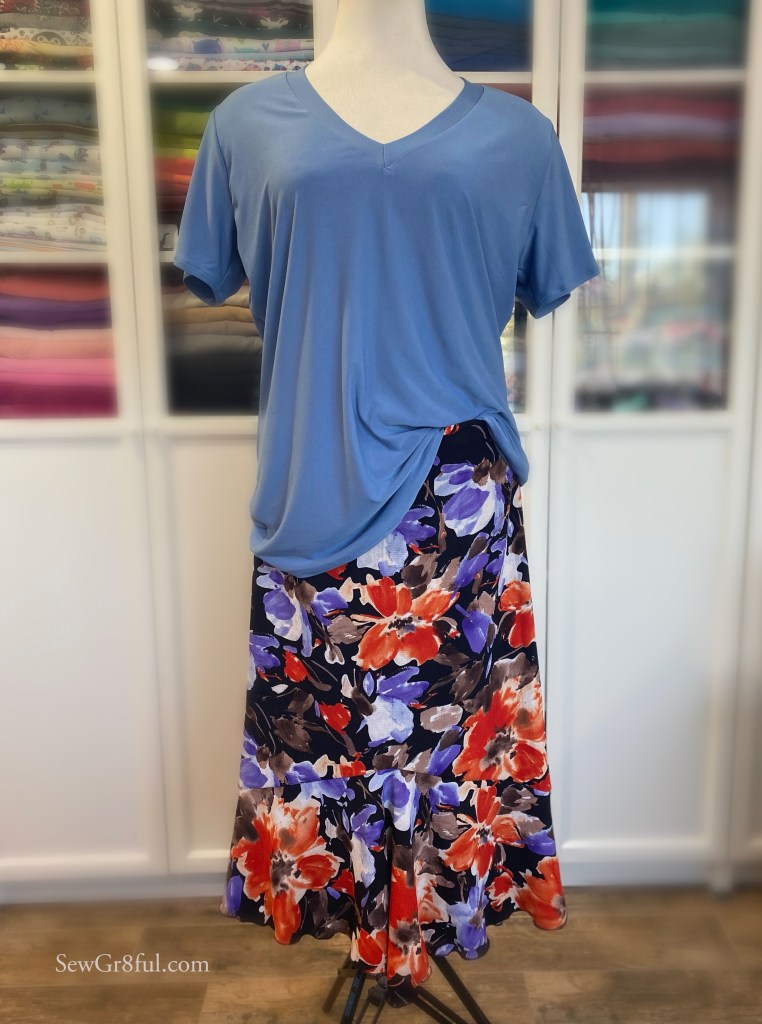
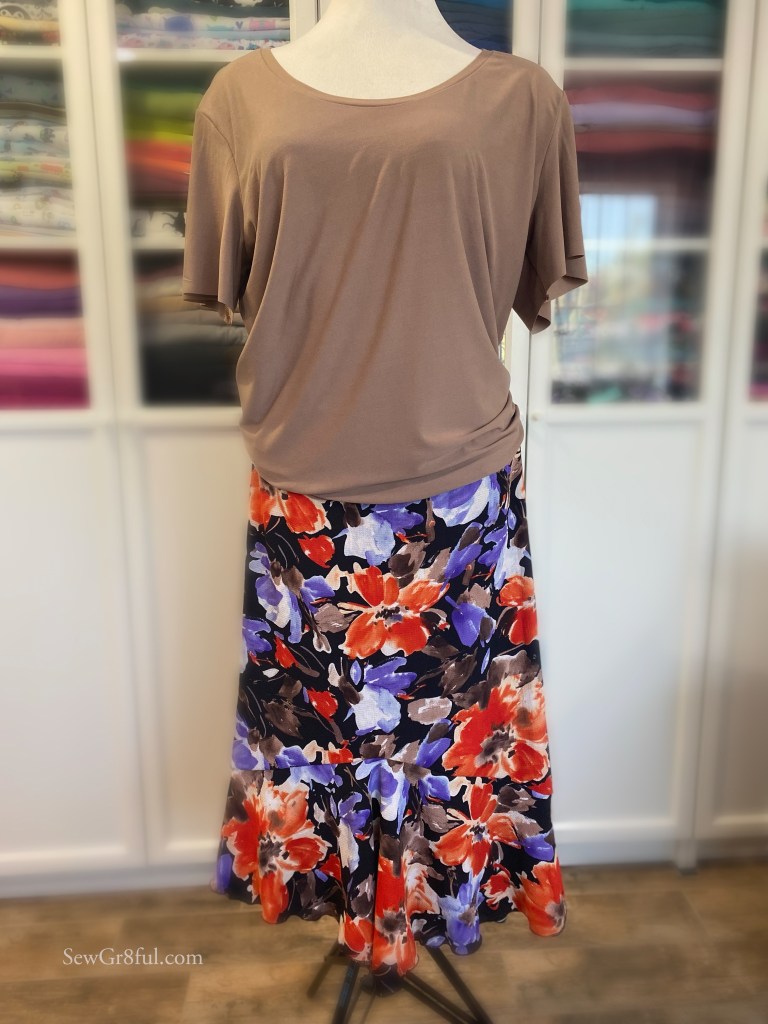
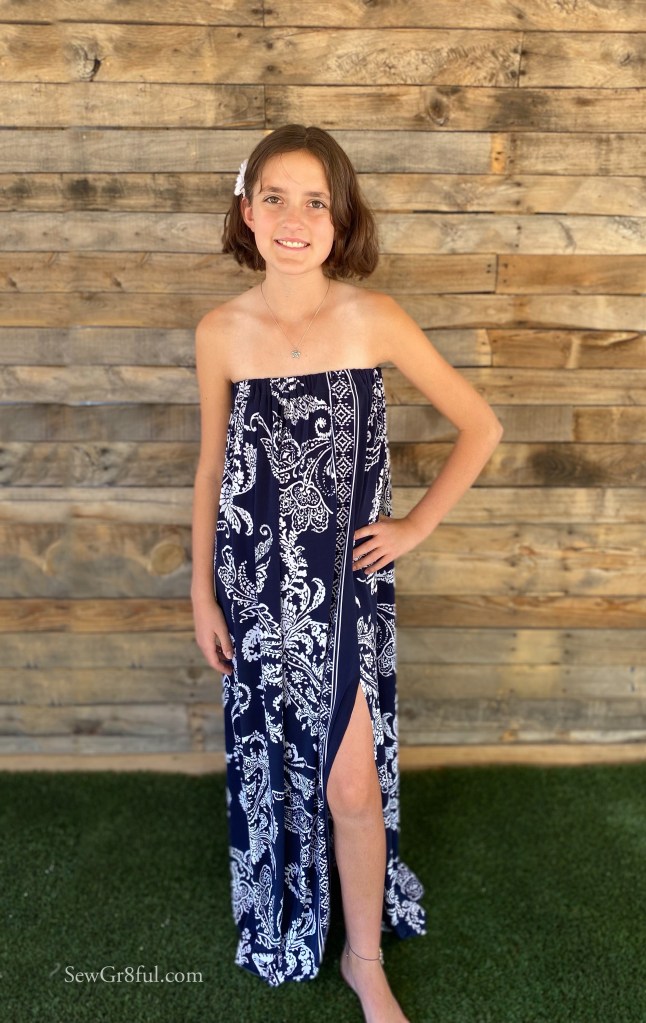
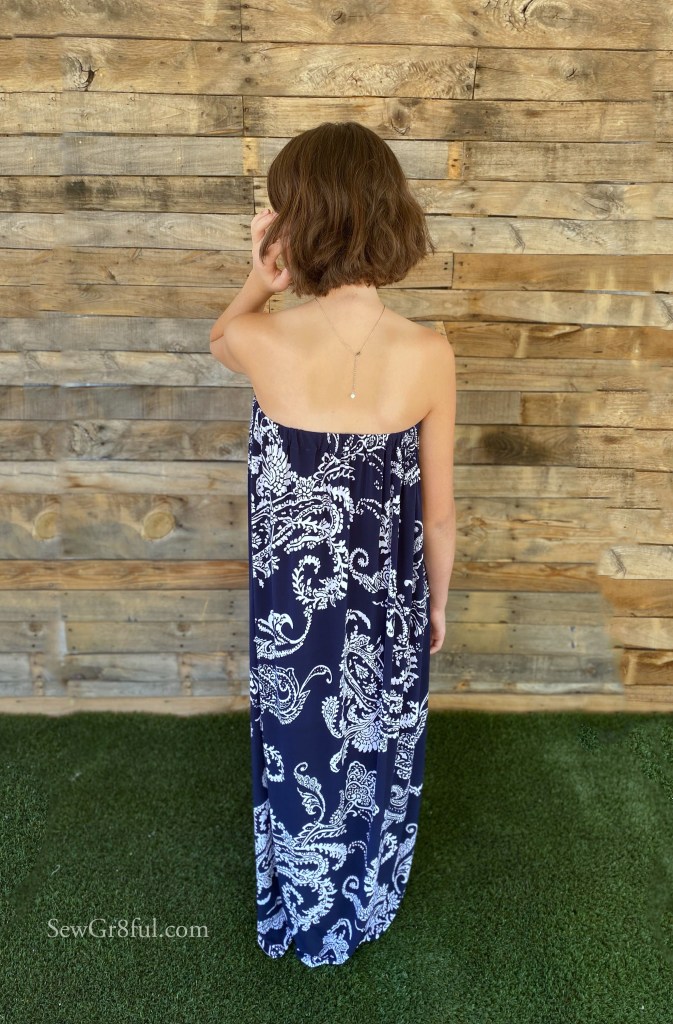
One of the things that grabbed both my daughter and my attention, was the single border print this fabric had. We both felt that it needed to be emphasized, and so we added a slit in the maxi, which allows for more movement as well as drawing the eye to that fun border. To determine the slit length, we just measured down from her upperbust/underarm to just above her knee/ mid thigh area (20″).

Now that we had all our measurements I was ready to cut. The first thing I did was to square up the fabric to make sure we had a pretty even starting point. Then I removed all the extra non printed selvedge.

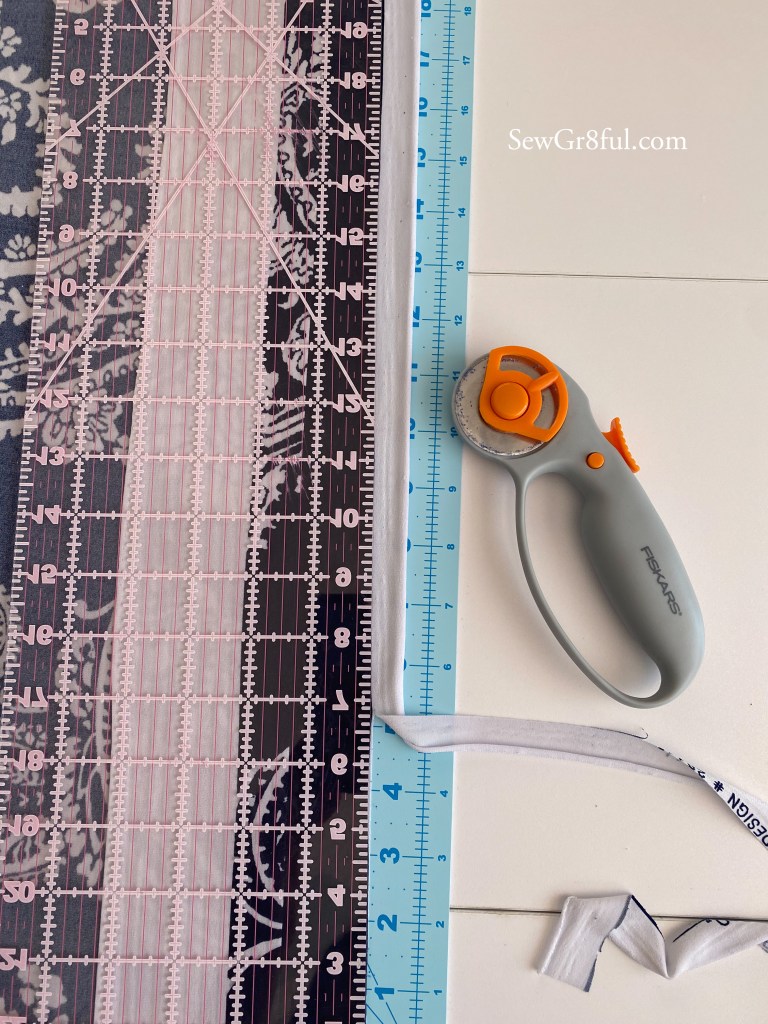
Once it was squared up and selvedge removed, I measured out my 47″ length and then marked across the entire width of fabric (WOF). The fabric was wider than my cutting mat, so I used both my rotary and scissors, then cleaned up the scissor cutting since I’m not so good at that.

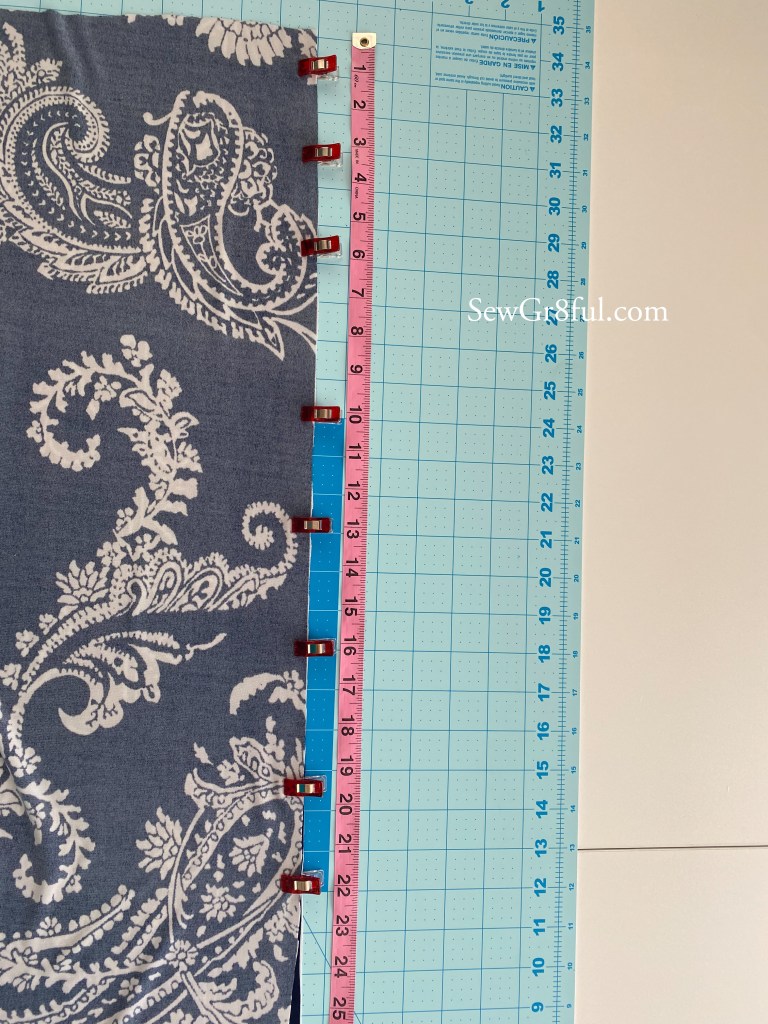
To sew it up you place the fabric right sides together, then measure out and mark your side seam/slit opening. We measured 20″ for my daughter, so I clipped it to just below that. Then I basted that to hold it together and for a quick length check before serging.

When making the slit you can do it several ways. For this fabric, print, and look I kept it simple and just serged it. I like to start at the slit, place the fabric under the pressure foot, and just start serging it up to the top of the dress. Then I tie off my serger tails. It leaves a nice finish, and since it kind of rolls the fabric into the slit, it keeps the slit more subtle. If you have basting stitches here, you can now remove them. Most of mine ended up serged in the seam, but those that didn’t, I removed.

As I said earlier, I like to serge the top of the elastic casing. So I did that next, being sure not to cut off any fabric. Then I folded that serged edge over, pressed it, and then folded it all over another 1.25″. Pressing and clipping as I went.

Once it was pressed and clipped I sewed an edgestitch all around the lower part of the casing, being sure to leave a few inches open so I could insert the elastic.

To determine the elastic length we started with her upperbust measurement and removed a few inches. Once we put it through the casing and added the fabric weight we determined we needed to remove more.

TIP: Since all elastic stretches differently and fabric weights will vary, I highly recommend basting your elastic and trying it on prior to closing your casing. No one wants that dress falling down šŸ™ˆšŸ¤£.

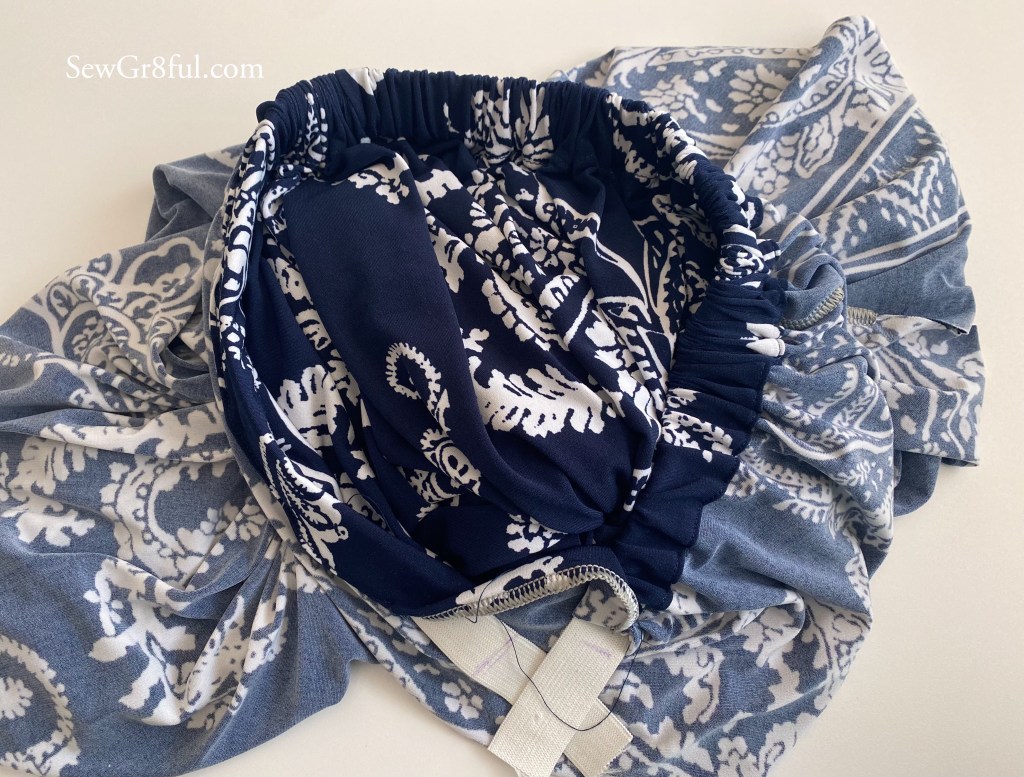
You can see my markings on the elastic where I basted, then marked it for the final stitching. Once I did that, I finished the edgestitching on the open portion of the casing.

I evenly distributed the gathers around the elastic, and then to prevent rolling during washing and wear, I added a few vertical lines of stitching, through the elastic, in a few places around the casing.

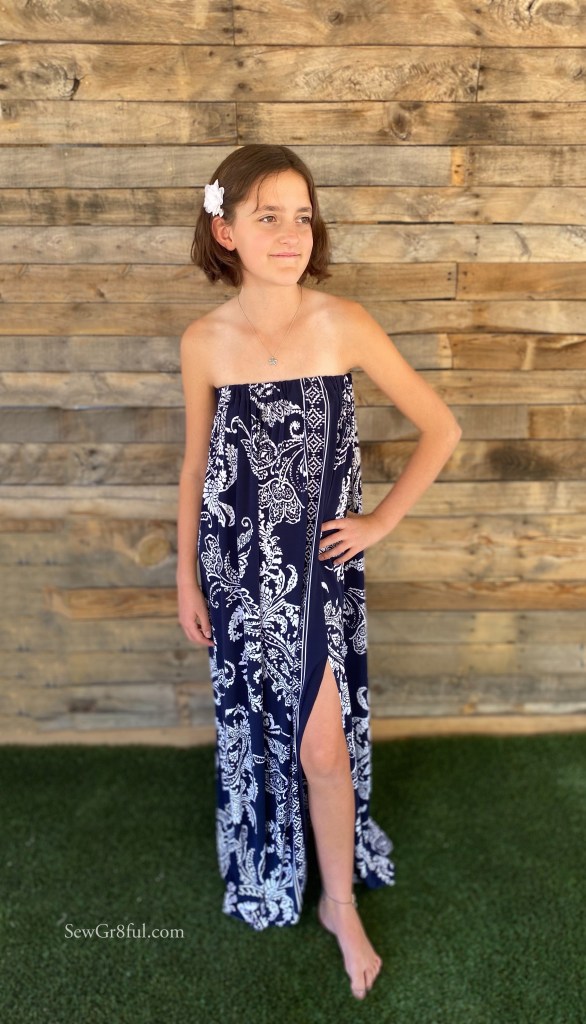
I was going to hem the dress, but my daughter wants me to leave it exactly as it is, fortunately with it being ITY, it doesn’t fray, and can be left unhemmed. It’s something that is easy to add at a later date if she changes her mind. Maybe even a rolled hem would be nice!

She was so happy when she tried it on and that makes my heart incredibly happy. I even think I have enough fabric to make myself a short skirt or a tank top. šŸ¤žšŸ¼

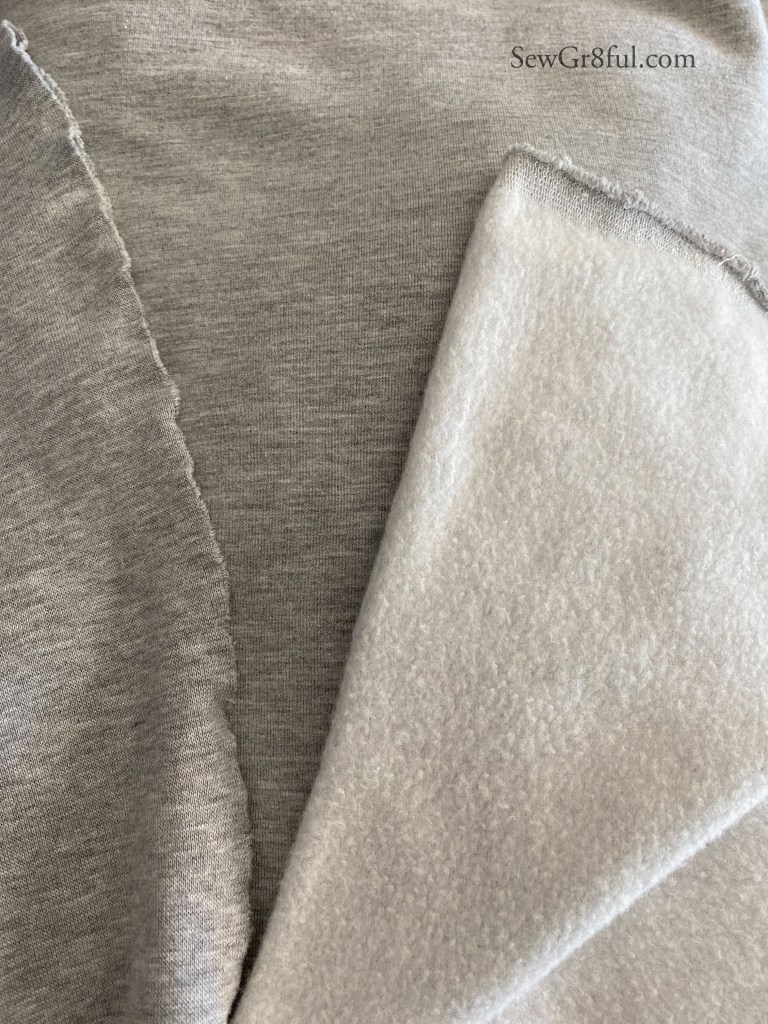
Fabric is Navy/White Single Border ITY from So Sew English Fabrics

This post may contain affiliate links. This means if you make a purchase through that link, I may get a % back, at no additional cost to you.Ā Thank you for supporting my sewing šŸ’•

A few not so basic, basics

My daughter has moved into several adult sized patterns, but because she has a shorter side waist length than they are drafted for, and she is only 5 ft, most are still a little too long on her.

One of her recent requests was for some regular shirts, like my most worn shirt, my solid black v neck Hey June Union St Tee. So I looked at the pattern and she just fit into the smallest size.

Because of her height difference, I knew I needed to raise the v neck and remove length, both in the amount of 2″.

To remove the 2″ in the v, I just moved the point up 2″ and then blended the new point, into the original neckline. I recalculated the neckband at 90% and then removed 2″ in the length of the bodice.

Once I made the solid black v neck, we decided to also make three scoop necks.

To do something a little different I did a slight sleeve mod and made two of them flutter.

I love being able to use one pattern but with different options and a little hack, she has four different shirts.

Fabric: all fabrics are Double Brushed Poly from So Sew English Fabric
Pattern: Hey June Handmade Union St. Tee

This post may contain affiliate links. This means if you make a purchase through that link, I may get a % back, at no additional cost to you. Thank you for supporting my sewing šŸ’•

Twining From Afar

A few months ago I was scrolling and came across shirts that had funny sayings and was sending them to my friend, Afton. One in particular caught our attention and we couldn’t stop laughing about it. Since we both sew, in fact that is how we met, we decided it would be fun to make some for ourselves and twin.

We got to meet in person earlier this year!

We started discussing fabrics and patterns. Afton had heard great things about the bamboo cotton spandex sweatshirt fleece and coordinating ribbing from Raspberry Creek Fabrics. We looked at it and it seemed like a good option for the top we had in mind, and perfect for the coming cooler weather. We picked the heathered grey color for both the fleece and ribbing.

This was my first order with RCF and I was excited to try out something from them. When the fabric arrived I noticed right away how soft and squishy the sweatshirt fleece was. It has great stretch as well, which is a requirement for so many patterns, and as we hadn’t decided on a pattern yet, I wanted to make sure it would work for multiples. The ribbing wasn’t super stiff like some I have come across in the past, and that was a nice feature for me, because my neck is sensitive after a surgery years ago.

Then came the pattern selection. It is surprising how small of an overlap we actually had in our “sweatshirt” type patterns. We looked and looked and nothing seemed to fit what we wanted. Either it would need to be sized up several, changed from a hood to a neckband, reshaping the bodice, the sleeves were wrong, etc. Then Greenstyle Creations posted a sneak peek video on their Instagram, of a pattern in the works. It looked perfect!!

As Afton and I are both in their promotion/tester group, she asked about the testing and release timeline of it. It was meant to be. We were both able to test it, and it was released, just in time for our plans. The pattern is Sav’s Sweatshirt, in the regular length.

Sav’s Sweatshirt is designed for fabrics with minimal to no stretch, and ribbing for the neckband, hem band, and sleeve cuffs. You can read about my non stretch version here. BUT it also can be done with fabrics that have more stretch and so it worked perfectly with the fabric we picked from RCF. I’m glad the fabric has four way stretch and the pattern requires minimal, because I cut my bodice out with the greatest direction, not realizing that the heathering actually would be vertical. Afton cut hers the opposite way ( You can read about her version over on the RCF blog), and they both turned out beautifully.

So what was this super funny saying we decided to use?? I present to you, Retired Hot Girl. šŸ¤£

We all try to feel our best, and for some that means showering and doing our hair, wearing makeup, getting dressed, etc. But as a Mom, or with my health issues, there are days where those things just don’t happen, and I feel less than my best. That feeling is “retired” and I just want to put on something comfy and relax.

I had heard people saying “Hot Girl Summer”, so naturally I had to look up what that meant. The short of it is that feeling of living your life, unapologetically being you, and having a good time. I can get onboard with that! But usually after I have days like that, I need to rest and take it easy, especially in the winter.

So while the saying, Retired Hot Girl, can have different meanings to different people, to me it is feeling relaxed, comfy, and chill, with lots of laughter. And twining with Afton, in this sweatshirt, fits that bill to the tee.

Pattern – Greenstyle Creations Sav’s Sweatshirt

Fabric – Raspberry Creek Fabrics Bamboo Cotton Spandex Sweatshirt Fleece and Bamboo Cotton Spandex 1×1 Ribbing

You can see more of Afton’s creations on her Instagram and read all about her version on the Raspberry Creek Fabrics Blog.

We used Black and Currant Glitter HTV from 143vinyl.com

This post may contain affiliate links. This means if you make a purchase through that link, I may get a % back, at no additional cost to you. Thank you for supporting my sewing šŸ’•

New Sweatshirt – Styling Fun!

I have been looking for the perfect oversized sweatshirt for a while, and I think the newly released Sav’s Sweatshirt from Greenstyle Creations, is pretty dang spot on.

This sweatshirt is made for those warm, minimal to no stretch fabrics, but can also be used for something with a higher stretch. Which means you can use those nice and thick sweatshirt fleece fabrics and soft ribbing for the neck, hem, and cuffs.

I have made a few of these and have fabric on the way for a few more, but I really wanted to try out different looks and styles with this simple white one.

First I tried it on with my regular skinny jeans and white tennis shoes.

I like the simple, almost sporty feel I get with this combo. It’s perfect for errands, grocery shopping, just every day type things.

Then I decided to try out my faux leather leggings. Which I actually really love with it! It changes it to a more glam relaxed look, and I have to say, it was even more comfortable than the jeans.

Perfect length for just a little shaping of the rear too šŸ˜‰

I had to try it with my scrunchie black boots, and I think it would make a nice casual dinner out outfit, with a little jewelry.

Since its shackett season, and I haven’t had time to make one, I just borrowed my husbands flannel shirt and threw it on over it.

Same outfit, but with my black boots. I like the boots with it, but I’m kinda thinking I’d prefer some boxier, maybe lace up ankle boots, a bit more. What do you think??

This one is with my athletic leggings, and I know I’m going to be wearing this for all the dog walks, chilling around the house, and running errands.

I have to say, I was surprised, but my favorite outfit was pairing it with the faux leather leggings and white tennis shoes. It is ridiculously comfy and I feel great in it!

How would you wear it?? Please share, I’d love to have more suggestions for wearing this amazing sweatshirt!

Pattern (On sale along with the rest of the patterns for 35% off. Sitewide ends today 11/30 and then just Sav’s Sweatshirt will be on sale for a few more days) – Sav’s Sweatshirt from Greenstyle Creations

Fabric – Solid White Heavy Cotton French Terry from So Sew English Fabrics

Ribbing is Cotton Rib Knit 1×1 from Joanns

This post may contain affiliate links. This means if you make a purchase through that link, I may get a % back, at no additional cost to you. Thank you for supporting my sewing šŸ’•

Cozy Cardigans for two

A few weeks ago we had a storm blow through and it rapidly dropped our temps for a few days. It was so nice and it totally put me in the mood for Fall sewing.

I was looking at fabric and my daughter “happened” to be looking over my shoulder and saw the Purple/Ivory Leopard Brushed Hacci Sweater Knit I was considering. She thought it was cute and asked what I was going to make. Then proceeded to ask if I could make her one as well.

I was going to make the Calgary Cardigan from Pattern Niche. They only have the adult sized pattern, but since my daughter is starting to fit into some adult patterns, I decided to see if it would work for her as well. She fits perfectly into the smallest size.

She isn’t tall enough so I needed to remove some height. Fortunately with the amount I needed to remove and the shape and multiple length options of the cardigan, I was able to cut the hip length and it was the perfect tunic length for her. No other mods were necessary which made it a really quick adjustment.

Options Line Drawing From The Calgary Pattern

The Calgary has so many options, you can use the same pattern to get a variety of looks.

We chose the standard bands for ours and we love how they turned out! They are so cozy and perfect for cooler weather. Hopefully we get another storm soon so our temps drop again, in the meantime these will be getting worn in the early mornings.

She may be getting into adult patterns, but she still fits under my arm šŸ¤£

Something to note, we usually wear thin long sleeve shirts, tank tops, or short sleeve shirts under most cardigans. This pattern could be a little snug of a fit in the arms, if you were wearing something more substantial under it. You definitely need to pay attention to the required fabric stretch percentage of 35% or more.

Pattern: Calgary from Pattern Niche
Fabric: Purple/Ivory Leopard Brushed Hacci Sweater Knit from So Sew English Fabrics

This post may contain affiliate links. This means if you make a purchase through that link, I may get a % back, at no additional cost to you. Thank you for supporting my sewing šŸ’•

Mix and Match – For my Mom

A long time ago, (Pre covid), my Mom showed me two skirts she had and loved, and asked if I could recreate them for her. My parents were going on a cruise and the skirts would pack light, small, and resist wrinkles. We discussed fabric options, she looked at my stash, and we placed a fabric order for three separate skirts. One skirt would be a single skirt and the other two would be reversible.

The solo skirt would be made from ITY and the two reversible were from rayon crepe (crinkle woven).

The fabric arrived and I got to work on the skirts. I finished the solo one and got the first reversible one done, up to the hemming fit check. Then covid hit, their cruise got cancelled, and the skirt was put on the back burner.

Fast forward to a few months ago. They were prepping for their rescheduled cruise so it was time to get the skirts done. Plus a few new shirts to wear with them. We had a lot of fun ( Well I did šŸ¤£ hopefully she did too) shopping my stash and coordinating fabrics to maximize her outfit possibilities.

Here are the finished outfits, modeled by my mannequin.

Skirt number one – ITY, elastic waist band, rolled hem. Lightweight, wrinkle resistant, and these colors are so pretty!!!

We used the Hey June Handmade Union St Tee, V-neck and short sleeve options, for both this mauve DBP (Double Brushed Poly) and this light blue DBP shirt.

The other two shirts are both scoop neck with a flutter sleeve. This one is in a tan DBP.

This one is Dark Berry ITY from Surge. My Mom fell in love with the color and how it went with so many of her skirts and other outfits she had, but the only issue was I couldn’t part with it. The dangers of letting people shop your stash šŸ¤£. Fortunately I was able to check with Surge, and they had a few yards remaining. Crisis averted, I got to keep my fabric and she was able to have a shirt in the gorgeous fabric.

We picked these shirt colors since they also work with the reversible skirt. All four look great with this side.

I just love all the colors this fabric has. It really allows for multiple ways to style it.

And three of the tops work well with this side of the reversible skirt.

I love that these tops and skirts will also work well with her current wardrobe, so she can mix and match even more. Once she gets back from her cruise I will be finishing up her second reversible skirt.

Fabrics –
DBP was from So Sew English Fabrics
ITY Shirt was from Surge Fabrics
ITY and Rayon Crepe skirts were from So Sew English Fabrics

Pattern – The V neck shirts are the Hey June Handmade Union St Tee

This post may contain affiliate links. This means if you make a purchase through that link, I may get a % back, at no additional cost to you. Thank you for supporting my sewing šŸ’•

A Trio of Outfits

My daughter has been growing rapidly and we went shopping at the beginning of the year for some training bras/ sports bras, for her to try out. Then she fell in love with my two Greenstyle Creations Power Sports Bra makes (here and here), and since her store bought ones no longer fit, asked if I could make her some. She just fits into the women’s sizing, and I had scraps left of my stripe one, so I made her one to try.

She wore it for her first day and didn’t want to take it off.

She is needing quite a few new clothing items so I made her three sets of a modified Greenstyle Creations Solo Tank (read about the mod here), Power Sports Bras, and Chelsea Shorts. She didn’t know I was making the matching power sports bras, and she was absolutely thrilled when I gave them all to her.

For her first outfit she picked this sunflower print bullet and a solid black performance.

The Chelsea shorts were a first try for us, and she really likes them. This outfit she did the short cutline, with the slanted pockets and the yoga style waistband.

I used the same fabric for the Power Sports Bra as I did for the Tank.

For her second combo she picked this pretty tropical look with the peachy background ITY.

It matches perfectly with the navy blue performance she picked for her shorts. She chose the same options for her Chelsea shorts as her sunflower pair.

I again used the same fabric from her shorts, for the bra.

Her third combo is the test version of the solo tank modification I did with an ombre leopard print ITY, and using the same black performance for the shorts as we did for her sunflower set (bra and tank).

This one she picked the Bermuda length on the Chelsea shorts. For the bra to go with them, I found some scraps of the Dharma I used in an outfit for myself (read about it here).

She has informed me that these power sports bras are insanely more comfortable than the store bought ones we tried first and she loves her new outfits so much.

Patterns:
Greenstyle Creations Solo Tank (modified) – On Sale!
Greenstyle Creations Power Sports Bra– Available in women’s and kids sizingOn sale this month!!!
So Sew English Chelsea Joggers – Available in adult and kids sizing – Kid’s on Sale!

Fabrics:
Sunflower Bullet from So Sew English
Solid Black Performance from SSE
Solid Navy Performance from SSE
Peach Tropical ITY from SSE
Rainbow Ombre Leopard Bulgaree ITY from SSE – sold out
Dharma Heathered Dusty Rose and Jade Green from The Fabric Fairy

This post may contain affiliate links. This means if you make a purchase through that link, I may get a % back, at no additional cost to you. Thank you for supporting my sewing šŸ’•

Solo Tank Modification – Tween Sizing

It’s that time of the year when my kids clean out their drawers and bring me a list of things they need. My daughter has been growing rapidly this past year and needs quite a few new items. She saw a Greenstyle Creations Solo Tank I made and asked if I could make her some, with coordinating shorts. Since the Solo Tank is only available in women’s sizing, and she isn’t fully in the chart, I knew I would have to do some modifying to make it work. BUT she fell in love with the look so I decided to give it a try.

Her bust and hip are just under the XXS and her waist is in size XS. Since I was familiar with the shape and fit of the shirt, I felt comfortable making her a straight size XXS.

The issue we were going to have was in her height. The Solo is drafted for a height of 5’7″ and she is just 5′. So while it would be too long in general, the low armscye depth would be crazy low on her and for the test version, I decided to remove 3″. I came up with that amount based off the general guideline of 1/2″ for every 1″ difference in drafting height. I then confirmed I wanted her armscye to come up that exact amount, and decided to take the length out there, vs the usual bodice points.

I don’t usually like taking length out in the armscye, because you have to recalculate the bands, and it can also cause neckline/ neckband changes. But in this instance it was a definite need. To try and avoid messing with the neckline, I picked a spot in the middle, making sure it was at least 3″ below the neckline. She wanted the high neckline, which made this even easier.

I cut the pattern apart at my chosen spot, and then measured and marked a spot on the top portion, 3″ up.

I placed the bottom piece, over the top piece, at those 3″ marks.

As you can see, this changes the shape and our armscyce lines no longer match up. I got these little grading tools a while back, and absolutely love them for these kind of adjustments. Makes it so much simpler than trying to free hand the line. I just laid my tool on the pattern, lining up the curve with the original lines, and blended them together like this.

Then I repeated the same steps on the front pattern piece to make them match.

Since I changed the armscye, I also needed to recalculate the binding. I measured the new armscye (24.25″), then multiplied that by 85% (20.6). I like to round my measurements, and the fabric I was using was ITY (very drapy), so I made it an even 20.5″ by the original width of 1.5″.

Before cutting into the test fabric, I also measured the pattern pieces at three spots. The chest, the waist, and the hip. I took the tape measure and made a circle, the amount of each measurement, and held it around her body at those same spots. I did this to make sure I didn’t loose too much width in the specific spots by taking the 3″ out.

Once she tried it on she decided she wanted a little more length than she would have ended up with once hemmed, so I added 1″ back in, in the lower bodice for her other ones. I’m starting to think she carries her height in the same places I do. šŸ¤£

To allow the test version to still be wearable, I just serged the bottom edge instead of doing a traditional hem.

Because of all her rapid growing, she also now fits in the women’s power sports bra pattern, so I surprised her with a matching one to go with each of her new solo tanks and shorts outfits. You can see all three outfits and their details, in this post.

Patterns- Greenstyle Creations Solo Tank
Also Pictured – Greenstyle Creations Power Sports BraON SALE THIS MONTH!!
So Sew English Kids Chelsea Pants / Joggers

AFTER PUBLISHING I FOUND OUT THE SOLO TANK AND KIDS CHELSEA ARE ALSO ON SALE!!

Just keep Sewing, Swim

How do you “torture” your children without even meaning to?? You let them pick their fabrics and patterns for their first Mom made swim suits. Then you sew them, but only half of each set, because you have to change the thread color in your machines, for the second half. And they see their amazing first half, waiting, every time they walk by. šŸ¤£

“Torture” aside, my kids both love their new suits and have been wearing them almost daily to swim, since they were done. I shared earlier this week about my Son’s suit, you can read about it here.

My daughter took a little longer to find the suit pattern she wanted, she kept changing her mind on one piece or two, one strap or two, etc. etc. One thing she was adamant about though, was that there be no ruffles, and she didn’t want any “extras”. When she first saw the Roxy from Made For Mermaids, she wasn’t a fan because the rouching on the bottom, belt, and peplum type skirt on the top. But once she saw the line drawings and realized that they were optional, she was sold.

She picked the plain bottoms and the plain bikini top. While it is labeled as plain, it is anything but. The top has a really flattering sweetheart neckline with cute straps that are wider and slightly gathered at the bodice.

Fabric shopping for her was really fast. She saw the Unicorns and Rainbows and was done. She saw the two coordinating options and immediately chose the Plumtastic Kira to go with. Both these fabrics have a matte look, which she particularly likes, and UPF 50+, which I love!

The quality of these two fabrics was really nice. They weren’t super slick, had a nice weight to them, and they sewed up really well. We even had enough left over after her suit, to make two matching scrunchies. Now she can match and have her hair up when in the pool.

I was really surprised with how simple sewing these swim suits actually was. I really enjoyed the process and they both keep telling me how much they like them.

Pattern – Made For Mermaids Roxy (Also available in Women sizing)

Fabrics – All from The Fabric Fairy
Top: Unicorns and Rainbows Nylon Spandex Swimsuit Fabric
Bottoms: Plumtastic Kira Nylon Spandex Swimsuit Fabric
Lining: Light Peach Poly Spandex Swimsuit Lining Fabric

Sewing Swim – For my Son

If you follow me on Instagram, you may have seen little snippets of the backyard renovation my family has been working on for the past several months. We have gone from dirt, to artificial grass, a pool, yard rock, and once done we will also have a pergola/patio and deck by the pool. It has been a long and very labor intensive process, but we have gotten enough done to enjoy it now.

Of course the kids swimsuits from last year, have either become too small, fallen apart, or melted together, didn’t even know they would do that. With having this pool in and our current temps being in the triple digits already, they needed new suits.

Time to cross another first off my sewing list !!

But have you seen all the swimsuit options out there?? It is so overwhelming to me. So I asked the amazing group of sewists at The Fabric Fairy, to point me in the direction of their favorite pattern companies. That helped immensely and my kids had fewer choices to decide between.

My son’s suit was relatively simple since he wanted a t-shirt and pair of shorts. Nothing fancy. He really liked the Waterburst Black Flow Boardshort Fabric from The Fabric Fairy. The colors are so vibrant and the water droplets look so realistic, he immediately picked it for his shorts. Bonus points in my book, it has UPF 50+, which is so important with our almost constant sun. Something else I noticed right away with this boardshort fabric, was how nice it felt. It didn’t have a crunchy feel, like some other board short fabrics I have felt.

A really cool feature on the Fabric Fairy website, is the coordinating fabrics at the bottom of each listing, it makes it really simple to find matches, when you are trying to make outfits. And if nothing is listed, you can send an email or ask in the Facebook group for matching help.

The matching fabric my son picked for his shirt was the Cobalt Palm Rec. Again with the UPF 50+!! Check out this fabric description – Eco friendly, certified recycled, high chlorine resistance, and UV protection. Smooth, cool hand that does not snag. AMAZING !!

The 5 out of 4 Patterns, Kids Swim Trunks were recommended a few times and when I showed the listing photos to my son, he said they were perfect. The swim trunks have two lengths, long or short, plus optional pockets, drawstring, and liner. We did the long length and optional liner for his pair. It was a really quick sew and the fit was spot on.

We used our go to t-shirt pattern for the top, the Jalie 2918. I have made it in a variety of fabrics and it was great with the swim fabric. The fabric was a bit more slippery, so I just slowed down when sewing, to make sure all the layers stayed together.

He loves it!!!

My daughter loves her suit too, blog post about that coming at you later this week šŸ’•

Patterns:
5 Out Of 4 Patterns, Kids Swim Trunks (available in Men’s sizing too)
Jalie 2918 – pattern comes with boys and men sizing, all in one.

Fabrics, all from The Fabric Fairy:
Shirt – Cobalt Palm Rec 18 Recycled Nylon Spandex Swim Fabric
Shorts – Waterburst Black Flow Stretch Boardshort Fabric (Also available in white)
Liner for shorts – Light Peach Poly Spandex Swimsuit Lining

This post may contain affiliate links. This means if you make a purchase through that link, I may get a % back, at no additional cost to you. Thank you for supporting my sewing šŸ’•