Trying a new pattern company – SeaChange

Have you sewn any patterns from Pattern Emporium?? I have almost purchased a few in the past, but always forget to go back and miss the sale, and since I try to only purchase when on sale, I have yet to make a PE pattern.

Side note, I love watching Kate’s preview videos. Even if the pattern isn’t my style, I just love to listen to her talk and see all the different ways she styles her own pattern. All the fabrics she uses, and her personal thoughts on why she likes which ones. I just love them and her passion for sewing her own clothing.

The video for the SeaChange was no different, I thoroughly enjoyed it. Except this time, I was determined to catch the release sale and make one for myself.

When I was shopping for fabric at Fabmere, for my Siena ( you can read about it here), I saw a gorgeous red floral, with an almost paisley look to the flowers. It made it into my cart and was earmarked for my SeaChange. I have said it before and I will probably say it a million more times, I LOVE RAYON CHALLIS, especially for our spring and summer.

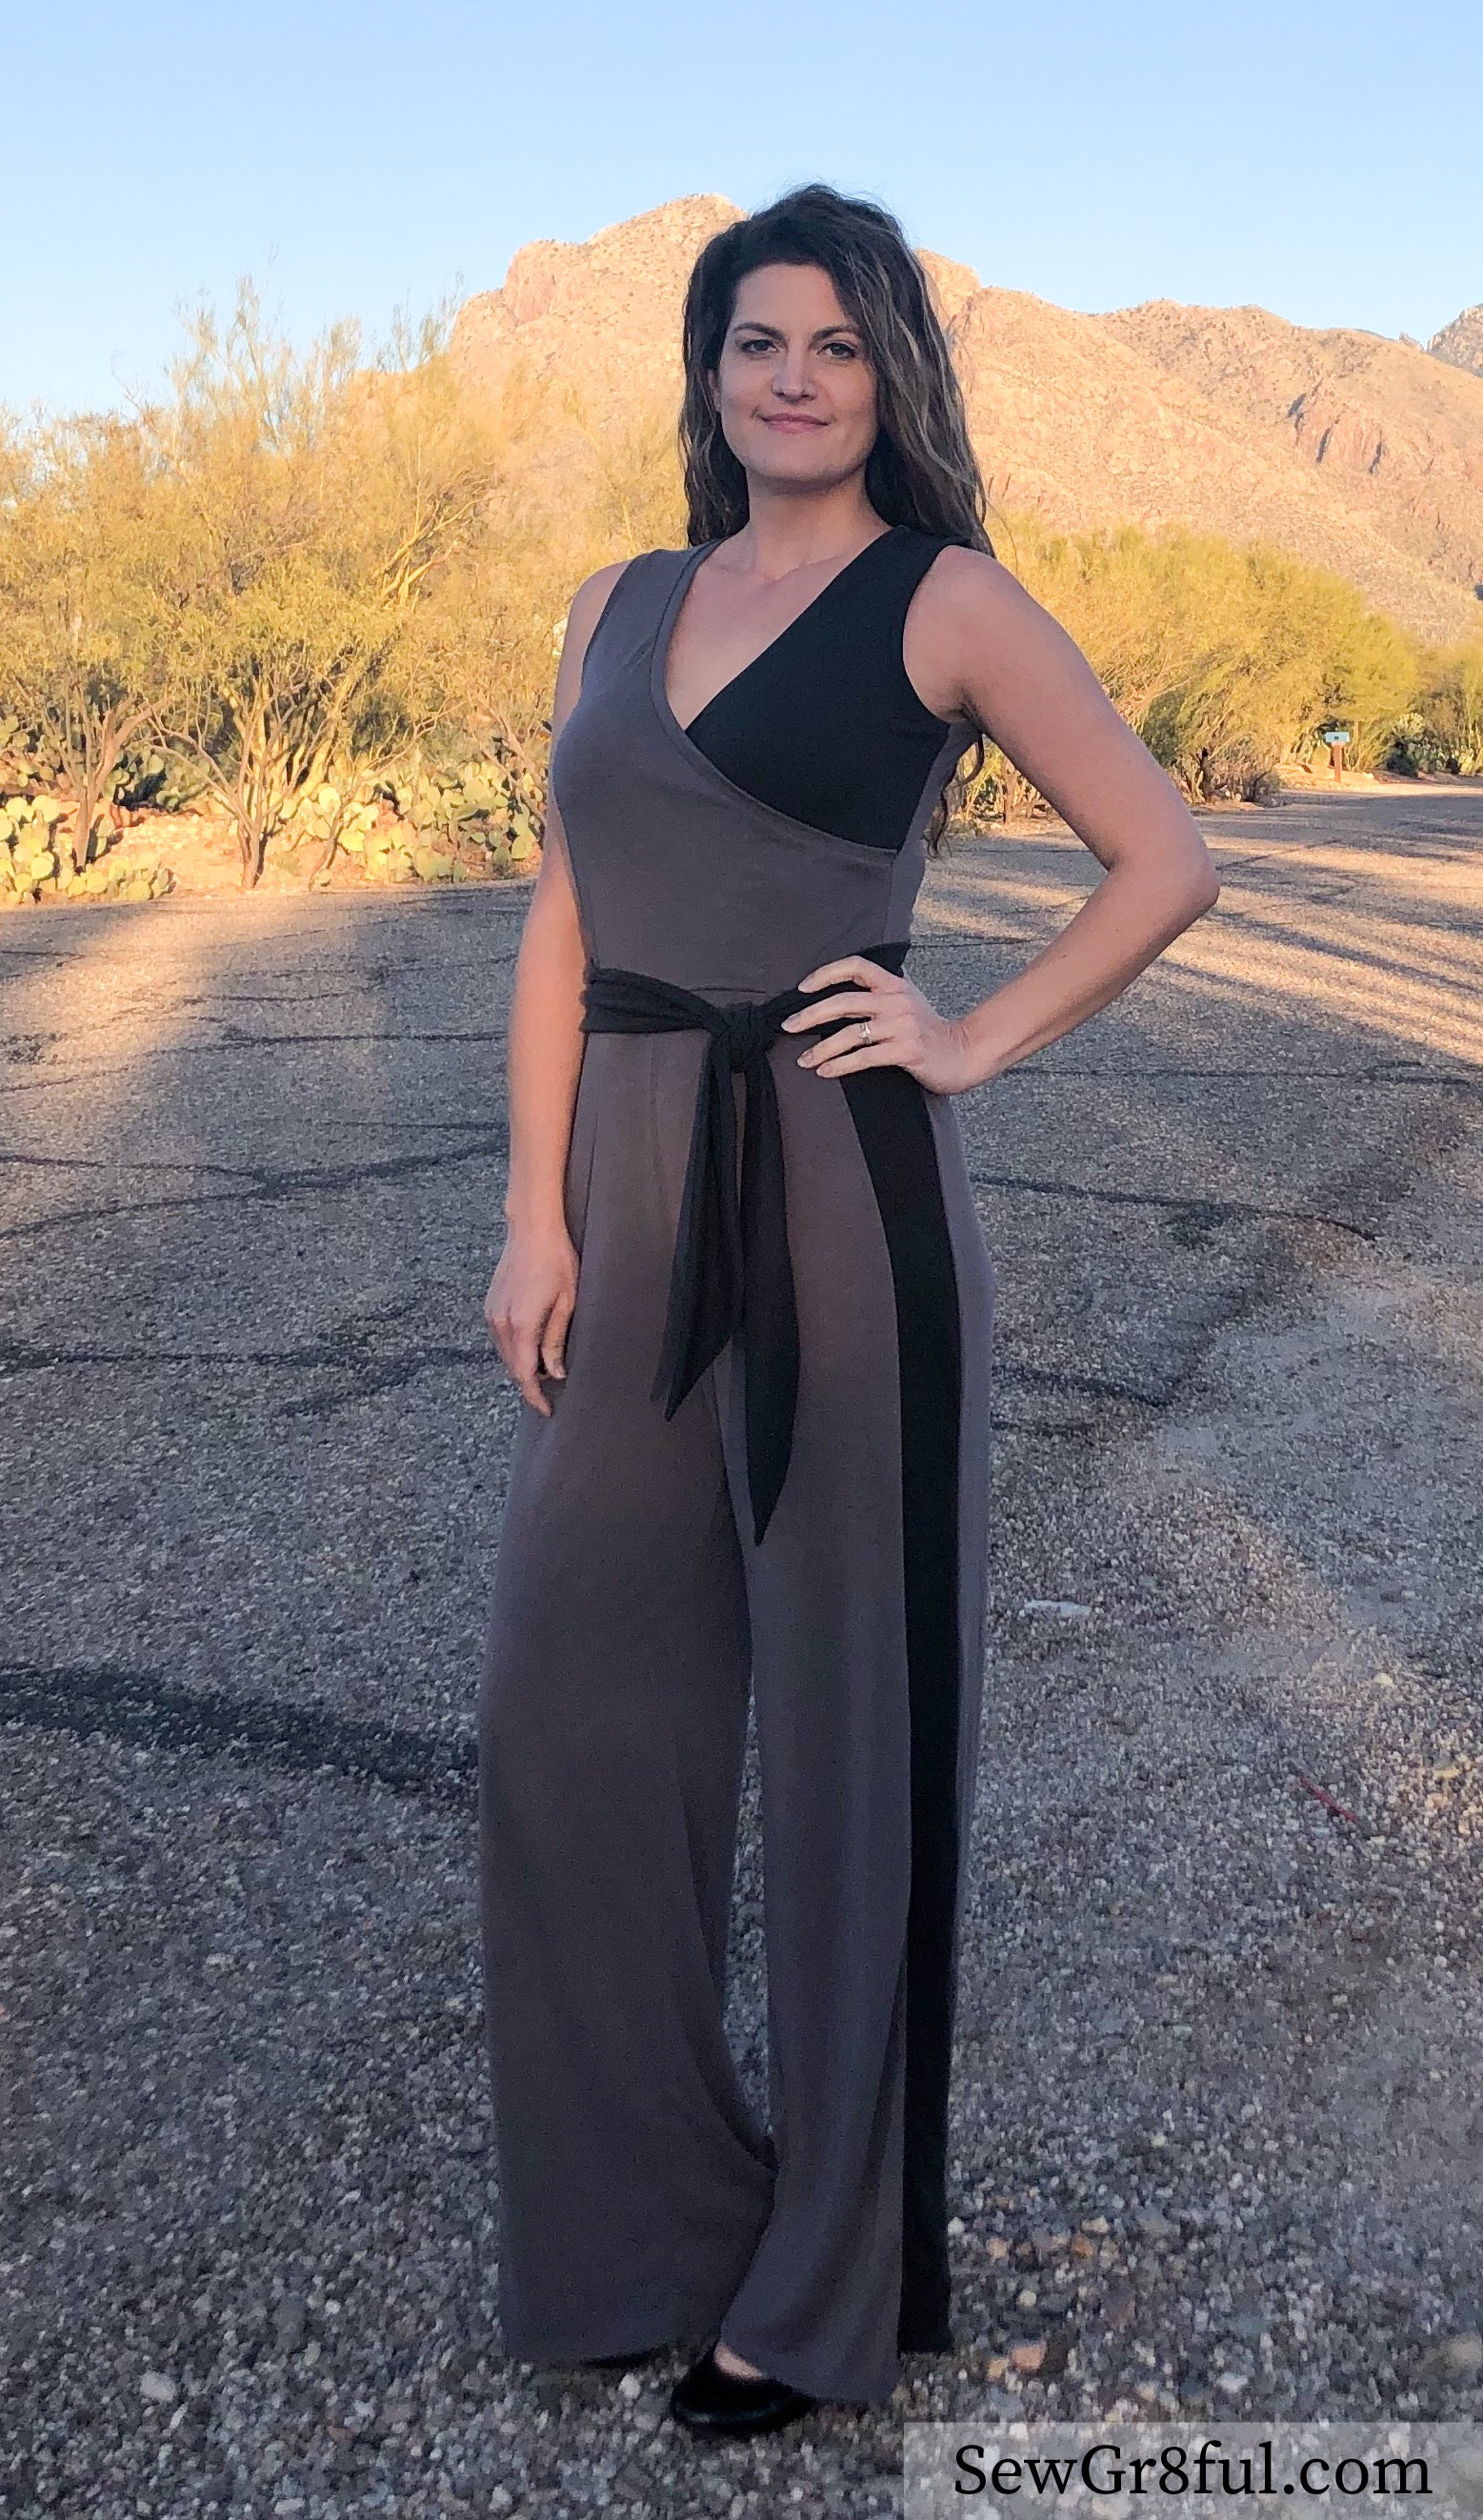
The SeaChange is a jumpsuit (3/4 or full length) & playsuit ( short or mid length) romper. It has short, regular, or tall cutting lengths, wide or narrow straps that can be fixed, adjustable, or tied. Plus optional side ties, sash, and pockets.

I chose the short length playsuit, with narrow fixed straps, and pockets. For fun I did a narrow rolled hem for the legs.

I know the mantra of making a muslin first, I also knew that I only had a couple yards to make this pattern, and this was my very first time making a PE pattern, all very good reasons for making a muslin first. BUT, I have heard great things about Kate’s drafting, I read her tutorial ( the amount of tips and fit help and steps on how to check fit, were amazing!!) and felt really comfortable with just going for it. With not having much time to sew this past month, it was a good call and I had absolutely no fit issues.

I really appreciated the attention to fit that was provided. I know I usually need to make certain adjustments to patterns for my body, and I can’t even begin to explain how nice it was to know if I actually needed to make those adjustments. For an example, the straps. I almost always have to adjust the straps on cami type tops, and usually longer, which means I need to recut. Kate actually made the straps longer, included a note about it, and I was able to do one fit check and use the original straps, vs multiple fit checks and having to recut new longer straps.

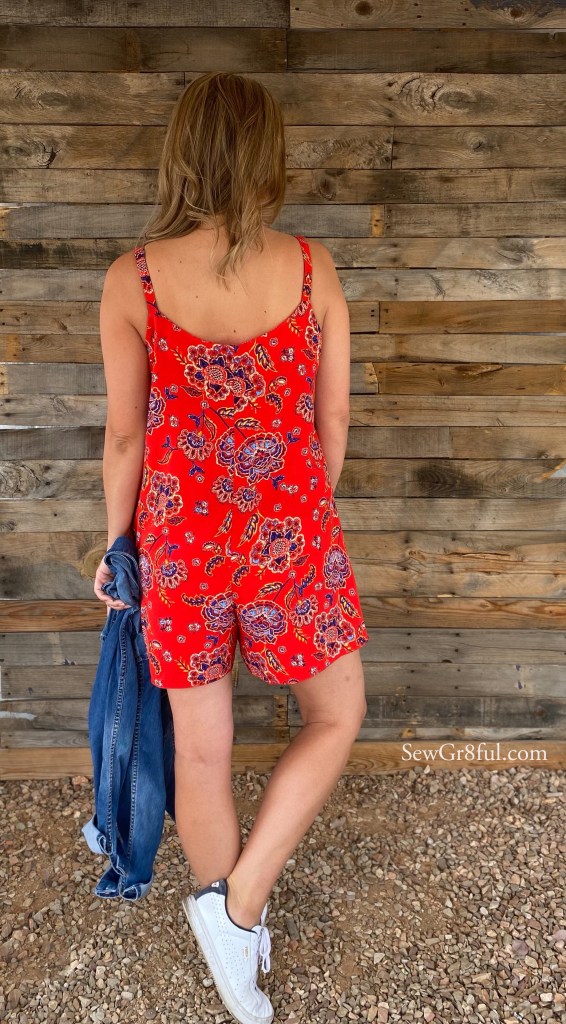
I chose to wear my SeaChange loose with no tie or sash. It really feels very springy, breezy, and super comfy (especially with my current health flare). I love how it almost looks like a dress, but I have no worries of things blowing up and being exposed.

Since our weather is currently fluctuating from the 70’s in the morning and evening, and the 90’s during the day, I decided to try it on with some white tennis shoes and my jean jacket.

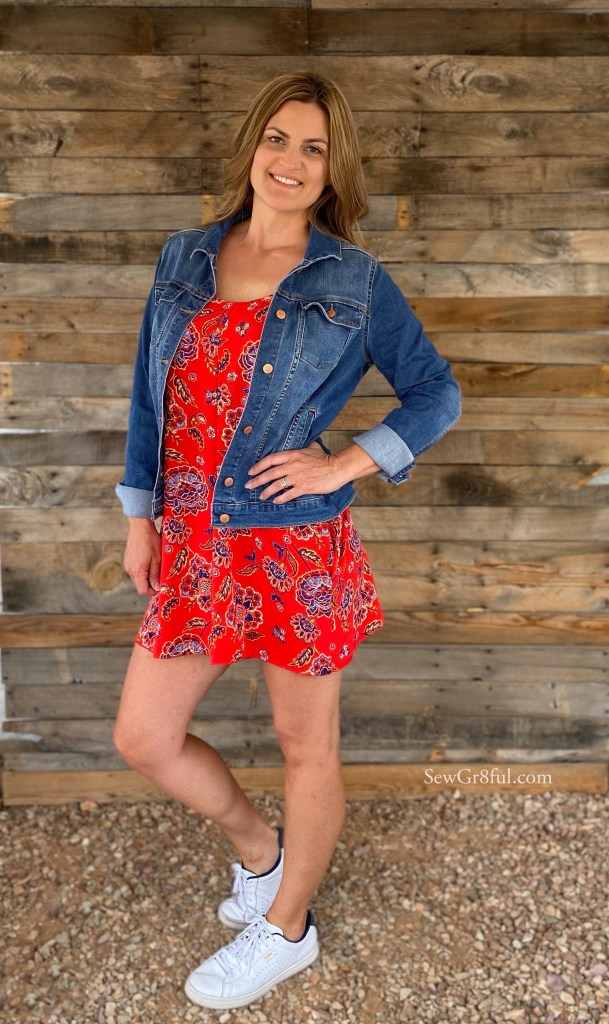
I love how this looks!!

I am definitely making more of this pattern, and I’m determined to not miss another PE sale 😂

Fabmere Fabrics has this Rayon Challis still in stock, plus a few other solids and prints.

Tank Hack for a Pinspiration Jumpsuit

Yup, Pinterest strikes again.  This time I was testing a new pattern from Sonia Estep Designs, the Hollywood. When I made my muslin fit, I tried it on before adding the sleeves and I knew right then I needed it to be a tank. Naturally, I scrolled Pinterest to get some color ideas and came across this fun version.

IMG_2393

Yes! This was happening. I went fabric shopping and found steel cupro slub and black cupro pique from Surge fabrics. I have really liked cupro the last two times I used it. It has a little stretch vertical, and about 50% horizontal. I love that it doesn’t have a ton of vertical stretch, which helps longer garments like these pants or a skirt, keep its shape. It is just annoying to make something and then it grows inches after putting it on. No issues with that using this cupro, and it has nice drape.

408D0DA9-F152-4B12-B579-F9BCB7A3593F

Now, I took my hack a little further than just making it a tank, by color blocking my neckband and arm band pieces to match the bodice colors. I also added in the solid black stripe on the legs. Doing the extra color matching added some more math, but over all, converting it to a tank is relatively simple.

Since I liked where the fit was on my non sleeve muslin, I knew I just needed to do a small adjustment to the armscye and make bands. I wanted to have a finished armband of 1/2″ to keep it close to the look of the current neckband. With the seam allowance of 1/4″ for the bodice piece, I marked and removed 1/4″ from the armscyce, which made my finished tank hit the same place as the sleeveless muslin. Be sure to make this adjustment on both the front and back bodice pieces.

0935F514-C1D9-4470-B0DB-B6CE3F4708DB

I love to keep my pattern pieces together as much as I can, so I usually tape in the center of my cut, and make a kind of hinge. Then I can fold back the piece I need to remove to make a tank or leave it down for a sleeved version.

3BE2A775-9E62-44C5-AFD1-CCBB98DECADC

To figure out my bands, I measured the new armscyce and multiplied it by 90%. I like to use 90% for cupro since it has less stretch and I didn’t want my armbands tight, just a comfortable fit. My bands ended up being 17 3/8″ x 1 1/2″ for reference. To make a simple tank version, that is all you need to do. You would follow the pattern tutorial for assembly, with the exception of skipping steps 6 & 7, do step 8, and then attach your armbands.

Now for the “extra” stuff 😂 I really wanted my armbands and neckband to match the bodice colors exactly. To do that, I needed to make my neckband two pieces, and one of my armbands, two pieces as well.

For my neckband I needed gray for one front bodice piece and the back bodice piece, then black for the other front bodice piece. So I measured those two pieces separately, multiplied them each by 85% (yes, 85%. I was worried it wouldn’t hold me in if I did longer, but in retrospect, 90% would have worked as well with this cupro) and cut the two out, using the same width as the original neckband piece. I then sewed them right sides together to make my complete neckband.

For the one armband that had a black front and a grey back, I simply measured the front bodice armscye and multiplied that by 90% for the black portion, and measured the back bodice armscye, multiplied by 90%, to get the grey portion. Sewed the two pieces right sides together, and had the matching armband.

When sewing, you will just match up those seams with the coordinating bodice seams and attach. The tricky part for me was the neckband. Since the shoulder seam is not the quarter point, I had to be extra careful with how much I was stretching and make sure the color block seams met. Of course it was my armband that ended up a little off, but for the most part, it looks like one seam.

6FCBF5E2-7882-420D-B9F4-9D5E76EEA126

I should note, I did all my color blocking and measuring, AFTER I had already graded the pattern and added length for my side waist, rise, and legs. 

The last modification I made to the pattern was adding in the black stripe to the legs. After looking at my pattern piece and the pinspiration photo, I decided I wanted to make the stripe around 3″ wide. I didn’t feel like making two separate pattern pieces for the color block, so I took my front pant piece and measured in from the outer seam, 2.75″.

272EA310-7320-41EC-94D2-E5AC4C6CCEDD

I measured and marked the entire length of the pants piece and then connected the marks to make a smooth line. I used the same “hinge” technique for this and cut up and down the line, leaving my secured piece in the middle.

A7CAF007-FA6D-48ED-B6F1-5EE9AE81E4A1

It is very important that you account for whatever seam allowance you want to use for sewing these two pieces together, or your pants will be too small.

I like to use 1/4″ so when I cut out my grey piece, I cut 1/4″ out from the pattern edge. Then I flipped the main portion back and cut out my black stripe, again adding 1/4″ to the color blocked edge. I figured out that my rotary edge is about 1/4″ away from the blade, so I just line that up with the fabric and it cuts and adds the 1/4″ all in one step.

Once you have your stripes and front pant pieces cut out, you will just sew them right sides together, to create your full pattern pieces, and assemble per the pattern tutorial.

DCAB82C9-8CF2-4840-A9FA-5FC8E700C2E3

I am ridiculously pleased with this final jumpsuit and know I will be making other versions of Hollywood with the tank modification. What do you think? Pinterest Nail or Fail?

321B66DA-3507-40D2-800A-7BFE6DC98B72

Enabler alert. The Hollywood is from Sonia Estep Designs and on sale for 50% off until January 26th, 11:59pm EST. The pattern options include a crossover bodice with three sleeve lengths, a shorts romper (in three lengths), a pants jumpsuit, and a skirted shorts romper. Plus you can do a simple mod and make your own tank version 😉

This post may contain affiliate links. This means if you make a purchase through that link, I may get a % back, at no additional cost to you. Let’s be honest, we all know it goes right back to adding to my fabric stash.