
I have been obsessed with searching for just the right denim fabric to make myself, and my kids, some pants. This fabric couldn’t be just any denim though. I had fabric requirements and so did my kids.
My kids requirements first My requirements first, lets be real, I need pants more than they do. This fabric needed to have stretch and lots of it. It also needed great recovery, I really HATE sagging pants after wearing for a short time. It needed to actually look like denim if it wasn’t true denim. I also needed it to be squat test approved, you know the test where you squat down and force your children or husband to tell you if it is see through? Unless of course you can contort yourself well enough to see your rear in a mirror or you get brave and decide to take a squatting booty selfie, that you promptly delete. PROMPTLY DELETE. It also needed to work for one of my favorite patterns, the Peglegs from Patterns for Pirates (free with the code from their facebook group ), plus a few other patterns I have on my radar this year. I had about given up finding the right fabric when So Sew English Fabrics (SSE) got in this crazy Stretch Denim.

I say crazy because it is Cotton Spandex Heavy French Terry, say what??? I’d never heard of it. Amanda, the owner of SSE shared a video of it in their facebook group and wow, this stuff looked amazing! It has the denim look on the inside and outside, no faux here. Plus the stretch (80% x 50%) and recovery to make my Peglegs. All I needed for it to pass my list of requirements was passing the squat test. So, like any logical seamstress, I ordered 2 yards to try it out.
The fabric arrived and I immediately loved it. I knew as soon as people started getting their orders and sewing it up, it was going to disappear quickly. I moved my pair of peglegs up on my “to be sewed” list, just in case I needed to get more. Then, Heidi, from SSE, posted her pair of peglegs, in this fabric. It was exactly what I was looking for. I got so excited! Then I realized that I wasn’t the only one who thought they were amazing. Shoot, that fabric was going to be gone fast. Naturally, I got online and ordered a “few” more yards. I told you, I’m logical. I needed more for shorts, pants for my kids, and if it passed the squat test, I was going to need a few pairs of my own.
I washed up my yardage and sewed up my peglegs. I sewed them up live by the way, in the Sew Inspiring facebook group. You can see that here if you are so inclined ha ha ha. It was my first time sewing live and while it was very nerve wracking, I had a ton of fun chatting with the ladies that joined me. Back to my leggings. I tried them on and yup, I took one for the team, they absolutely pass the squat test. *cheers*
A few details about sizing in case you were lucky enough to snag some of this denim. I made my usual size peglegs that I do with ponte. This means, I size up the legs one from the chart and make my waistband my true size. I usually do that, because while I like snug fit leggings, I have health issues that cause me to get uncomfortable if it is past a certain snugness. I make my usual waistband size since ponte can relax a little after wearing and I don’t want to risk slippage. This denim has the right stretch and amazing recovery. The recovery is so good that it has a little more of a snug feel. While I really like my first pair, I will probably size up my waistband as well as my leg pieces for my next pair.
When I was looking for something to wear with my new pants, I pulled out one of my first sews, from 2016. It got me thinking. This shirt was my very first pinspiration make and pattern hack. I had seen it floating around pinterest and just knew I wanted to have one of my own. I had no idea what I was doing and it took me FOREVER to figure it out. I laugh now because it seems so simple when in reality I was doing all kinds of math and had lines all over my pattern piece. It worked though and totally gave me the confidence to try more hacks and pinspiration makes.
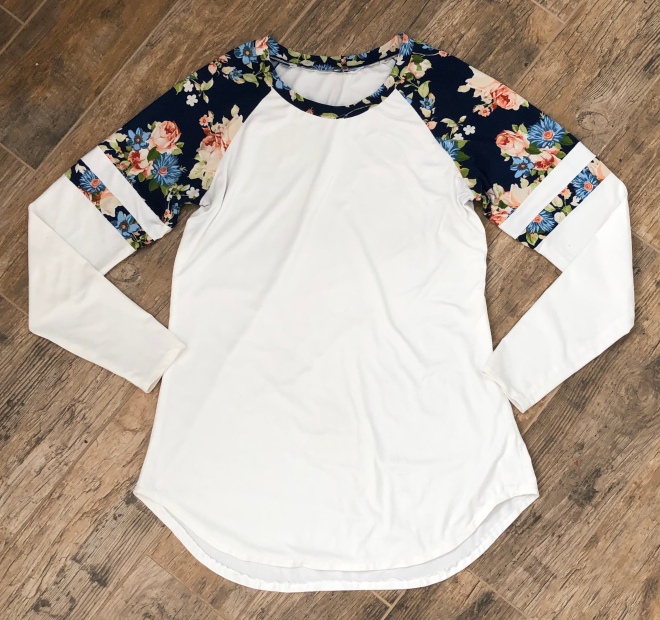
For anyone wanting to make one of these sleeve stripe raglans for themselves here are the few steps I took using the Slimfit Raglan from Patterns for Pirates. I made a few pattern pieces to cut out my fabric but for the sake of this tutorial I will be drawing and marking on the same piece so you can see the effect.
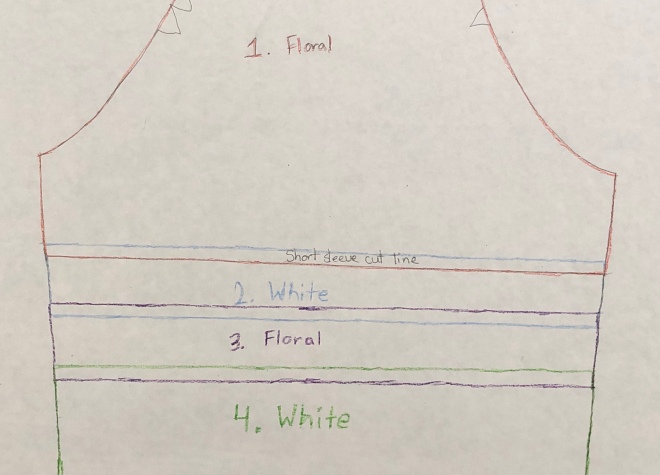
Step 1. I cut out the floral using the short sleeve line. Shown below in red.

Step 2. I measured out and marked a 1.5″ strip, overlapping the short sleeve line from step 1, by 1/4″, for the white fabric. Shown below in blue.
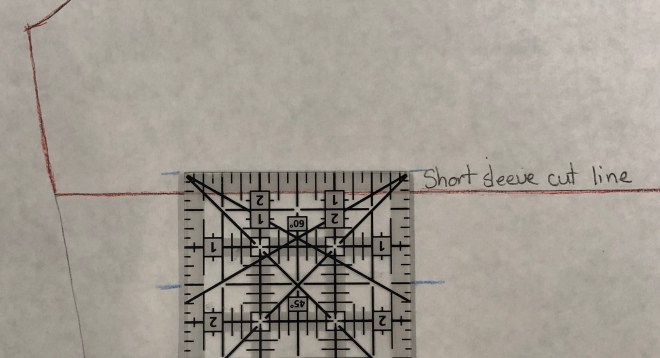
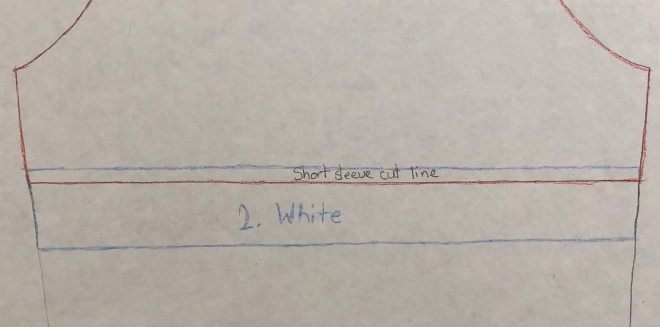
Step 3. I measured out and marked a 1.5″ strip, overlapping the bottom line of step 2, by 1/4″, for the floral fabric. Shown below in purple.
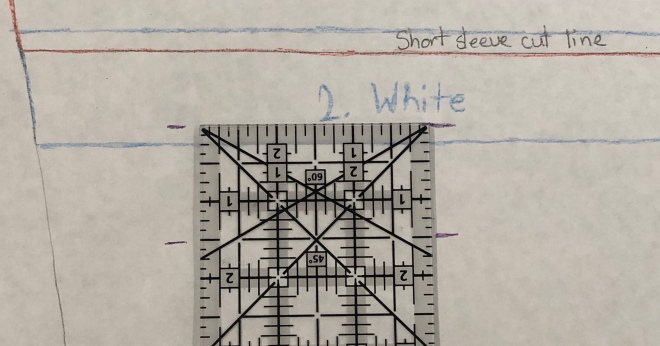

Step 4. I used the remaining bottom portion of the sleeve, adding 1/4″ to the top and overlapping the bottom line from step 3, for the white fabric. Shown below in green.

I used 1/4″ as the overlap amount for each piece since that was the amount of seam allowance I chose. You can see below how all the pieces will go together.
Cut out your four pieces and sew them together. You will do this twice, once for each sleeve.
- Take the piece from step 1 and place it right sides together (RST) with the top of the piece from step 2. Sew together to create the beginning of your new sleeve.
- Take the 1/2 piece and place it RST with the top of the piece from step 3. Sew together.
- Take that 1/2/3 piece and place it RST with the top of the remaining piece from step 4. Sew together.
You should now have your new sleeve 1/2/3/4 all ready to assemble the rest of the pattern per the included instructions.
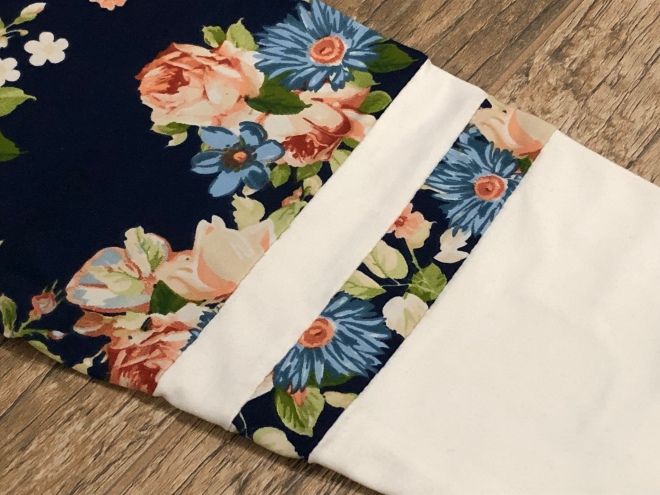
There are a few other ways you can achieve a similar stripe look but I chose to go this route since it gave me the complete sleeve and clean look I was going for. This shirt was pre serger time for me and was completely sewn using my starter sewing machine. It is so neat to look back at where I started and see how much I have learned and improved.
I love the fact that my first pinspiration pattern hack from three years ago, not only looks so great with my new stretch denim leggings, but that it has held up and still looks almost brand new. Longevity sewing makes my heart and wallet happy <3.
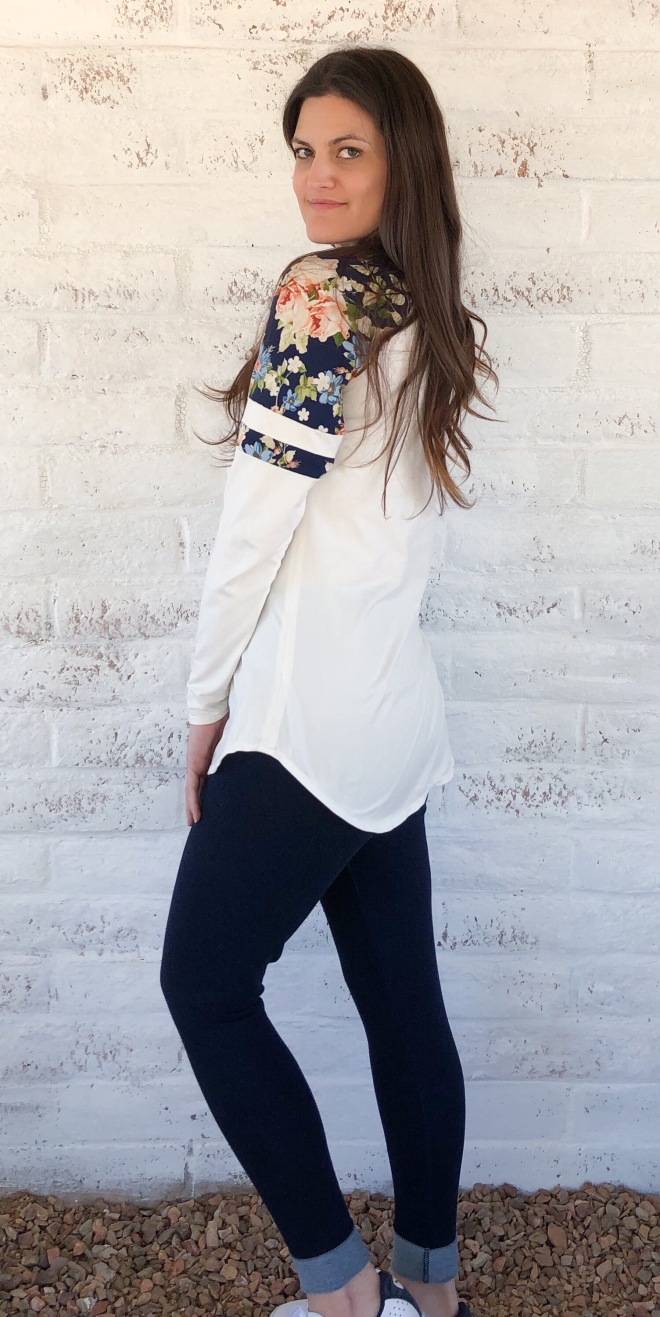
I think it’s also safe to say that my denim search obsession has come to a close. Now I get to work on the list of denim makes I have planned with my “few” yards.
This post may contain affiliate links. This means if you make a purchase through that link, I may get a % back, at no additional cost to you. Let’s be honest, we all know it goes right back to adding to my fabric stash. All opinions on this blog are my own and I have a lot, ha ha ha.

I just love you! And those denim pegs. I wish I would’ve sized up but I wore them all day and they didn’t move!! Incredible.
LikeLiked by 1 person
Awww thanks lady !! Yes, these babies don’t budge ha ha ha.
LikeLike
Your denim story is adorable. But your shirt hack is inspirational! I really like how you figured things out step by step. Your top is gorgeous! Great outfit! I bet it gets top rotation in your wardrobe!!! ❤
LikeLiked by 1 person
Thank you so much ! Yes, it does get top rotation. Even more so, now that I have these new leggings.
LikeLiked by 1 person
I love the colour-blocking on that top, so clever yet so easy. Very inspiring 💕
LikeLiked by 1 person
Thank you ❤
LikeLiked by 1 person